

In this article you will see how to enable and disable paging in a Visual Studio LightSwitch application. Paging is an advanced concept for a Visual Studio LightSwitch application. Paging is used when you want to see all the data or records in a display page but there is a limited number of records that can be displayed in one page. Such as there are 100 records in your table but display page shows only 10 records at a time. Now if you want to see all the records then here you will use paging concept.
Step 1 : First of all open Visual Studio LightSwitch application->Click on create new table.

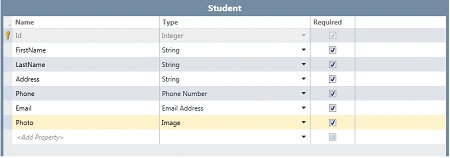
Step 2 : Create table like as students.
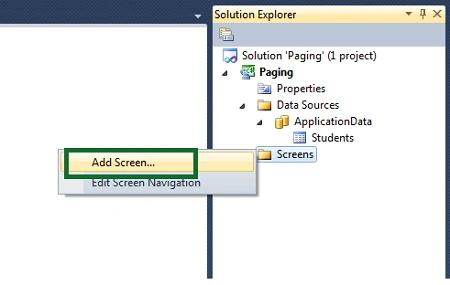
Step 3 : Now we will add a screen. Right click on screens->Add screen.
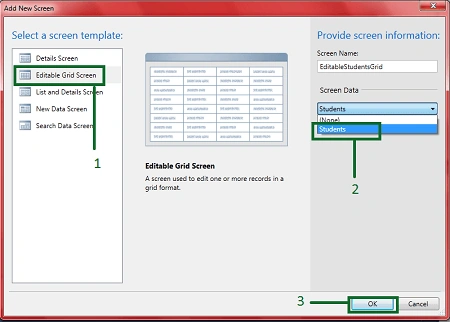
Step 4 : Select editable grid screen->Select screen data->Ok.
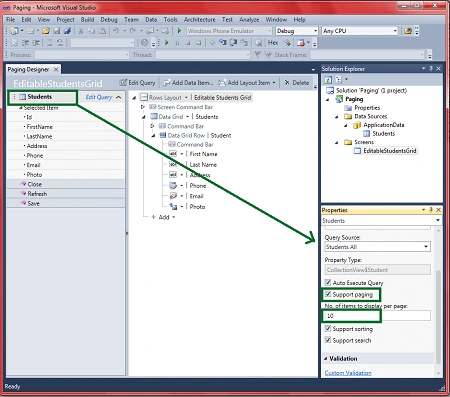
Step 5 : Now we will go to students properties->Mark support paging and enter the value for number of item to display per page in the next textbox.
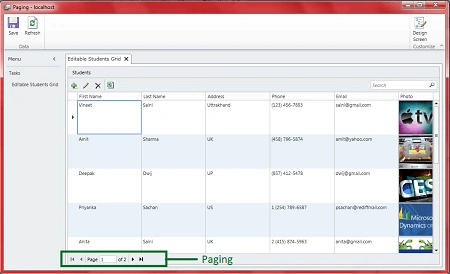
Step 6 : Run the application (Press F5). Now you can use the paging concept to show all the data like as in the following image.
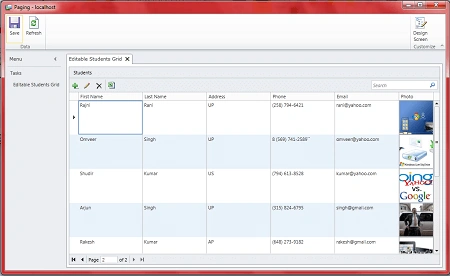
Step 7 : When you click on 2 in the paging property then you will see the next record in the display page like as in the following image.
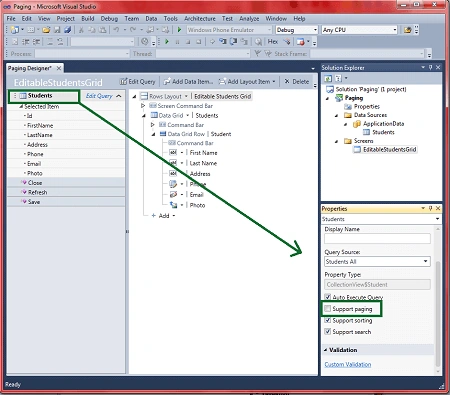
Step 8 : If you want to disable paging in a LightSwitch application then you can do that. To do that go to the student's properties->Unmark support paging.
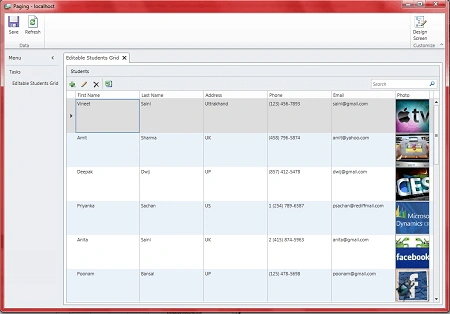
Step 9 : Run the application (Press F5). Now
you will see there are no paging properties in your display page. The same as in the
process sown above you can disable the searching box, sorting and auto execute query.
Summary
So the paging concept has significant importance in a LightSwitch application. Using the paging properties you can see the whole data one by one page.
Some Helpful Resources
Join the conversation! Your thoughts help the community grow.