

As we know MVC, gives Test Driven Development hence use this in a small application.
Step 1 : First Open Visual Stdio 2010>New> Project.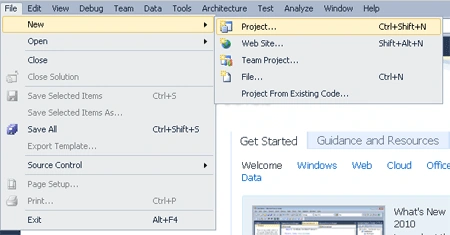
Step 2 : Chose ASP.NET MVC Web Application.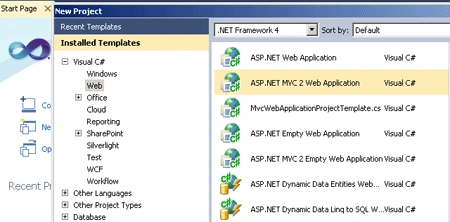
Step 3 : After that next step is to check the Radio Button TO test the development.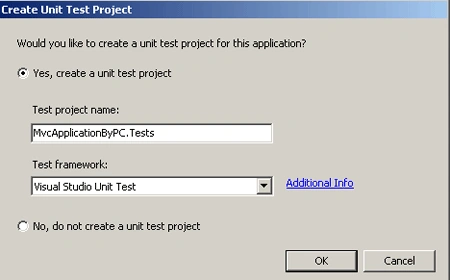
Step 4 : Now you can see the following items in your solution explorer.
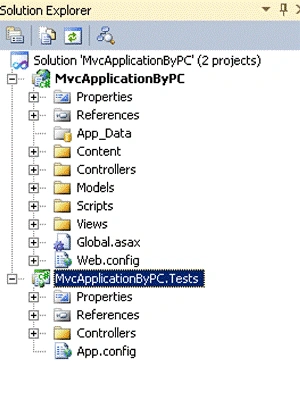
Step 5 : Now the First step is to form
a path to the Controller, Model and Veiw in Global.asax file as shown in the Solution Explorer above
using
System;
using
System.Collections.Generic;
using
System.Linq;
using
System.Web;
using
System.Web.Mvc;
using
System.Web.Routing;
{
// Note: For instructions on enabling IIS6 or IIS7 classic mode,
// visit http://go.microsoft.com/?LinkId=9394801
public class MvcApplication : System.Web.HttpApplication
{
public static void RegisterRoutes(RouteCollection routes)
{
routes.IgnoreRoute("{resource}.axd/{*pathInfo}");
protected void Application_Start()
{
routes.IgnoreRoute("{resource}.axd/{*pathInfo}");
routes.MapRoute(
"PacificShow", // Route name
"Pacific/{firstname}", // URL with parameters
new { // Parameter defaults
controller = "Pacific",
action = "Show",
firstname = ""
}
);
}
AreaRegistration.RegisterAllAreas();
RegisterRoutes(RouteTable.Routes);
}
}
}
Step 6 :Now after manipulating the routing add Model Class by following the steps as shown below:
- Right Click on Model>add>new item>chose class from template
- Name the class and click on add button
using
System;
using
System.Collections.Generic;
using
System.Linq;
using
System.Web;
namespace
MvcApplicationByPC.Models
{
public class
Pacific
{
public string
Firstname { get; set;
}
public string
Mcnid { get; set;
}
public string
Technology { get; set;
}
public string
Address { get; set;
}
}
}
Step 7 : Next step is to add Controller who route is mentioned in
the route map.
Step to add Controller
Right Click on Controller Folder>add Controller>name the Controller
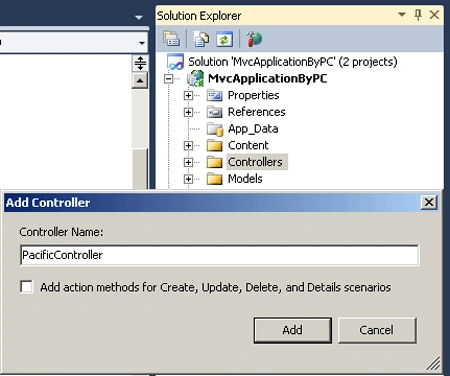
Now work on Controller to the data:
using
System;
using
System.Collections.Generic;
using
System.Linq;
using
System.Web;
using
System.Web.Mvc;
using
MvcApplicationByPC.Models;
{
public class PacificController : Controller
{
//
// GET: /Pacific/
public ActionResult Show (string firstname)
{
if (string.IsNullOrEmpty(firstname))
{
ViewData["Errormessage"] = "Please enter the first name";
}
else
{
Pacific mcn = new Pacific
{
Firstname = "Pacific",
Mcnid = "mcnid",
Technology = "Technology",
Address = firstname + "-abc"
};
ViewData["Firstname"] = mcn.Firstname;
ViewData["Mcnid"] = mcn.Mcnid;
ViewData["Technology"] = mcn.Technology;
ViewData["Address"] = mcn.Address;
}
return View();
}
}
}
Step 8 :After working on Controller and Model final step is to
use the third part of MVC that is View
To do so first add View by following these steps:
- Right Click on Controller page>add View
- Chose View Data Class
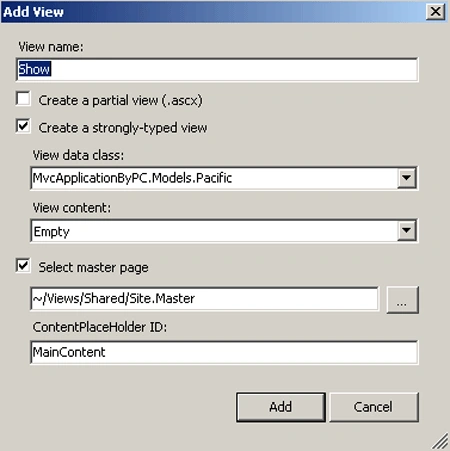
Now Manipulate the Show.aspx i.e View page
<%@
Page Title=""
Language="C#"
MasterPageFile="~/Views/Shared/Site.Master"
Inherits="System.Web.Mvc.ViewPage"
%>
<asp:Content
ID="Content1"
ContentPlaceHolderID="TitleContent"
runat="server">
</asp:Content>
<asp:Content
ID="Content2"
ContentPlaceHolderID="MainContent"
runat="server">
<%
if (ViewData["ErrorMessage"]
!= null) { %>
<h1><%=ViewData["ErrorMessage"]%></h1>
<h1><%=ViewData["Firstname"]%> <%=ViewData["Mcnid"]%></h1>
<p>
Technology: <%=ViewData["Technology"]%>
</p>
<p>
Address:
<%=ViewData["Address"]%>
</p>
<% } %>
</asp:Content>
Step 9 : After Creating the View you
can run your application by f5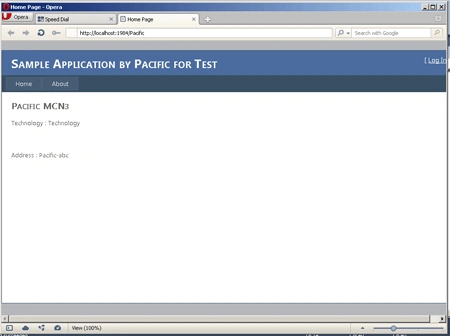
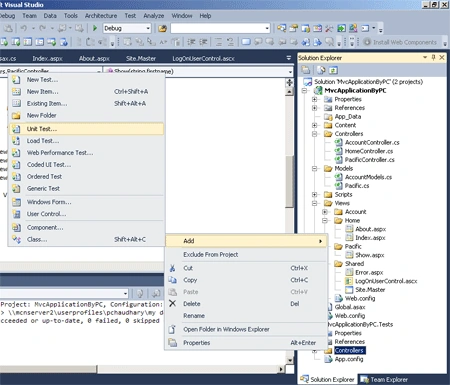
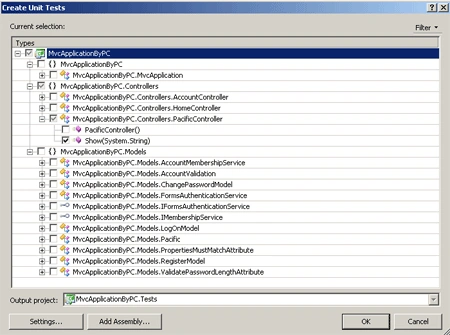
Step 11 : Finally Chose the Controller which you want to test as shown
Prashant ChaudharyPosted Dec 9, 2011, 5:17 AM
Your Welcome
thiru prakashPosted Dec 5, 2011, 11:30 PM
thanQ for submitting this article............... very useful for startups in asp.net mvc