

Here you will see how to edit or delete a record using Editable Datagrid Screen in a LightSwitch application using Visual Studio 2012.
In my previous article I described how to add a record using Editable DataGrid Screen (see http://www.c-sharpcorner.com/UploadFile/18ddf7/adding-new-records-using-editable-datagrid-screen-in-lightsw/),
The following is the procedure for editing a record in the Editable DataGrid Screen.
There are two ways by which you can edit a record.
Step 1
In the first way, select a record and double-click on that record that you want to edit as in the following.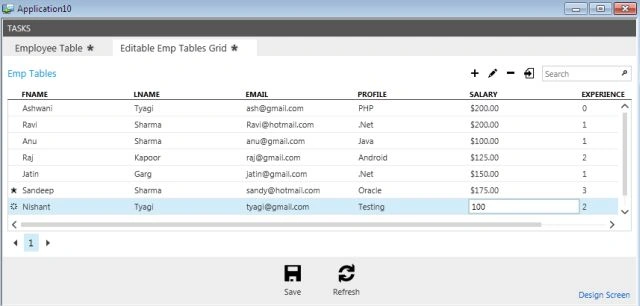
Step 2
Now place the different value in the field. If you want to modify any other column then press Tab Key. Once you edit the records, click on the "Save" button to save the modified records.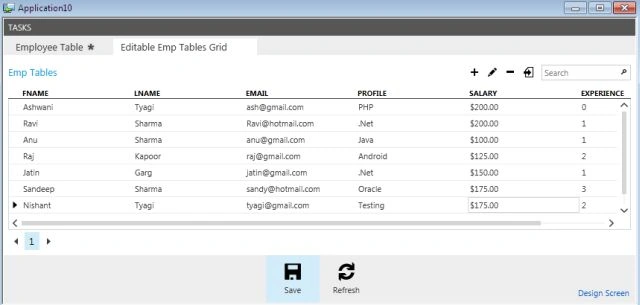
Step 3
In the second way, select the row that you want to modify and click on the Edit Button.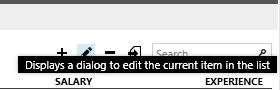
Step 4
A child window appears, modify the record that you want and click the "OK" button.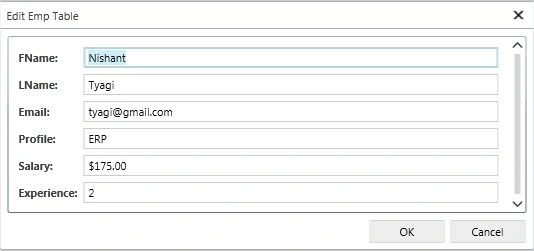
Step 5
Press the "Save" button to update the records and you will notice that the record has been modified successfully in the Editable Emp Tables Grid.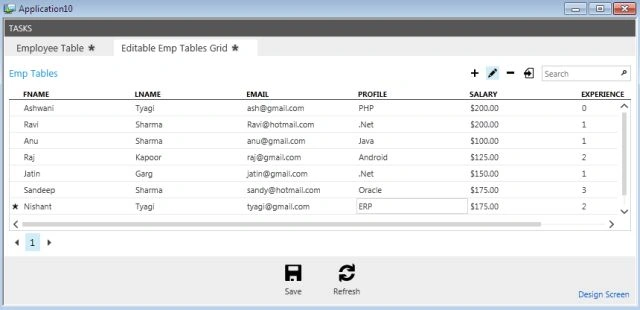
Delete a Record
There are two ways to delete a record.
Step 6
In the first way, select the record that you want to delete and press Delete.
Step 7
We will see that the record has been deleted.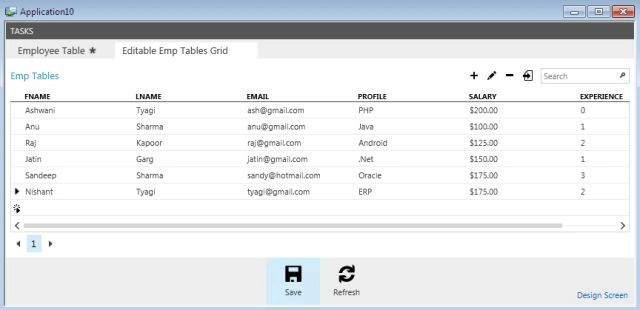
Step 8
In the second way, select the row that you want to delete and click on the Delete button.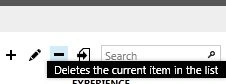
Step 9
You will see that the record has been deleted and there is a "x" mark placed at the starting side of the record, which means that the record has been deleted.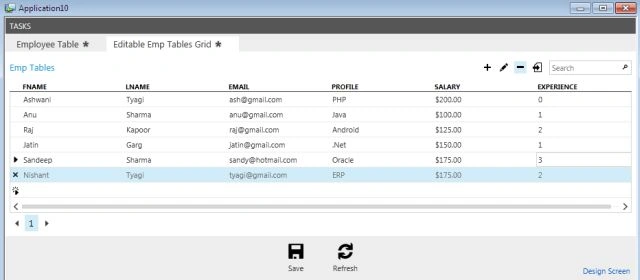
Step 10
Press the Save button and you will see that the record has been successfully removed.
Join the conversation! Your thoughts help the community grow.