

Introduction
In this tutorial, we will learn about the jQuery UI developed using JavaScript. The UI in jQuery UI stands for User Interface which means that it's a library to provide an interface to the user to interact with your web application or web site. It is a kind of abstraction provided to the user for doing low-level interaction and designing. To survive in the current technology web designers must learn jQuery. jQuery makes website design for anyone a cakewalk. This library contains 11 widgets, five interactions, and nine effects. This tutorial covers the 3 widgets and all the interactions and effects of each of the widgets. Let's first see what a Widget is.
Widgets in jQuery UI
Widgets are just like any other JavaScript object attached to a Web Element to maintain its interaction, lifetime, theming, state and so on. The jQuery plugins are used as simply as other jQuery methods. Widgets are very helpful in web design. They save many of your keystrokes wasted by writing the code from scratch to get the same functionality. That's enough for Widgets.
Some jQuery Widgets
Accordion
Dialog
Tooltip
Interaction in jQuery UI
Interaction in jQuery UI is a way to provide interaction between your web element and the user. The user can interact with web elements in many ways but as a designer, you must know which interaction is the most suitable. In jQuery, we have five types of interactions. Each has its own uses and advantages.
jQuery Interactions
Draggable
Droppable
Resizable
Selectable
Sortable
Effects in jQuery UI
Effects are nothing but everything for any good website. Whatever magic you see on websites are mostly using the jQuery effects. It applies an animation on an element. In this tutorial, we will learn Hide, Show and toggle class effects.
Working With jQuery
Part 1 Adding widgets on a web page
- Create an empty web page with basic HTML in it and put in the Body:
- <div id='accordion'>
- <h3>Title 1</h3>
- <div>
- Content 1 Goes here.
- </div>
- <h3>Title 2</h3>
- <div>
- Content 2 Goes here.
- </div></div>
-
Create a JS file and add this code:
- $(document).ready(function () {
- $("#accordion").accordion({});
- });
Here the second line adds the Accordion Widget to the div having the ID "accordion". You can use any widget option, like Active, animate, collapsible and so on inside the {} curly brace. For example: "{Active:2}".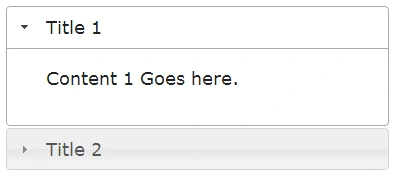
Dialog
- In your HTML file put this code in the Body:
- <inputtypeinputtype='button'value="Login"id="login"/>
- <dividdivid='loginDlg'style="display:none;">
- Username:<inputtypeinputtype='text'/><br>
- Password:<inputtypeinputtype='password'/>
- </div>
-
In your JS file add this code after line 3:
- $('#login').click(function () {
- $("#loginDlg").dialog({});
- });
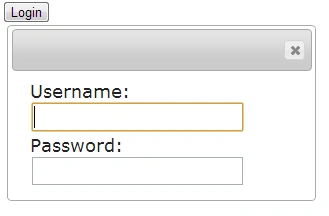
Here line 5 will open the "Login as" Dialog when the user clicks on the Login button. Try adding this code between the curly braces and check the Output :)- show: {
- effect:"blind",
- duration: 1000
- },
- hide: {
- effect:"fold",
- duration: 1000
- }
ToolTip
- Now add the title to your login button. The code will be like this:
- <inputtype='button'value="Login"id="login"title="Click this button to open login Dialog "/>
-
In your JS file add this line:
- $('#login').tooltip({});
Here Line 7 adds the tool tip to the login button.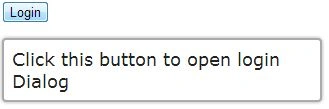 Live Demo Here
Summary
It's time to summarize what we have learned so far. We learned about the jQuery widgets. We saw how easy it is to add a widget to any element. We saw how 2 lines of jQuery give us this versatile and magnificent view of the site. As a takeaway of this article you can remember this rule of thumb for adding any widget to an element, use this syntax:
$(element_to_target).widget_name({List_of_options});
The code is kept simple and short for the sake of understanding the concept. In Part 2, we will learn about jQuery Interactions and how to use them properly. So stay tuned and don't forget to Comment.
Join the conversation! Your thoughts help the community grow.