

Introduction
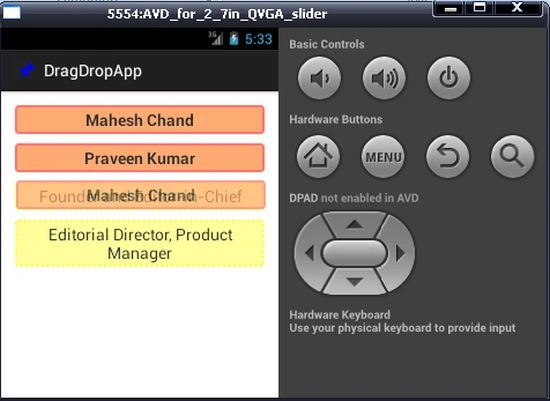
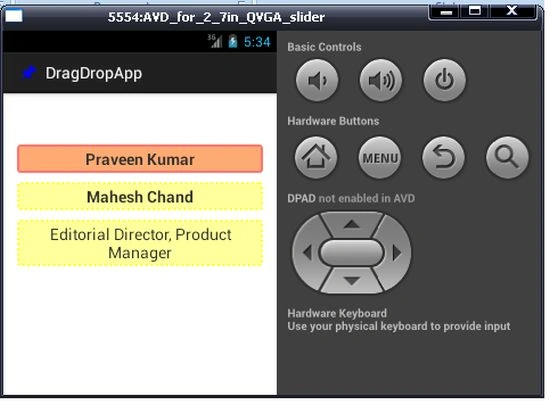
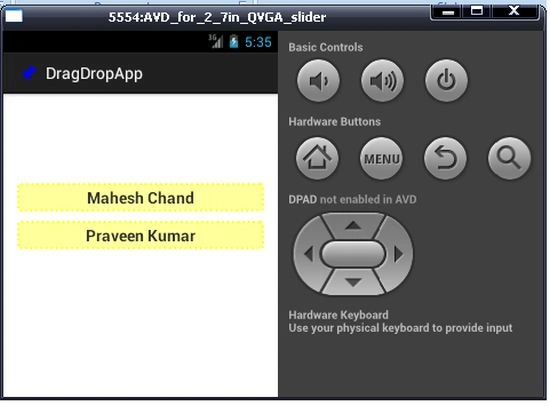
Somewhere we played a game of dragging objects to an appropriate location. We will develop something like this with the same functionality. I have created a mockup of our application.
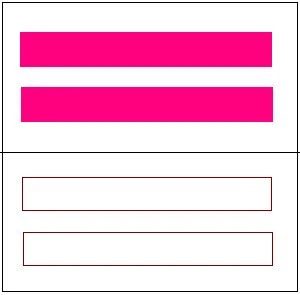 So let's start with our new application. You know very well how to create a new project and which type of parameter you need to pass. If not then visit http://www.c-sharpcorner.com/UploadFile/88b6e5/first-application-in-android-studio/.
Note: This project requires a minimum SDK version of 12 or greater.
Step 1:
Open your "values/strings.xml" file. We need to create some string resources inside it.
Strings.xml
So let's start with our new application. You know very well how to create a new project and which type of parameter you need to pass. If not then visit http://www.c-sharpcorner.com/UploadFile/88b6e5/first-application-in-android-studio/.
Note: This project requires a minimum SDK version of 12 or greater.
Step 1:
Open your "values/strings.xml" file. We need to create some string resources inside it.
Strings.xml
- <string name="intro">Place following persons in Appropriate Position.</string>
- <string name="option_1">Mahesh Chand</string>
- <string name="option_2">Praveen Kumar</string>
- <string name="choice_1">Founder and Editor-in-Chief</string>
- <string name="choice_2">Editorial Director, Product Manager</string>
Step 2:
To provide a background color effect, we need to create a custom shape and will pass this to option views. So use the following procedure.
Click on "Project" then open the "res" directory then right-click and select "New" -> "Android Resource File".
Then enter the name "option.xml" and select "drawable" from the drop-down list.
Option.xml
Step 3:
- <shape xmlns:android="http://schemas.android.com/apk/res/android"
- android:dither="true" >
- <solid android:color="#ffffaa77" />
- <corners android:radius="2dp" />
- <stroke
- android:width="2dp"
- android:color="#ffffaa77" />
- <padding
- android:bottom="5dp"
- android:left="10dp"
- android:right="10dp"
- android:top="5dp" />
- </shape>
To provide a background color effect, we need to create a custom shape and pass it to choice views. So use the following procedure.
Click on "Project" then open the "res" directory then right-click and select "New" -> "Android Resource File".
Then enter the name "choice.xml" and select "drawable" from the drop-down list.
choice.xml
- <shape xmlns:android="http://schemas.android.com/apk/res/android"
- android:dither="true" >
- <solid android:color="#ffffff99" />
- <corners android:radius="2dp" />
- <stroke
- android:dashGap="4dp"
- android:dashWidth="2dp"
- android:width="2dp"
- android:color="#ffffff00" />
- <padding
- android:bottom="5dp"
- android:left="5dp"
- android:right="5dp"
- android:top="5dp" />
- </shape>
Step 4:
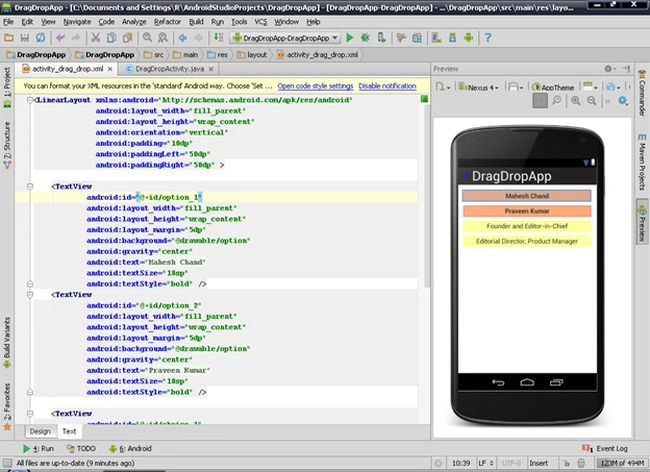
Now, open your layout file and paste in the following code.
Activity_drag_drop.xml
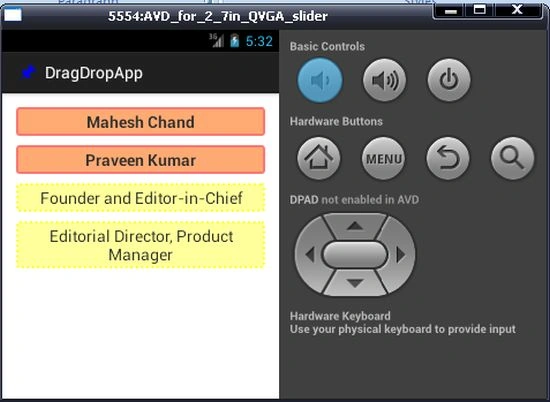
The following will be the output of your layout:
- <LinearLayout xmlns:android="http://schemas.android.com/apk/res/android"
- android:layout_width="fill_parent"
- android:layout_height="wrap_content"
- android:orientation="vertical"
- android:padding="10dp"
- android:paddingLeft="50dp"
- android:paddingRight="50dp" >
- <TextView
- android:id="@+id/option_1"
- android:layout_width="fill_parent"
- android:layout_height="wrap_content"
- android:layout_margin="5dp"
- android:background="@drawable/option"
- android:gravity="center"
- android:text="@string/option_1"
- android:textSize="18sp"
- android:textStyle="bold" />
- <TextView
- android:id="@+id/option_2"
- android:layout_width="fill_parent"
- android:layout_height="wrap_content"
- android:layout_margin="5dp"
- android:background="@drawable/option"
- android:gravity="center"
- android:text="@string/option_2"
- android:textSize="18sp"
- android:textStyle="bold" />
- <TextView
- android:id="@+id/choice_1"
- android:layout_width="fill_parent"
- android:layout_height="wrap_content"
- android:layout_margin="5dp"
- android:background="@drawable/choice"
- android:gravity="center"
- android:textSize="18sp"
- android:text="@string/choice_1" />
- <TextView
- android:id="@+id/choice_2"
- android:layout_width="fill_parent"
- android:layout_height="wrap_content"
- android:layout_margin="5dp"
- android:background="@drawable/choice"
- android:gravity="center"
- android:textSize="18sp"
- android:text="@string/choice_2" />
- </LinearLayout>
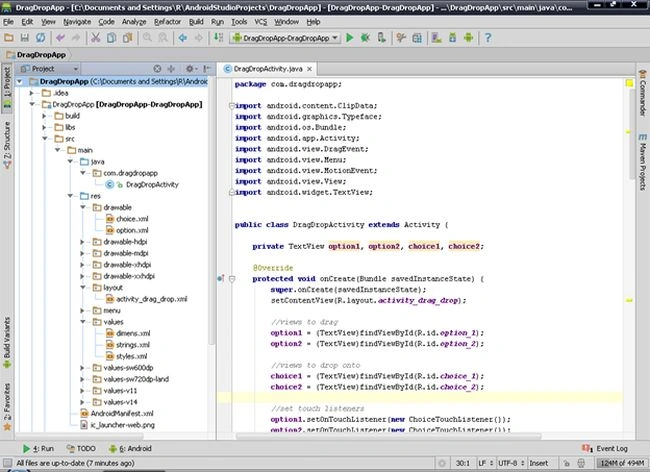
- private TextView option1, option2, choice1, choice2;
- Inside onCreate(), write following code.
- //views to drag
- option1 = (TextView)findViewById(R.id.option_1);
- option2 = (TextView)findViewById(R.id.option_2);
- //views to drop onto
- choice1 = (TextView)findViewById(R.id.choice_1);
- choice2 = (TextView)findViewById(R.id.choice_2);
- private final class ChoiceTouchListener implements View.OnTouchListener {
- @Override
- public boolean onTouch(View view, MotionEvent motionEvent) {
- if (motionEvent.getAction() == MotionEvent.ACTION_DOWN) {
- //setup drag
- return true;
- }
- else {
- return false;
- }
- }
- }
- //setup drag
- ClipData data = ClipData.newPlainText("", "");
- View.DragShadowBuilder shadowBuilder = new View.DragShadowBuilder(view);
- //start dragging the item touched
- view.startDrag(data, shadowBuilder, view, 0);
- private class ChoiceDragListener implements View.OnDragListener {
- @Override
- public boolean onDrag(View v, DragEvent dragEvent) {
- switch (dragEvent.getAction()) {
- case DragEvent.ACTION_DRAG_STARTED:
- //no action necessary
- break;
- case DragEvent.ACTION_DRAG_ENTERED:
- //no action necessary
- break;
- case DragEvent.ACTION_DRAG_EXITED:
- //no action necessary
- break;
- case DragEvent.ACTION_DROP:
- //handle the dragged view being dropped over a drop view
- View view = (View) dragEvent.getLocalState();
- //stop displaying the view where it was before it was dragged
- view.setVisibility(View.INVISIBLE);
- //view dragged item is being dropped on
- TextView dropTarget = (TextView) v;
- //view being dragged and dropped
- TextView dropped = (TextView) view;
- //update the text in the target view to reflect the data being dropped
- dropTarget.setText(dropped.getText());
- //make it bold to highlight the fact that an item has been dropped
- dropTarget.setTypeface(Typeface.DEFAULT_BOLD);
- //if an item has already been dropped here, there will be a tag
- Object tag = dropTarget.getTag();
- //if there is already an item here, set it back visible in its original place
- if(tag!=null)
- {
- //the tag is the view id already dropped here
- int existingID = (Integer)tag;
- //set the original view visible again
- findViewById(existingID).setVisibility(View.VISIBLE);
- }
- //set the tag in the target view being dropped on - to the ID of the view being dropped
- dropTarget.setTag(dropped.getId());
- break;
- case DragEvent.ACTION_DRAG_ENDED:
- //no action necessary
- break;
- default:
- break;
- }
- return true;
- }
- }
- //set touch listeners
- option1.setOnTouchListener(new ChoiceTouchListener());
- option2.setOnTouchListener(new ChoiceTouchListener());
- //set drag listeners
- choice1.setOnDragListener(new ChoiceDragListener());
- choice2.setOnDragListener(new ChoiceDragListener());
Join the conversation! Your thoughts help the community grow.