

Introduction
This article introduces the creation of a SharePoint list using JQuery and SharePoint web services.
Requirement:
This is required when the client wants to customize their site and they don’t want to use the OOB options in SharePoint. So we can provide a custom page to create a SharePoint list using a custom dashboard.
Here I am providing a sample example in a SharePoint page.
Step 1: Open your SharePoint site and create a SharePoint Page in SitePages library
Step2: Download JQuery and Spservices reference files from source code of this article
Step3: Add above downloaded reference files to the created page and add the following code in body of the page.
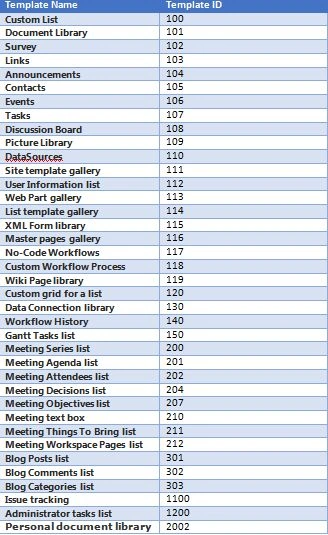
Note: If you want more templates, please refer list given at end of this article.
- <p>Create SharePoint list using SPServices</p>
- <div>
- <table>
- <tr>
- <td>List Name:</td>
- <td><input type="text" id="txtListName" /></td>
- </tr>
- <tr>
- <td>Description:</td>
- <td><input type="text" id="txtListDesc" /></td>
- </tr>
- <tr>
- <td>Template:</td>
- <td>
- <select id="selTemplate">
- <option value="100">Custom List</option>
- <option value="101">Document Library</option>
- <option value="102">Survey</option>
- <option value="103">Links</option>
- <option value="104">Announcements</option>
- <option value="105">Contacts</option>
- <option value="106">Events</option>
- <option value="107">Tasks</option>
- <option value="108">Discussion Board</option>
- <option value="109">Picture Library</option>
- <option value="115">DForm Library</option>
- <option value="120">Custom List in Datasheet View</option>
- <option value="1100">Issues</option>
- <option value="110">DataSources</option>
- </select>
- </td>
- </tr>
- <tr>
- <td></td>
- <td><input type="button" id="btnCreate" value="Create List" /></td>
- </tr>
- </table>
- </div>
- $(document).ready(function() {
- $('#btnCreate').click(function() {
- crateList();
- });
- });
- function crateList()
- {
- var strListName = $('#txtListName').val();
- var strListDesc = $('#txtListDesc').val();
- var strTemplate = $('#selTemplate').val();
- //alert('Welcome working');
- $().SPServices({
- operation: "AddList",
- async: false,
- listName: strListName,
- description: strListDesc,
- templateID: strTemplate,
- completefunc: function(xData, Status)
- {
- if (xData.status == 200)
- {
- alert(strListName + ' List created successfully');
- } else
- {
- alert(xData.status);
- alert(xData.responseText);
- }
- }
- });
- }
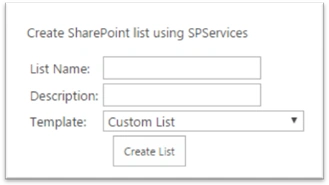
Step 6: Enter List Name, Description and select the Template which you want to create as shown below.
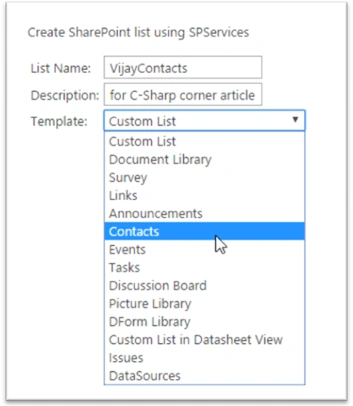
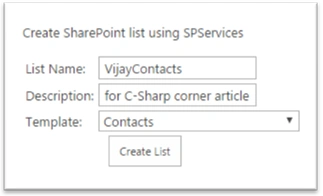
Step 7: Click on ‘Create List’ button.
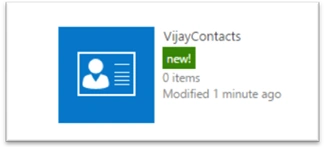
Step 8: Go to site content and check there, you will find the new list which you have created.
Step 9: Open the list and check the columns.
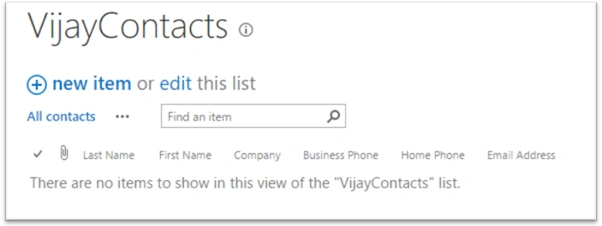
This script can be used for SharePoint 2013 apps and mobile pages as well. It can be implemented from any external website or app also.
Please find the following are the List template Ids which I have provided in dropdown.
Thanks for reading. Please comment below.
Gunjan RajputPosted Feb 14, 2019, 1:39 AM
Hi, Does this work for custom list template as well?
Dhayanand KalimidiPosted Dec 29, 2017, 5:19 AM
Nice article. This is help full
Tejesh BarmaPosted Feb 16, 2016, 1:32 AM
<p>Create Sharepoint List Using SPServices</p> <div> <table> <tr> <td>List Name:</td> <td><input type="text" id="txtListName"/></td> </tr> <tr> <td>Description:</td> <td><input type="test" id="txtFirstName"/></td> </tr> <tr> <td>Template:</td> <td> <select id="selTemplate"> <option value="100">Custom List</option> <option value="101">Document Library</option> <option value="102">Survey</option> <option value="103">Links</option> <option value="104">Announcements</option> <option value="105">Contacts</option> <option value="106">Events</option> <option value="107">Tasks</option> <option value="108">Discussion Board</option> <option value="109">Picture Library</option> <option value="115">DForm Library</option> <option value="120">Custom List in Datasheet View</option> <option value="1100">Issues</option> <option value="110">DataSources</option> </select> </td> </tr> <tr> <td></td> <td><input type="button" id="btnCreate" value="Create List" /></td> </tr> </table> </div> <script type="text/javascript" src="/SiteAssets/scripts/jquery-2.1.4.min.js"></script> <script type="text/javascript" src="/SiteAssets/scripts/jquery.SPServices-2014.02.js"></script> <script type="text/javascript"> $(document).ready(function(){ alert('hello'); $('#btnCreate').click(function(){ CreateList(); }); }); function CreateList() { var strLastName=$('#txtListName').val(); var strDescription=$('#txtFirstName').val(); var strTemplate=$('#selTemplate').val(); $().SPServices({ operation:"AddList", async: false, listName: strLastName, description: strDescription, templateID: strTemplate, completefunc: function(xData, Status) { if (xData.status == 200) { alert(strLastName+ ' List created successfully'); } else { alert(xData.status); alert(xData.responseText); } } }); } </script>
Tejesh BarmaPosted Feb 16, 2016, 1:32 AM
Rupali,please insert below code into script editor.with ref of your jquery and spservice library files.
Humayun Kabir MamunPosted Feb 3, 2016, 11:16 PM
Nice...
Rupali ShindePosted Feb 3, 2016, 5:16 AM
can you please check it is working or not for office 365 ?? i tried ur code but it is not working ..if possible please upload source code
Rupali ShindePosted Feb 3, 2016, 4:07 AM
thanks for sharing
Sibeesh VenuPosted Feb 1, 2016, 1:11 AM
Nice Share
Ankit BansalPosted Feb 1, 2016, 12:38 AM
nice one..
Vijay BhaskarPosted Jan 31, 2016, 3:44 PM
Thank you for your encouragement..
Santhakumar MunuswamyPosted Jan 31, 2016, 12:35 PM
Thanks for nice article
Nanddeep NachanPosted Jan 31, 2016, 10:11 AM
Nice share