-
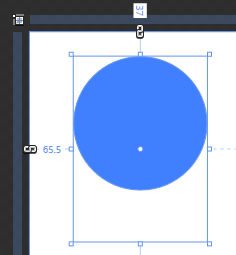
Draw a Path and Name it as MyPath.
 <Path Height="277" Width="200" Canvas.Left="306" Canvas.Top="65" Fill="#FF4080FF" Stretch="None" x:Name="RedPath" Cursor="Hand">
<Path.Data>
<PathGeometry>
<PathFigure IsClosed="True" StartPoint="200,100">
<BezierSegment Point1="200,155.228469848633" Point2="155.228469848633,200" Point3="100,200"/>
<BezierSegment Point1="44.7715263366699,200" Point2="0,155.228469848633" Point3="0,100"/>
<BezierSegment Point1="0,44.7715263366699" Point2="44.7715263366699,0" Point3="100,0"/>
<BezierSegment Point1="155.228469848633,0" Point2="200,44.7715263366699" Point3="200,100"/>
</PathFigure>
</PathGeometry>
</Path.Data>
</Path> -
Open MainControl.xaml.cs in Visual Studio for editing.
-
As with DoubleAnimation and ColorAnimation, everything begins with the declaration of a storyboard. Before the MainControl() constructor, add the following code to declare a storyboard called MovePointDown:
private Storyboard MovePointDown = new Storyboard();
-
Inside the MainControl() constructor, the TargetName property for the storyboard is set to the MyPath object. This is a deviation from the previous examples where the target was set on the individual animations. While it is also acceptable to set the target for each PointAnimation object, all three animations affect the same object, so it saves a couple of lines of code doing it this way.
Storyboard.SetTargetName(MovePointDown,"MyPath");
-
Next, each of the three PointAnimation objects is created. Let's go through each of them in order. Begin by declaring a new PointAnimation object for the first point. Place this code just below the storyboard declaration before the MainControl() constructor:
private PointAnimation P1Anim = new PointAnimation();
-
Now the animation must tell Silverlight which property will be affected. The following code specifies that we are setting the value for Point1 of segment 1.
P1Anim.SetValue(Storyboard.TargetPropertyProperty, new PropertyPath("(Path.Data).(PathGeometry.Figures)[0].(PathFigure.Segments)[1].(BezierSegment.Point1)"));
-
As with the DoubleAnimation and ColorAnimation types, Duration is assigned:
P1Anim.Duration = new Duration(TimeSpan.FromSeconds(0.5));
-
Then the To property value is assigned. Because this is a PointAnimation, the data type is expressed as an x,y point. This means that the To property must be created as type Point.
P1Anim.To = new Point(45,277);
-
Finish up by adding the animation to the storyboard:
MovePointDown.Children.Add(P1Anim);
-
Points 2 and 3 from the XAML example are coded in the same way. Start by declaring two more PointAnimation objects before the MainControl() constructor:
private PointAnimation P2Anim = new PointAnimation();
private PointAnimation P3Anim = new PointAnimation();
-
Inside the MainControl() constructor, use the values from the XAML as a guide to assign values to the properties of the animation. The code for that looks like the following:
P2Anim.SetValue(Storyboard.TargetPropertyProperty, new PropertyPath("(Path.Data).(PathGeometry.Figures)[0].(PathFigure.Segments)[0].(BezierSegment.Point2)"));
P2Anim.Duration = new Duration(TimeSpan.FromSeconds(0.5));
P2Anim.To = new Point(155, 277);
MovePointDown.Children.Add(P2Anim);
P3Anim.SetValue(Storyboard.TargetPropertyProperty, new PropertyPath("(Path.Data).(PathGeometry.Figures)[0].(PathFigure.Segments)[0].(BezierSegment.Point3)"));
P3Anim.Duration = new Duration(TimeSpan.FromSeconds(0.5));
P3Anim.To = new Point(100, 277);
MovePointDown.Children.Add(P3Anim);
-
Once all three PointAnimations have been defined and added to the storyboard, the storyboard can be added to the LayoutRoot resources:
LayoutRoot.Resources.Add("MovePointDown",MovePointDown);
-
As with previous articles, an event listener and event handler are used to play the storyboard when the MouseEnter is raised.
-
Just after the closing brace of the MainControl()constructor, add the following code to the event handler:
private void MyPath_MouseEnter(object sender, MouseEventArgs e)
{
MovePointDown.Begin();
}
Compile and run the program by pressing F5. When you place the mouse pointer over the blue ellipse, the bottom point will move downward.
One of the nuances in working with PointAnimation types is that an animation to return the point to its starting location does not return the calues to 0, as was done in the examples that used translations. Instead, the points need to be returned to the locations that are specified in the XAML definition of the object. Here's the code for the project:
<Path Height="277" Width="200" Canvas.Left="306" Canvas.Top="65" Fill="#FF4080FF" Stretch="None" x:Name="RedPath" Cursor="Hand">
<Path.Data>
<PathGeometry>
<PathFigure IsClosed="True" StartPoint="200,100">
<BezierSegment Point1="200,155.228469848633" Point2="155.228469848633,200" Point3="100,200"/>
<BezierSegment Point1="44.7715263366699,200" Point2="0,155.228469848633" Point3="0,100"/>
<BezierSegment Point1="0,44.7715263366699" Point2="44.7715263366699,0" Point3="100,0"/>
<BezierSegment Point1="155.228469848633,0" Point2="200,44.7715263366699" Point3="200,100"/>
</PathFigure>
</PathGeometry>
</Path.Data>
</Path>
Let's do a quick walkthrough to see what happens when the points are returned to 0,0.
-
Add a second Storyboard object to the project above the MainControl() constructor:
private Storyboard MovePointUp = new Storyboard();
-
Inside the MainControl() constructor, set the target on the storyboard rather than the individual PointAnimation objects:
Storyboard.SetTargetName(MovePointUp, "RedPath");
-
Above the MainControl() constructor, declare three new PointAnimation objects:
private PointAnimation P1AnimBack = new PointAnimation();
private PointAnimation P2AnimBack = new PointAnimation();
private PointAnimation P3AnimBack = new PointAnimation();
-
Assign the same properties used in the PointAnimations from the MoveointDown storyboard. Notice that the To property for each of the three PointAnimations has been set to an x,y point value of 0,0.
P1AnimBack.SetValue(Storyboard.TargetPropertyProperty, new PropertyPath("(Path.Data).(PathGeometry.Figures)[0].(PathFigure.Segments)[1].(BezierSegment.Point1)"));
P1AnimBack.Duration = new Duration(TimeSpan.FromSeconds(0.5));
P1AnimBack.To = new Point(45, 200);
MovePointUp.Children.Add(P1AnimBack);
P2AnimBack.SetValue(Storyboard.TargetPropertyProperty, new PropertyPath("(Path.Data).(PathGeometry.Figures)[0].(PathFigure.Segments)[0].(BezierSegment.Point2)"));
P2AnimBack.Duration = new Duration(TimeSpan.FromSeconds(0.5));
P2AnimBack.To = new Point(155, 200);
MovePointUp.Children.Add(P2AnimBack);
P3AnimBack.SetValue(Storyboard.TargetPropertyProperty, new PropertyPath("(Path.Data).(PathGeometry.Figures)[0].(PathFigure.Segments)[0].(BezierSegment.Point3)"));
P3AnimBack.Duration = new Duration(TimeSpan.FromSeconds(0.5));
P3AnimBack.To = new Point(100, 200);
MovePointUp.Children.Add(P3AnimBack);
-
The newly created storyboard needs to be added to the page resources:
LayoutRoot.Resources.Add("MovePointUp", MovePointUp);
-
Finally, an event listener and associated event handler code are created for the MouseLeave event.
-
And the event handler code to call the new animation goes outside of the MainControl() constructor:
private void MyPath_MouseLeave(object sender, MouseEventArgs e)
{
MovePointUp.Begin();
}
Press F5 to run the project. Place the pointer inside the BlueEllipse object. The bottom point will glide down as the MousePointDown storyboard plays. Now move the pointer off the BlueEllipse object. The point returns to the specified coordinate of 0,0, which is located at the top-left corner of the Path object's bounding box, rather than its starting point on the ellipse.

So how do you know which point from the XAML is the right one to use? Each BezierSegment has three sets of point data that describe the curve. With the reference storyboard for this project and a bit of detective work, we can identify the corresponding points between the object and those being modified by the storyboard.
The first PointAnimation in the MovePointUp storyboard has the following TargetProperty:
(Path.Data).(PathGeometry.Figures)[0].(PathFigure.Segments)[1].(BezierSegment.Point1)
The BezierSegments in the object are numbered as follows
0. BezierSegment Point1="200,155.228469848633" Point2="155.228469848633,200" Point3="100,200"/>
1. <BezierSegment Point1="44.7715263366699,200" Point2="0,155.228469848633" Point3="0,100"/>
2. <BezierSegment Point1="0,44.7715263366699" Point2="44.7715263366699,0" Point3="100,0"/>
3. <BezierSegment Point1="155.228469848633,0" Point2="200,44.7715263366699" Point3="200,100"/>
-
From the TargetProperty, we know that the P1Back animation is working with segment 1, and needs the coordinates for point 1, which are Point1="44.7715263366699,200" (which will be clean up to 45,200). Update the To property for the P1AnimBack animation as shown:
P1AnimBack.To = new Point(45, 200);
-
The P2Back animation targets segment 0, point 2, which is located at Point1="155.228469848633,0" (155,200). The P2Back animation is updated to the following:
P2AnimBack.To = new Point(155, 200);
-
The P3Back animation targets segment 0, point 3, which is the point 100,200. Updating the P3Back animation makes the code look like this:
P3AnimBack.To = new Point(100, 200);
After plugging in those three sets of coordinates and recompiling, the object now behaves as expected when the MouseLeave event is raised, returning our point to its starting position.
That's it you have experienced the PointAnimation through code behind. Hope you have enjoyed.
Enjoy Animating.