

Introduction
What is OData
- It is an open data protocol to exchange the data between client and server.
- The odata uses a REST architecture to send particular types of message over HTTP.
- OData standardizes the request/response formats in JSON and AtomXml on how the data and its metadata is structured.
- OData also specifies a very rich query language to enable consumers query your services for precise information they are looking for with the help of $filter, $orderby, $skip, $top, $expand.
Description
Now let us start with creating the OData End point with WEB API.
Just create a WEB API project in Visual Studio as in the following figures 1 and 2:
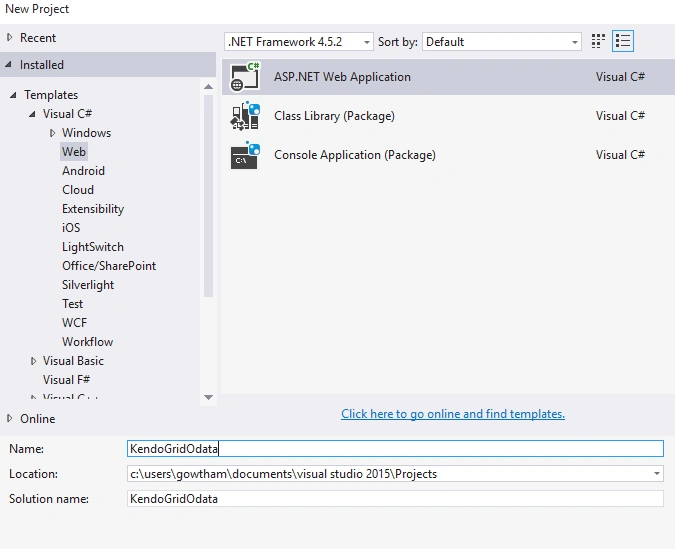
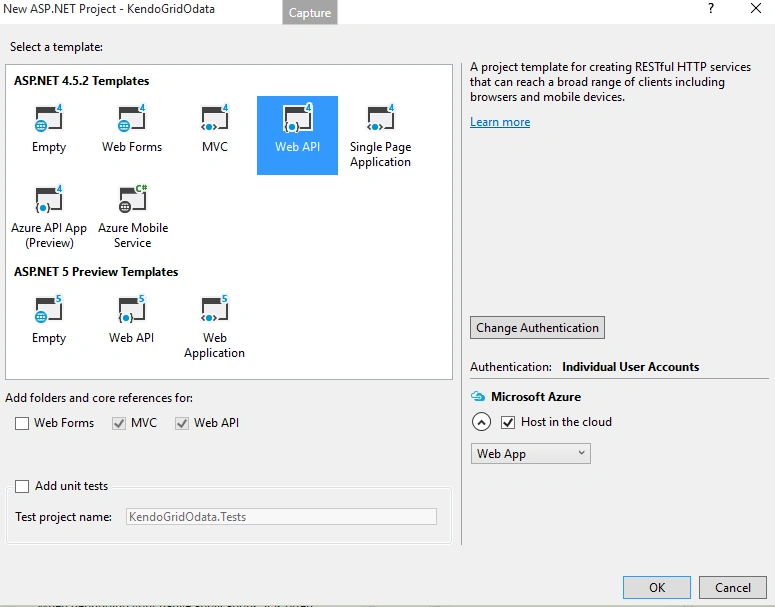
Right-click on the model folder and create a class. In my case I named it Product.
Write the following code in the Product.cs model class.
- public class Product
- {
- [Key]
- [DatabaseGenerated(DatabaseGeneratedOption.Identity)]
- public int ProductID { get; set; }
- [Required]
- public string ProductName { get; set; }
- [Required]
- public string UnitPrice { get; set; }
- }
Here I am using Entity Framework Code first technique so we need to create the context class.
Right-click on the model folder and create one more class. In my case I named it ProductContext.
Write the following code in ProductContext class.
- public class ProductContext : DbContext
- {
- public ProductContext() : base("name=TestConnection") { }
- public DbSet<Product> Products { get; set; }
- }
Scaffolding the WEB API Controller Class
Note: Before doing Scaffolding build your application once.
Right-click on Controller folder, then select Add--> Controller and create a WEB API class as in the following figure 3 and 4.
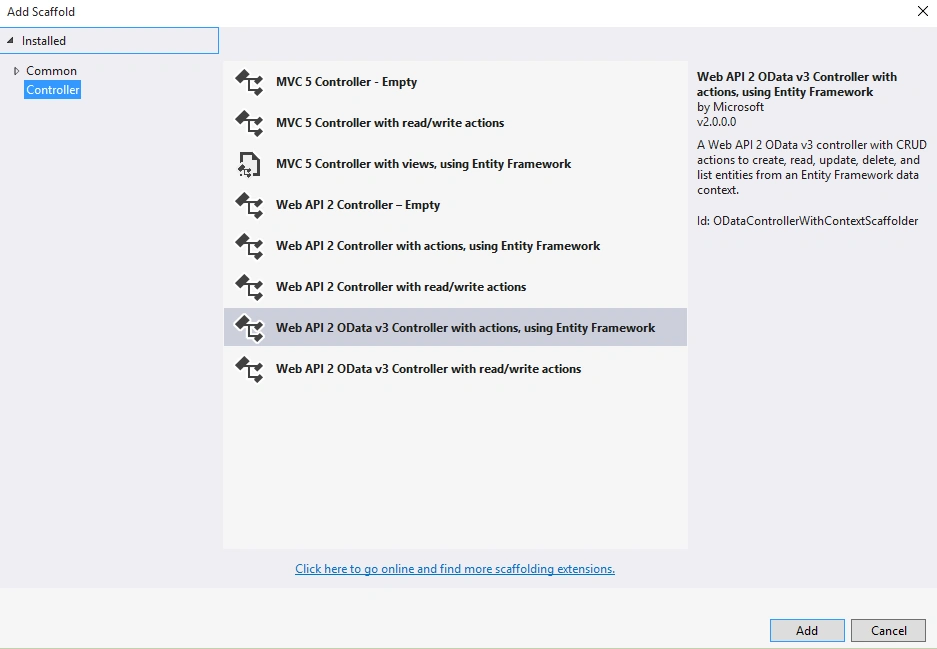
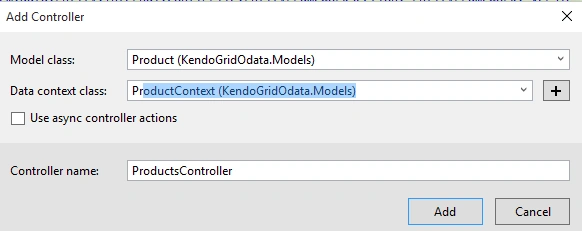
You will get some pre-defined HTTP GET, POST, PUT,PATCH and DELETE requests/responses in the products Controller. Modify the code based on your application requirements. For this example I didn't modified the code.
Before implementing the service in the Kendo UI once check the service request/response in Postman / Fiddler.
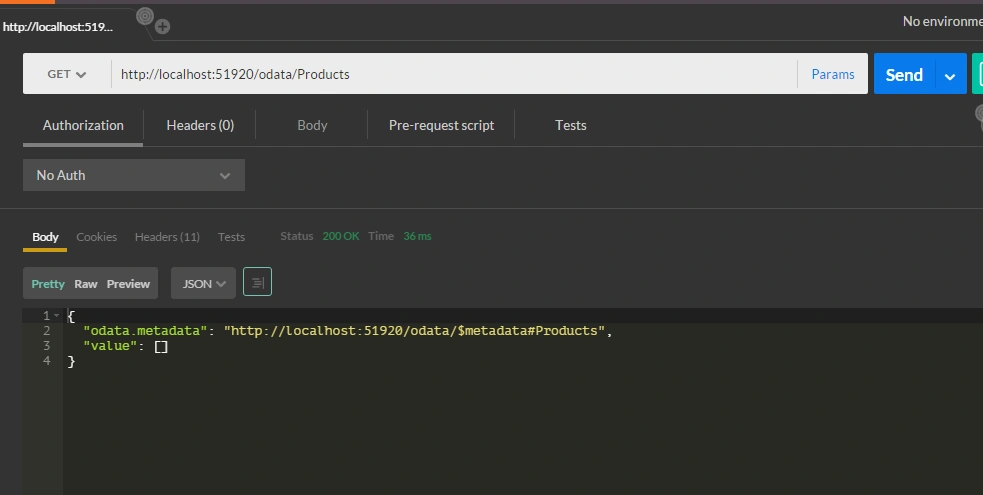
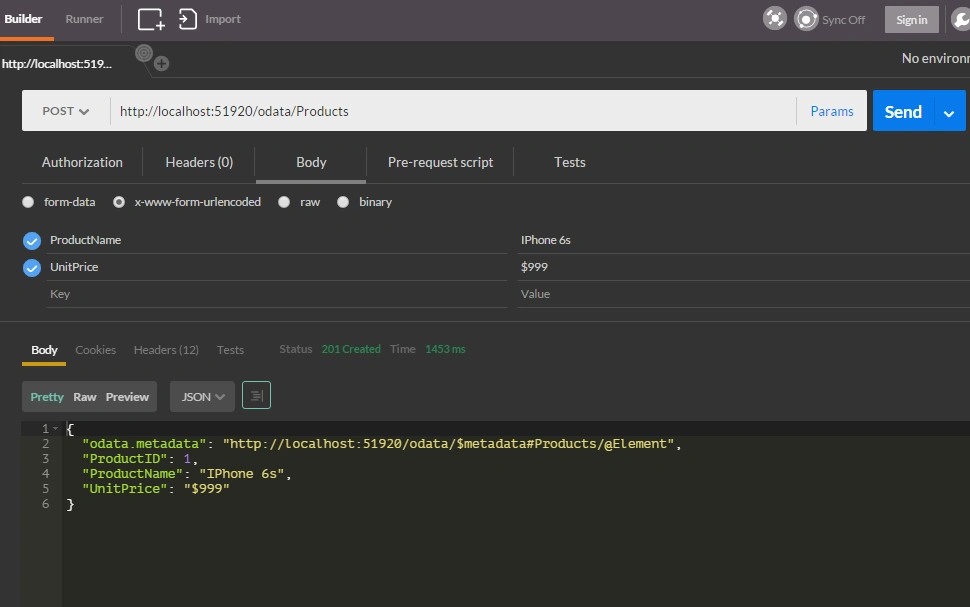
Create an HTML page in your project. In my case I named it KendoGrid.html.
- <!DOCTYPE html>
- <html>
- <head>
- <title></title>
- <meta charset="utf-8" />
- <link rel="stylesheet" href="http://cdn.kendostatic.com/2014.3.1316/styles/kendo.common.min.css" />
- <link rel="stylesheet" href="http://cdn.kendostatic.com/2014.3.1316/styles/kendo.default.min.css" />
- <link rel="stylesheet" href="http://cdn.kendostatic.com/2014.3.1316/styles/kendo.dataviz.min.css" />
- <link rel="stylesheet" href="http://cdn.kendostatic.com/2014.3.1316/styles/kendo.dataviz.default.min.css" />
- <script src="http://cdn.kendostatic.com/2014.3.1316/js/jquery.min.js"></script>
- <script src="http://cdn.kendostatic.com/2014.3.1316/js/kendo.all.min.js"></script>
- <script src="http://cdn.kendostatic.com/2014.3.1029/js/jszip.min.js"></script>
- </head>
- <body>
- <div id="example" class="container">
- <div class="row">
- <div class="col-sm-6">
- <div id="grid"></div>
- </div>
- </div>
- </div>
- </body>
- </html>
- $(document).ready(function () {
- $("#grid").kendoGrid({
- dataSource: {
- type: "odata",
- transport: {
- read: {
- url: "odata/Products",
- dataType: "json"
- },
- },
- schema: {
- data: function (data) {
- return data["value"];
- },
- total: function (data) {
- return data["odata.count"];
- },
- model: {
- fields: {
- ProductName: { type: "string" },
- UnitPrice: { type: "string" },
- }
- }
- },
- pageSize: 20
- },
- height: 200,
- width: 100,
- sortable: true,
- pageable: {
- refresh: true,
- pageSizes: true,
- buttonCount: 5
- },
- columns: [
- { field: 'ProductName', title: 'Product Name',width:200 },
- { field: 'UnitPrice', title: 'Unit Price', width: 100 }]
- });
- });
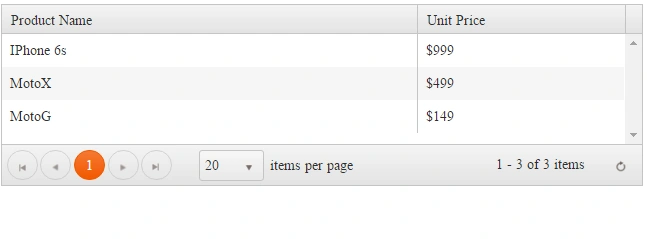
Figure 7
Conclusion
From this article we learned about OData and how to remote bind the Kendo grid using WEB API 2 ODATA v3 and Entity Framework
Hope you have enjoyed this article.
Thank you! Happy Coding!
Arul RPosted Jan 17, 2016, 10:52 AM
Thanks for nice article
Nilesh JadavPosted Oct 31, 2015, 11:16 PM
Good Share sir