
Introduction: In this article we are going to discuss how to use the jQuery plugin and how we will create an awesome effect by using such type of jQuery plugin. Further in details we are going to explore a menu that we will create by using the jQuery LavaLamp plugin. In this article we are creating a menu by taking an unordered list with links that will navigate to another page. Further for providing some style we are using a style sheet that will produce an awesome effect to the menu. In this menu whenever we click on the item of the menu then a line will move along with the cursor toward the item on the menu. This type of effect will be made using the jQuery LavaLamp plugin so let see how it will possible to do that.
Step 1: Firstly we have to create a web Application.
- Go to Visual Studio 2010
- Create the web Application
- Click OK.
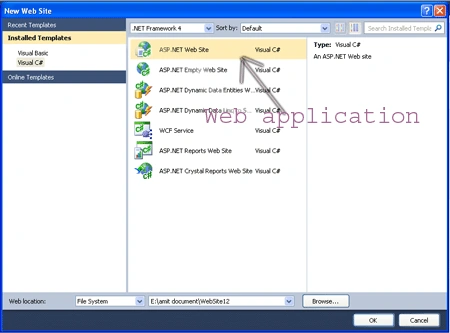
Step 2: Secondly you have to add a new page to the website
- Go to the Solution Explorer
- Right Click on the Project name
- Select add new item
- Add new web page and give it a name
- Click OK
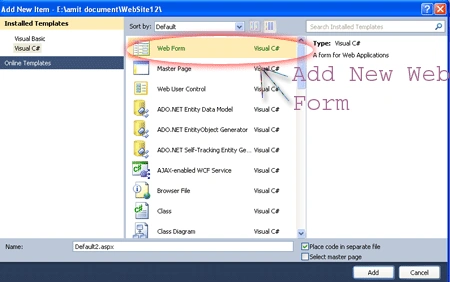
Step 3: In this step we are going to see that see from where the js reference will be added to the source page of the default2.aspx page.
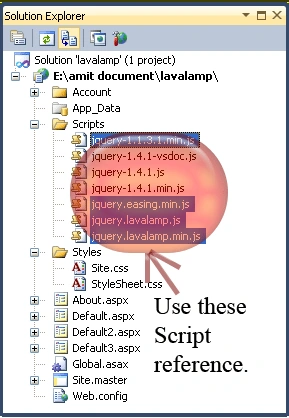
Step 4: Now we are going to write the script code which will be inside either on the head section or in the body section it will depend upon you which way you like most to placed it.

Step 5: In this step we are going to see that where you have to add the Style sheet file for it you have to add it inside the Styles folder let see below that how it will added:
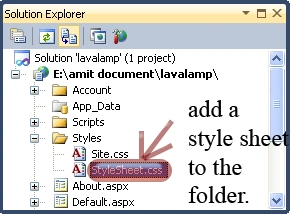
Step 6: In this step we will write the CSS code for the menu which will have to apply to take the effects let see the code given below:
Style Sheet Code:
.l_LampB_Style
{
position:
relative;
height: 50px;
width:
1000px;
background-color:orange;
padding:
15px;
margin: 10px
0;
overflow:
hidden;
border: 5px
groove yellow;
}
.l_LampB_Style li
{
float: left;
list-style:
none;
bottom:10px;
}
.l_LampB_Style
li.back
{
border-bottom:
5px groove
teal;
width: 7px;
height: 30px;
z-index: 20;
position:
absolute;
}
.l_LampB_Style li
a
{
font-size:x-large;
font-family:
Comic Sans MS;
border: 5px
groove #ffff99;
text-decoration:
none;
color:Maroon;
outline:
none;
text-align:
center;
top: 7px;
text-transform:
uppercase;
letter-spacing:
0;
z-index: 10;
display:
block;
float: left;
height: 30px;
position:
relative;
overflow:
hidden;
margin: auto
10px;
}
.l_LampB_Style li
a:hover, .l_LampB_Style
li a:active,
.l_LampB_Style li
a:visited
{
border: none;
}
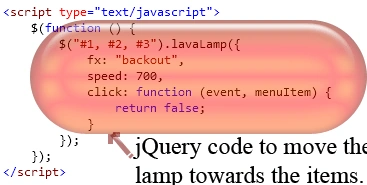
Step 7: In this step we will see the jQuery code let see the jQuery code given below:
Step 8: In this step we will write the complete code for the Default2.aspx page let see the code given below:
Code:
<%@
Page Language="C#"
AutoEventWireup="true"
CodeFile="Default3.aspx.cs"
Inherits="Default3"
%>
<!DOCTYPE
html PUBLIC
"-//W3C//DTD XHTML 1.0 Transitional//EN"
"http://www.w3.org/TR/xhtml1/DTD/xhtml1-transitional.dtd">
<html
xmlns="http://www.w3.org/1999/xhtml">
<head
runat="server">
<title>Demo</title>
<link
rel="stylesheet"
href="Styles/StyleSheet.css"
type="text/css"
media="screen"/>
<script
type="text/javascript"
src="Scripts/jquery-1.1.3.1.min.js"></script>
<script
type="text/javascript"
src="Scripts/jquery.easing.min.js"></script>
<script
type="text/javascript"
src="Scripts/jquery.lavalamp.min.js"></script>
<script
type="text/javascript">
$(function () {
$("#1, #2, #3").lavaLamp({
fx: "backout",
speed: 700,
click: function (event, menuItem)
{
return
false;
}
});
});
</script>
</head>
<body>
<h1
style="font-family:
'Comic Sans MS'; font-size:
xx-large; color:
#00FF00; background-color:
#800000">Create a menu using lava lamp jQuery plugin</h1>
<ul
class="l_LampB_Style"
id="3">
<li><a
href="#">Home</a></li>
<li><a
href="#">About Us</a></li>
<li><a
href="#">Services</a></li>
<li><a
href="#">Products</a></li>
<li><a
href="#">Articles</a></li>
<li><a
href="#">Contact
Us</a></li>
</ul>
</body>
</html>
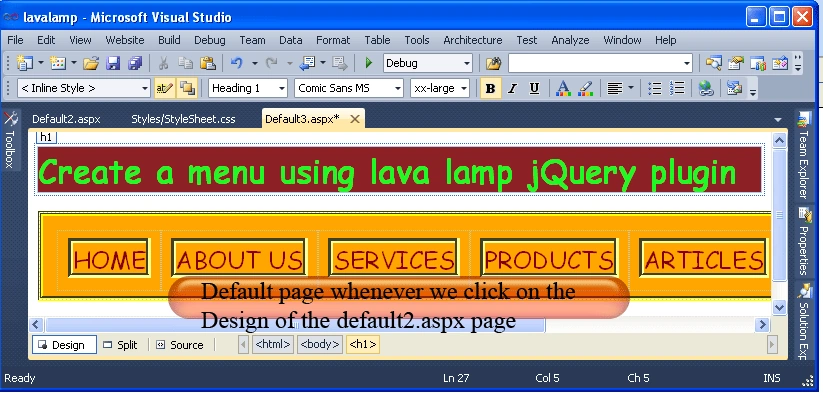
Step 9: In this step we will see the design page of the Default2.aspx page which is given below:
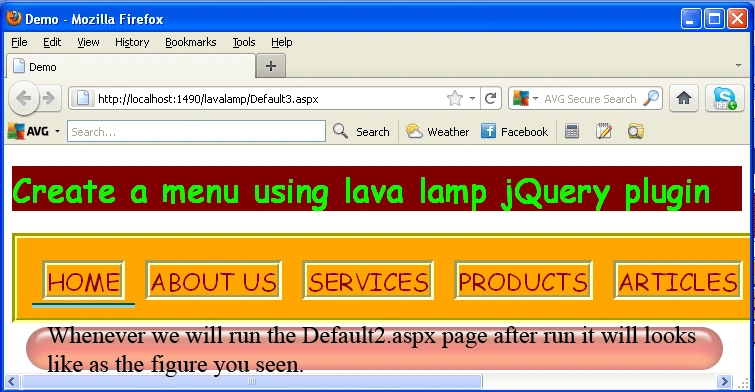
Step 10: In this step we are going to run the Default2.aspx page by pressing F5 let see the output given below:
Output1:
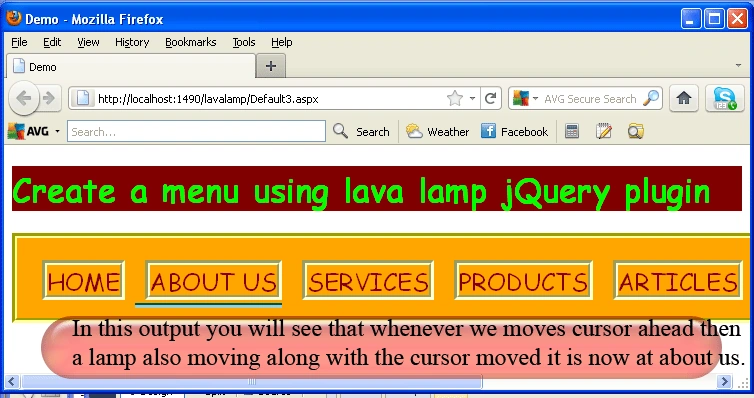
Output2:
Output3:
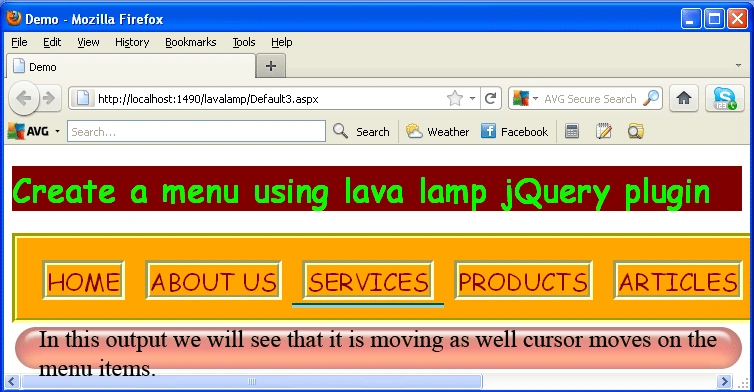
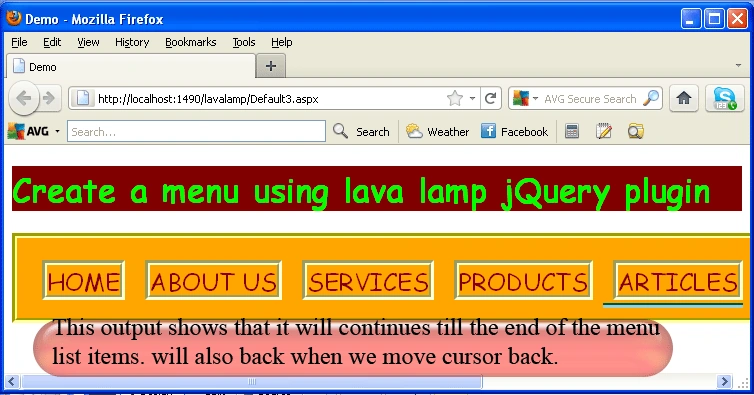
Output4:
Join the conversation! Your thoughts help the community grow.