

Introduction
You can add media, such as video, audio, or an image to a SharePoint page. The media file can come from your computer, from SharePoint, or from another location, such as a file share. There are several different ways you can add video clips to a SharePoint page when you edit the page in the browser. You can add a Media Web Part to the page to play an individual video file. In this article, I will explain how to add Media Webpart to SharePoint Page programmatically, using Server-Side Object Model. This is applicable to all SharePoint On Premise platforms.
Pre-Requisites
- Start Visual Studio.
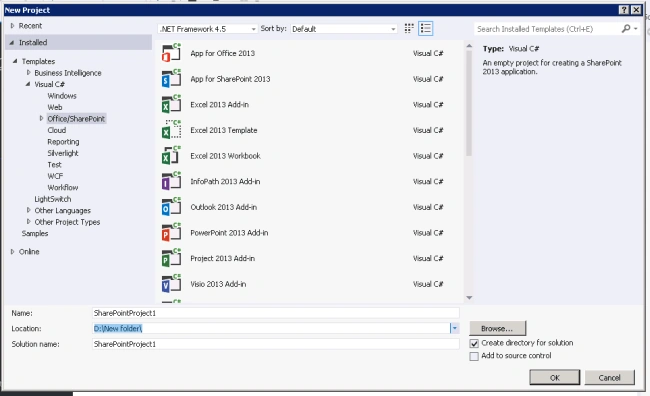
- Open the New Project dialog box, expand the Office/SharePoint node under the language that you want to use, and then choose the SharePoint Solutions node.
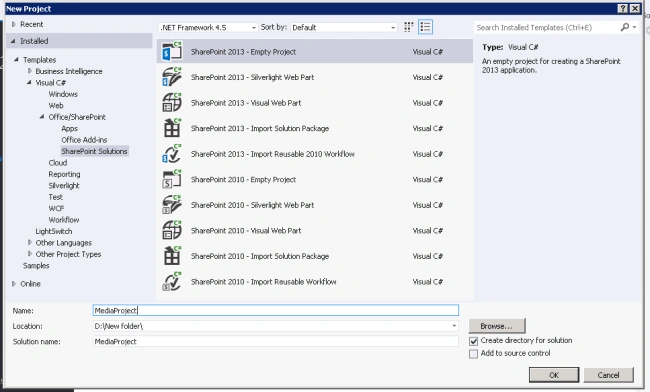
- In the Visual Studio Installed Templates pane, choose the SharePoint 2013 – Empty Project template. Name the project MediaProject, and then click the OK button.
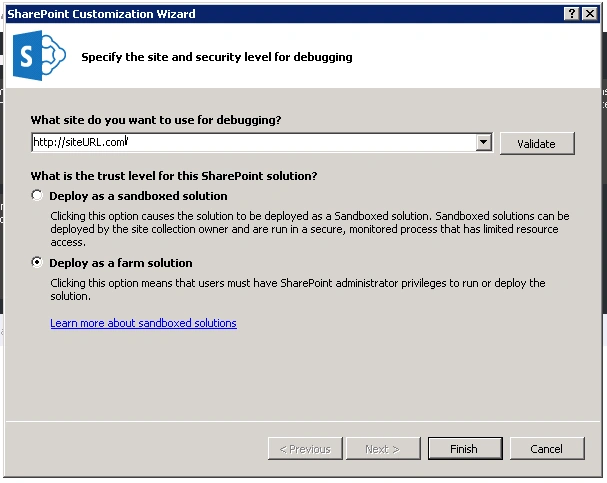
- Choose the Deploy as a farm solution option button, and then click the Finish button to accept the default local SharePoint site.
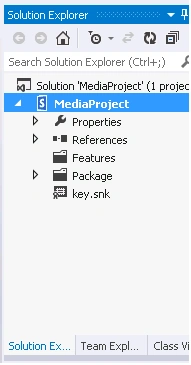
- To create an application page in Solution Explorer, choose the MediaProject project.
- On the menu bar, choose Project>> Add >>New Item.
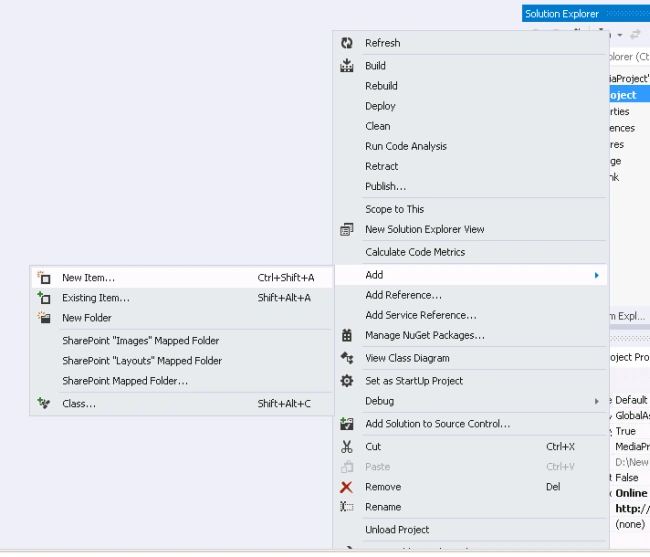
- In the Add New Item dialog box, choose the Application Page (Farm Solution Only) template.
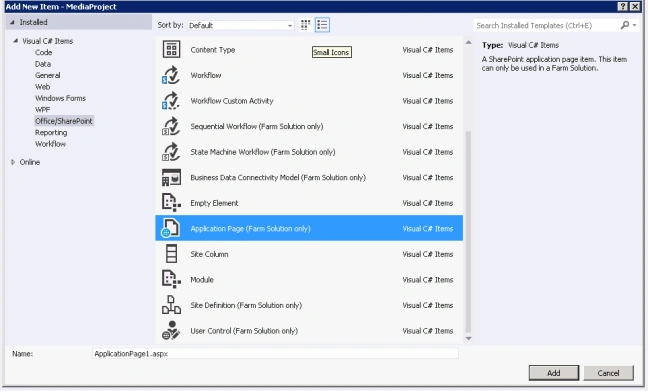
- Name the page AddMediaWebPart, and then choose the Add button.
Add Media Webpart
- Open the AddMediaWebPart.aspx file we created.
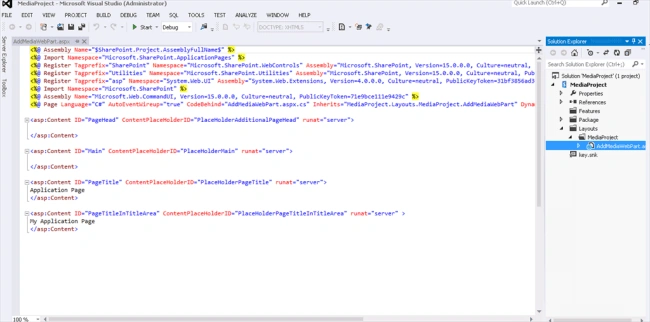
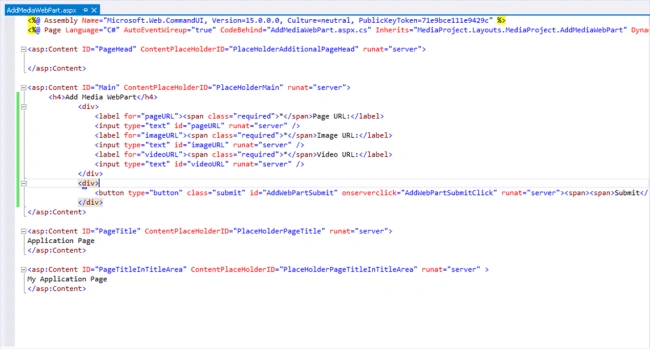
- Add the three text boxes for Page URL, Image URL, and Video URL and one Submit button control to the PlaceHolderMain content control.
- <h4>Add Media WebPart</h4>
- <div>
- <label for="pageURL">
- <span class="required">*</span>Page URL:
- </label>
- <input type="text" id="pageURL" runat="server" />
- <label for="imageURL">
- <span class="required">*</span>Image URL:
- </label>
- <input type="text" id="imageURL" runat="server" />
- <label for="videoURL">
- <span class="required">*</span>Video URL:
- </label>
- <input type="text" id="videoURL" runat="server" />
- </div>
- <div>
- <button type="button" class="submit" id="AddWebPartSubmit" onserverclick="AddWebPartSubmitClick" runat="server">
- <span>
- <span>Submit</span>
- </span>
- </button>
- </div>
- Open the AddMediaWebPart.aspx.cs file.
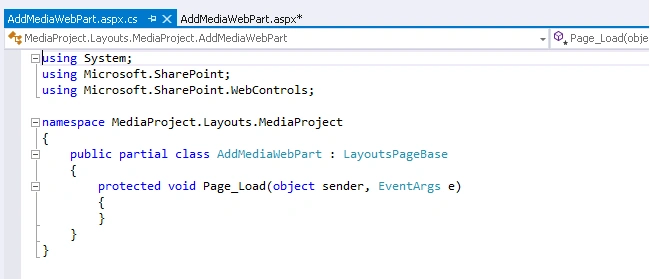
- Add the following references.
- using System;
- using Microsoft.SharePoint;
- using Microsoft.SharePoint.WebControls;
- using Microsoft.SharePoint.WebPartPages;
- using System.Xml;
- using Microsoft.SharePoint.Publishing.WebControls;
- using System.Web.UI.WebControls.WebParts;
- Add AddWebPartSubmitClick event receiver for the Submit button.
- protected void AddWebPartSubmitClick(object sender, EventArgs e)
- {
- }
- Open the site and web using SPSite and SPWeb object.
- Check out the page going to add media webpart.
- Access the webparts place holder on the page by creating SPLimitedWebPartManager object.
- Create the new unique id using GUID object.
- Create MediaWebPart object and assign following webpart properties.
- MediaSource – Video source URL.
- AutoPlay – To enable auto play option.
- Heigth- Height of video player.
- Width – With of video player.
- BackImageUrl – Back image of video in player.
- PreviewImageSource – Preview image for video player.
- Set ChromeState and ChromeType for webpart property.
- ID – Unique id of webpart.
- try {
- using(SPSite site = new SPSite(pageURL.Value)) {
- using(SPWeb web = site.OpenWeb()) {
- SPLimitedWebPartManager webParts = null;
- webParts = web.GetLimitedWebPartManager(pageURL.Value, PersonalizationScope.Shared);
- //Adding Media WebPart
- Guid storageKeyMedia = Guid.NewGuid();
- string wpIdMedia = String.Format("g_{0}", storageKeyMedia.ToString().Replace('-', '_'));
- MediaWebPart mediaWebPart = new MediaWebPart {
- MediaSource = videoURL.Value,
- AutoPlay = false,
- Height = 360,
- Width = 640,
- BackImageUrl = imageURL.Value,
- PreviewImageSource = imageURL.Value,
- ChromeState = System.Web.UI.WebControls.WebParts.PartChromeState.Normal,
- ChromeType = System.Web.UI.WebControls.WebParts.PartChromeType.None,
- ID = wpIdMedia
- };
- webParts.AddWebPart(mediaWebPart, "BlankContent", 1);
- webParts.SaveChanges(mediaWebPart);
- }
- }
- } catch (Exception ex) {
- //Log the errors
- }
- Add the Media webpart and save the page changes.
- Check in the page changes.
- Deploy the solution.
- Open the layouts AddMediaWebPart.aspx page that we created.
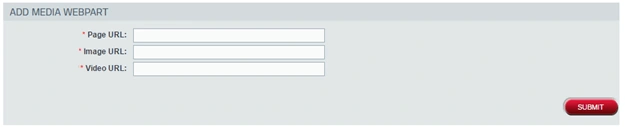
- Enter the Page URL, Image URL, and Video URL values.
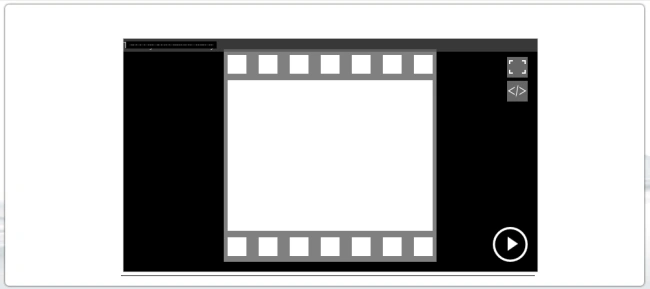
- Open the page and check the Media webpart added to the page. Click on play button to play the video.
Summary: Thus, you have learned how to add Media Webpart to SharePoint Page programmatically, using Server-Side Object Model.
Harish KhawathPosted Sep 24, 2016, 7:47 AM
Good one
Guru GunalPosted Sep 15, 2016, 10:22 AM
Good one
Prasanna MuraliPosted Sep 8, 2016, 12:03 PM
Nice one...
Anu VPosted Aug 31, 2016, 4:33 AM
Nice one.
Jagan BharathPosted Aug 29, 2016, 11:02 AM
Good one
Vignesh ManiPosted Aug 25, 2016, 6:30 AM
Nice one
Tarun DPosted Aug 25, 2016, 1:23 AM
Nice one.Thanks for sharing..