

Before moving further, please refer to the article series on Android:
- Creating A Toolbar In Android - Day One
- Activity Preference In Android - Day Two
- Activity Preference In Android - Day Three
- Android Studio And Git Configuration - Day Four
- Custom Class And Datasource - Day Five
Introduction:
In this article I will show you how to show data in ListView. There are many methods to show a data in ListView, but I have made custom adapter because in this adapter you can easily customize the rows.
- ListView is a view group that displays a list of scrollable items.
- The list items are automatically inserted to the list using an Adapter that pulls content from a source such as an array or database query and converts each item result into a view that's placed into the list.
Step 1:
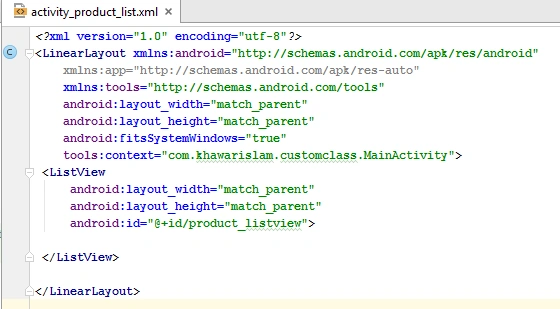
- Create a layout activity_product_list.xml
- Create ListView in activity_product_list.xml
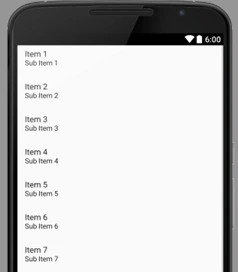
Design
Step 2:
What is ListRow
- Every line in the list view consists of a layout which can be as complex as you want.
- A typical line in a list view has an image on the left side and two text lines in the middle as depicted in the following graphic.
- <LinearLayoutxmlns:android="http://schemas.android.com/apk/res/android"
- android:layout_width="fill_parent"
- android:layout_height="wrap_content"
- android:background="#665544"
- android:orientation="horizontal"
- android:padding="2dp">
- <LinearLayout
- android:layout_width="wrap_content"
- android:layout_height="wrap_content"
- android:background="@color/black"
- android:padding="2dp">
- <!--image-->
- <ImageView
- android:layout_width="wrap_content"
- android:layout_height="wrap_content"
- android:adjustViewBounds="true"
- android:scaleType="fitXY"
- android:src="@drawable/ic_lion" />
- <!--title-->
- </LinearLayout>
- <LinearLayout
- android:layout_width="match_parent"
- android:layout_height="match_parent"
- android:background="#4433ff"
- android:orientation="vertical"
- android:padding="10dp">
- <TextView
- android:id="@+id/row_product_name"
- android:layout_width="match_parent"
- android:layout_height="wrap_content"
- android:text="Name here"
- android:textColor="@color/black"
- android:textSize="20sp" />
- <TextView
- android:id="@+id/row_product_price"
- android:layout_width="match_parent"
- android:layout_height="wrap_content"
- android:text="Price"
- android:textColor="@color/white"
- android:textSize="15sp" />
- </LinearLayout>
- </LinearLayout>
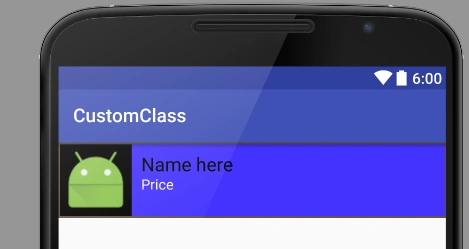
Now you can see that we made one row and all the ListRow follows this design.
Step 3:
Go to the ProductListActivity.class and paste the following code,
- package com.khawarislam.customclass;
- import android.app.Activity;
- import android.content.Context;
- import android.content.Intent;
- import android.os.Bundle;
- import android.support.v7.app.AppCompatActivity;
- import android.view.View;
- import android.widget.AdapterView;
- import android.widget.ListView;
- import android.widget.Toast;
- import java.util.ArrayList;
- public class ProductListActivityextends Activity
- {
- ListViewmListView;
- Context context;
- ArrayList < Product > arrayList;
- @Override
- protected void onCreate(Bundle savedInstanceState)
- {
- super.onCreate(savedInstanceState);
- context = this;
- setContentView(R.layout.activity_product_list);
- arrayList = new ArrayList < > ();
- final ProductDatasourcemProductDatasource = new ProductDatasource();
- arrayList = mProductDatasource.getItemarrayList();
- mListView = (ListView) findViewById(R.id.product_listview);
- ProductAdaptarmProductAdaptar = new ProductAdaptar(context, arrayList);
- mListView.setAdapter(mProductAdaptar);
- mListView.setOnItemClickListener(new AdapterView.OnItemClickListener()
- {
- @Override
- public void onItemClick(AdapterView < ? > parent, View view, intposition, long id)
- {
- Product mProduct = arrayList.get(position);
- mProductDatasource.insert(mProduct);
- Toast.makeText(context, mProduct.getProduct_name(), Toast.LENGTH_SHORT).show();
- }
- });
- }
- }
What is Adapter?
- An adapter manages the data model and adapts it to the individual rows in the list view. An adapter extends the BaseAdapter class.
What is ArrayAdapter?
- ArrayAdapter can handle data based on Arrays. The ArrayAdapter class can handle a list or array of Java objects as input. Every Java object is mapped to one row.
Default Vs Custom Adapter
Default Adapter:
- Android provides default adapter implementations. It can only handle String values.
Custom Adapter:
- The adapter needs to create a layout for each row of the list. The ListView instance calls the getView() method on the adapter for each data element. In this method the adapter creates the row layout and maps the data to the views in the layout.
Create a custom adapter class ProductAdapter.java,
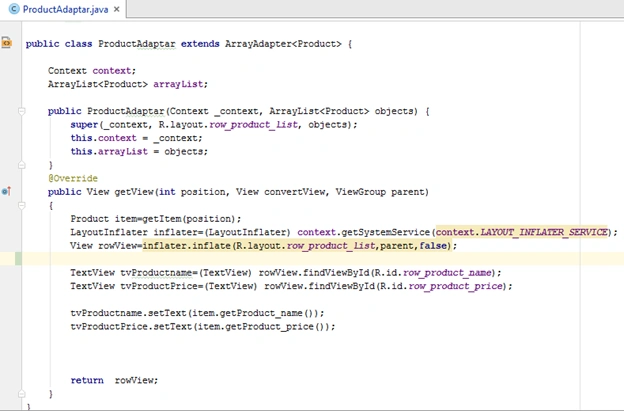
Now as we can see in this image we declared two methods: one method is to make object of arraylist of product and another we declare two textview and assign it into datasource.
What is LayoutInflater
- Instantiates a layout XML file into its corresponding View objects. It is never used directly. Instead, use getLayoutInflater() or getSystemService(String) to retrieve a standard LayoutInflater instance that is already hooked up to the current context and correctly configured for the device you are running on.
- LayoutInflaterinflater = (LayoutInflater) context .getSystemService(Context. LAYOUT_INFLATER_SERVICE);
- View rowView = inflater.inflate(R.layout.row_product_list, parent, false);
Read more articles on Android:
Shobana JPosted Jul 7, 2016, 7:31 AM
Nice explanation
Kashif SohailPosted Mar 26, 2016, 11:23 PM
Nice series
Sibeesh VenuPosted Mar 11, 2016, 4:49 AM
Nice Share
kalu singh raoPosted Mar 10, 2016, 11:18 AM
Nice...
Mohammed IbrahimPosted Mar 10, 2016, 10:20 AM
nice
Humayun Kabir MamunPosted Mar 10, 2016, 5:00 AM
Nice...
Kumaresh RajalingamPosted Mar 9, 2016, 8:37 PM
Nice share
Asfend YarPosted Mar 9, 2016, 3:03 PM
Nice share ... Today I've also learned listview in android