

Introduction
- Creating A Toolbar In Android - Day One
- Activity Preference In Android - Day Two
- Activity Preference In Android - Day Three
GIT offers two types of accounts; one is private and the other is public. The public account is free of cost and the private account has some charges.
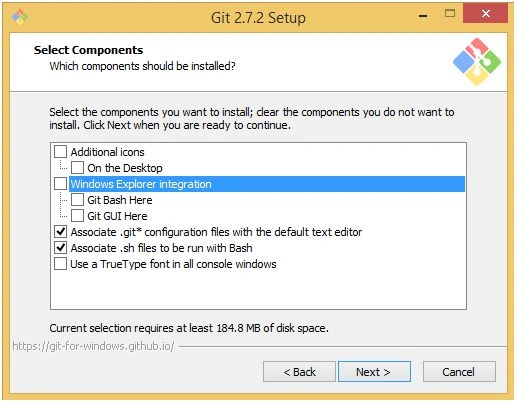
Step 1
I share only the one screen in a part of the installation, because when you install the GIT you are just a little bit confused; the installation is simple but in the midst of installation you can uncheck the Windows Explorer Integration and then install it. You can download the GIT from this URL.
 Step 2
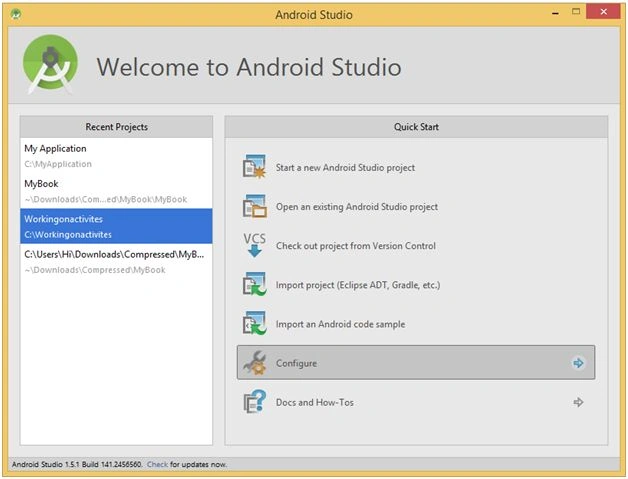
Now open the Android studio and go the configure button and press it.
 Step 3
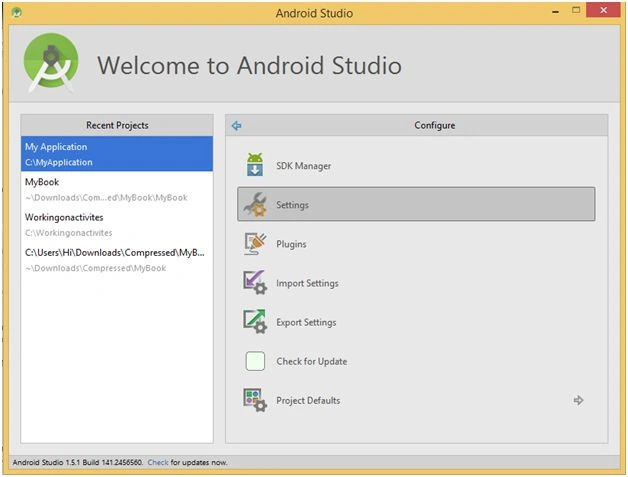
Then after clicking the configure button now click on the setting button.
 Step 4
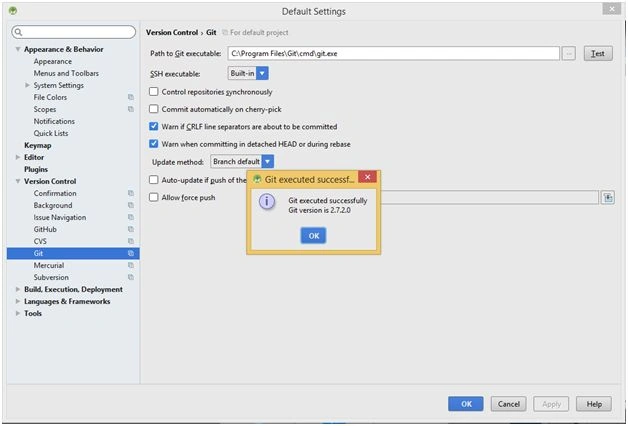
Now when you click the setting button this page appears, now you paste the correct GIT installation Path where you install it, then press the Test button for connection. My connection is OK.
 Step 5
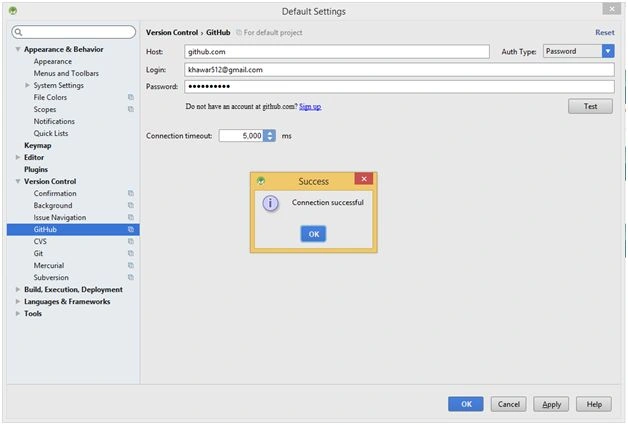
Now on the left side you see the GitHub tag appears, click on this tag and give the username and password and then click on the test button. Now you see that the connection between GitHub account and your Android studio is configured.
 Step 6
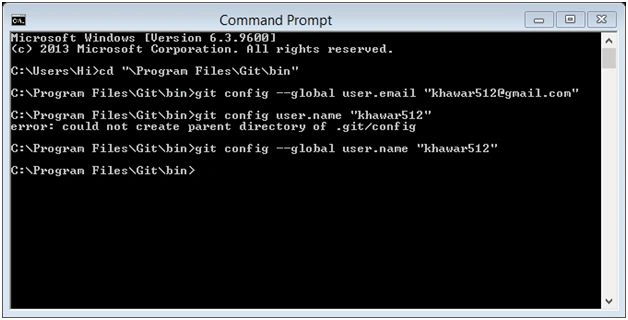
Now open the CMD and type the commands
- Cd “\Program Files\Git\bin Press Enter
- git config –global user.email “Your Email” Press Enter
- git config –global user. name “Your Username”
Step 7
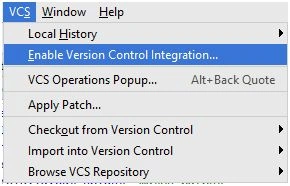
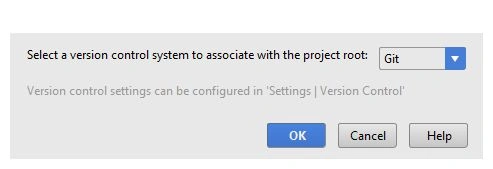
Now open the Android studio and at the top toolbar you can see that the VCS button appears; click on it and then click Enable Version Control Integration then you select the version control software which is Git and you see in the image also.
 Step 8
Now after pressing the Enable OK button in the previous step then again click on VCS and click on Import into version control and then click on Share Project On GitHub.
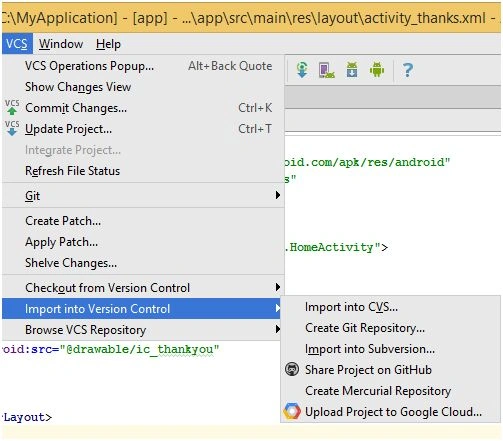 Step 9
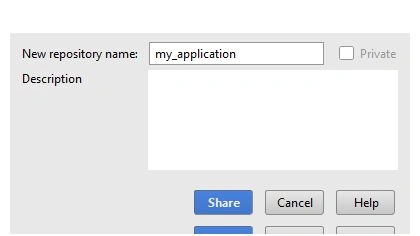
Now give the repository name which appears in the GitHub account. You can also change the name of your repository here and then press the share button.
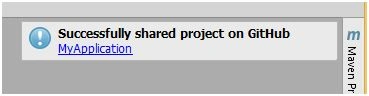
 Now the code is shared and it takes 2 minutes and then this option appears.
 Step 10
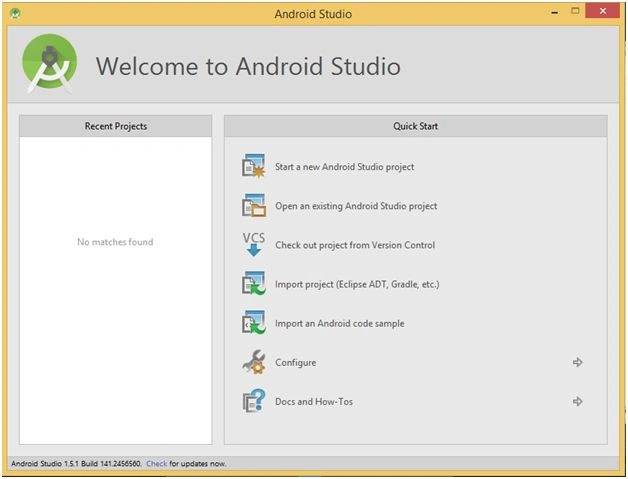
Now after that open the Android studio and delete the project which is in your computer and also delete from the Android studio by clicking on the backspace button; you can see that my window is clear.
 Step 11
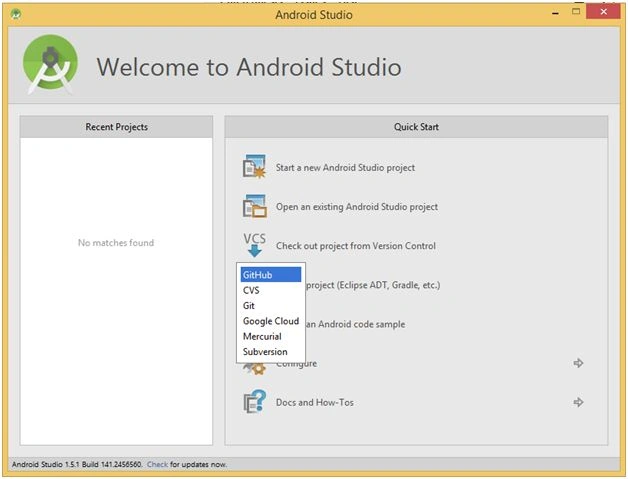
Now click on Check Out Version from Version Control and then select the GitHub.
 Step 12
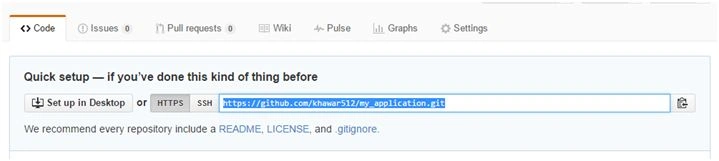
Now go the GitHub account and you see that your repository appears and now copy the URL and paste it.
 Step 13
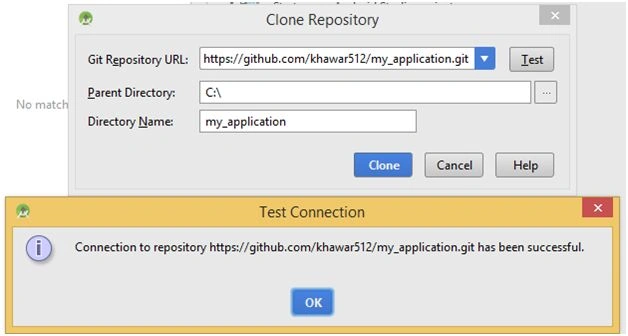
Now paste the URL address into Git Repository URL and select the parent directory and Directory Name and then click on Test button you see that the connection is successfully created.
 Step 14
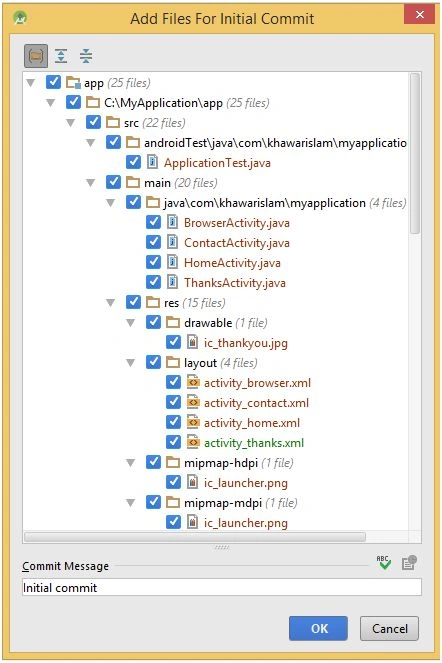
Now click on the clone button in the previous step and you select all checkboxes and click on an Ok button; now your project is loaded into your directory and as well as in your Android studio.
Read more articles on Android
Shobana JPosted Jul 7, 2016, 7:33 AM
Nice explanation
Kuppurasu NagarajPosted Apr 12, 2016, 12:36 PM
Nice Sharing..
Kuppurasu NagarajPosted Apr 12, 2016, 12:35 PM
Nice Sharing..
Asfend YarPosted Mar 13, 2016, 6:51 AM
very nice friend !!
Kashif SohailPosted Mar 11, 2016, 10:34 PM
nice
Vignesh ManiPosted Mar 8, 2016, 11:38 AM
Good