

Overview

In this article, we will see AngularJS routing with an example and we will see how to develop an Single Page Application(SPA). In this we will cover a simple small demo consisting of pages like ,
- Index Page(Our Home Page)
- Templates Folder in templates folder we will have pages like home,courses and students respectively.
Note 1 - Views will injected into layout view depending upon the URL requested.
Note 2 - The Angular JS Route module is present in seprate javascript file.
In this article, we will see-
- AngularJS Route Configuration.
- Remove # from URL’s in AngularJS.
- Default Route in Angular JS.
- AngularJS Intellisense.
For more articles on Angular JS, refer here-
- Overview Of AngularJS
- Modules And Controller In AngularJS
- Controllers in AngularJS
- AngularJS ng src Directive
- AngularJS ng-Repeat Directive
- Handling Events In AngularJS
- How To Use Two-Way Data Binding In AngularJS
- Filters In AngularJS
- Sorting Data In AngularJS
- Sorting Rows By Table Header In AngularJS
- Creating Custom Filters In AngularJS
- ng-Hide And ng-Show In AngularJS
- ng-init Directive In AngularJS
- Search And MultiSearch In AngularJS
- ngInclude Directive In AngularJS
- $http Service In AngularJS
- Consuming ASP.NET WebService In AngularJS
- AnchorScroll Service In AngularJS
Before starting AngularJS routing example, we need to download a separate file of AngularJS routing from Angular JS Website. Thus, from the official website, lets download the file. Let's browse.
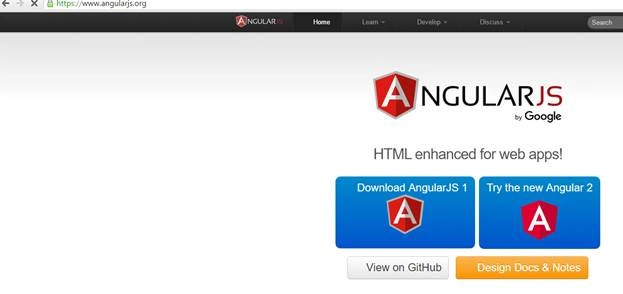
Click AngularJS1 and you will get the prompt, given below-
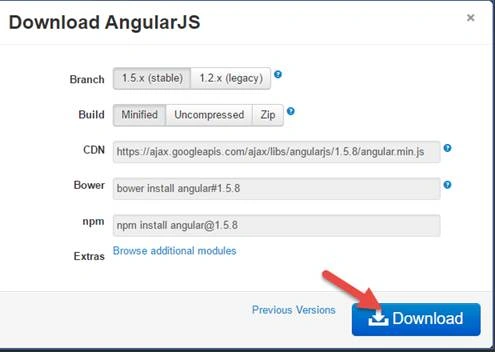
When you click Download button, it contains a core Angular script, which does not contain AngularJS routing module. Thus, click browse additional modules.
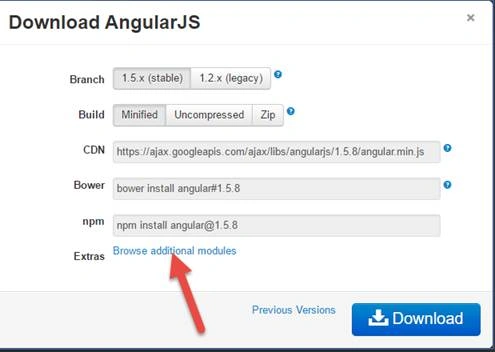
On the next page, you will see Javascript file, which contains routing modules.
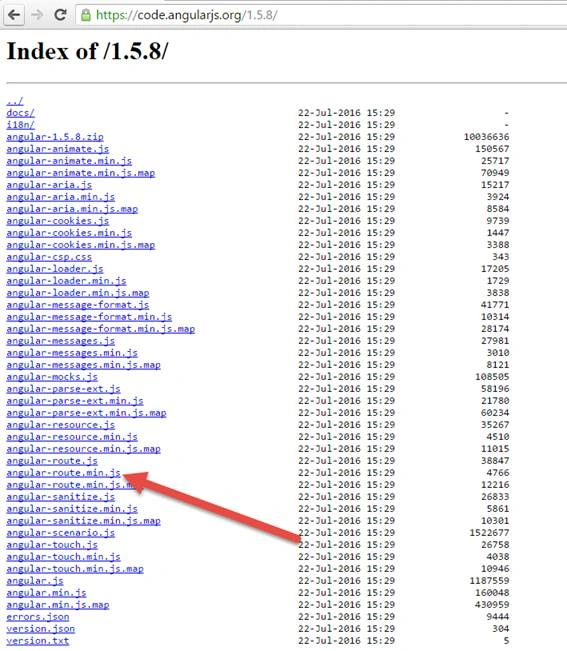
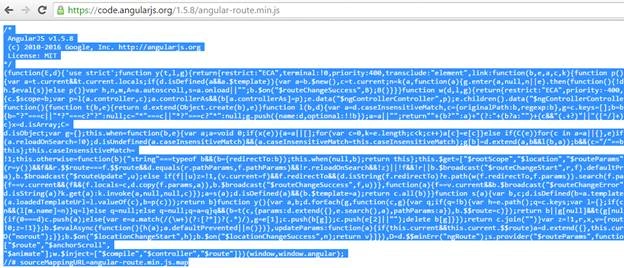
You can see, we have two versions of Angular JS and we will be using minified version of AngularJS. Thus, click it and will open a separate Window, copy it and save it in Notepad as angular-route.min.js.
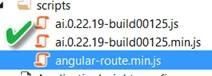
Your Application will look like-
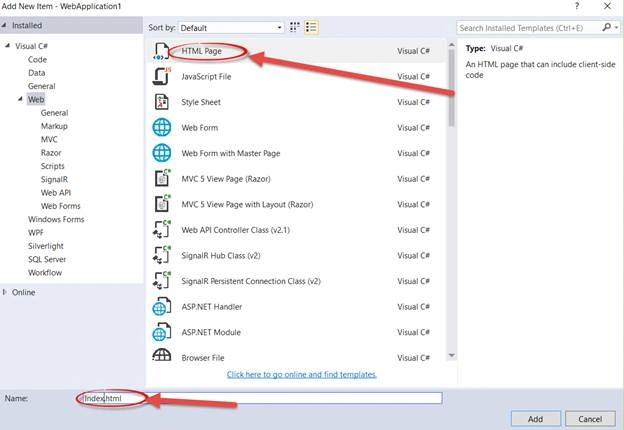
Let's add a page in your Application as index.html and this will be our home page.
Now, we will reference our core Angular script file and route file in out HTML page as, given below-
- <script src="scripts/angular.min.js"></script>
- <script src="scripts/angular-route.min.js"></script>

Look at this CDN link here for Angular JS for which, look at CDN link carefully. It doesn’t have route here. We will just add the route name here and just copy that CDN link and the URL, given below-
https://ajax.googleapis.com/ajax/libs/angularjs/1.5.8/angular-route.min.js
Thus, this will be your CDN link for AngularJS routing module .
Lets get back to our Page Index Page. We will first design a Header and Footer for our Page and apply some styles to it. Thus, we will design our stylesheet here. Just add a simple header and footer in those styles as, given below-
- .header {
- width:800px;
- height:80px;
- text-align:center;
- background-color:#BDBDBD;
- }
- .footer {
- text-align:center;
- background-color:#BDBDBD;
- }
- .leftMenu {
- height:500px;
- background-color:#D8D8D8;
- width:150px;
- }
- .mainContent {
- height:500px;
- background-color:#E6E6E6;
- width:650px;
- }
- a {
- display:block;
- padding:5px;
- }
- <link href="Styles.css" rel="stylesheet" />
- <table>
- <tr>
- <td colspan="2" class="header">
- <h1> Demo Application</h1>
- </td>
- </tr>
- <tr>
- <td class="leftMenu"> Links </td>
- <td class="mainContent"> home/Courses/Students </td>
- </tr>
- <tr>
- <td colspan="2" class="footer">
- <h1> Demo Application </h1>
- </td>
- </tr>
- </table>
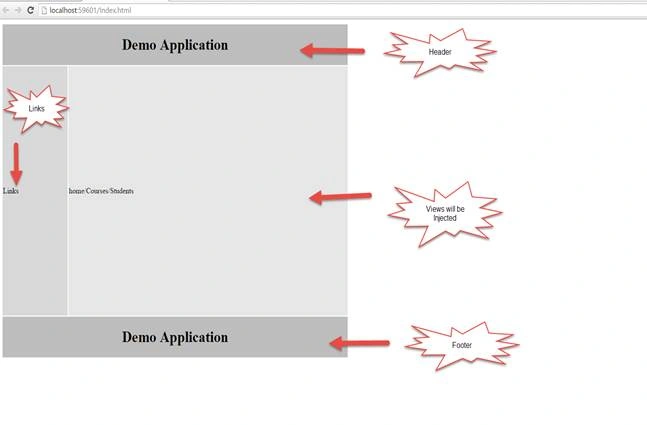
As you can see, we got the desired result, we had got header and footer of our Demo Application and Links, which we referenced .
Now, we will add the links as home, courses and students. In those, we will add the links with the help of an anchor tag and also before it, we will write #/ to denote the Browser, which we don’t want to navigate from our home page i.e from index.html.
Hence, just add these three lines as-
- <a href="#/home">Home</a>
- <a href="#/courses">Courses</a>
- <a href="#/students">Students</a>
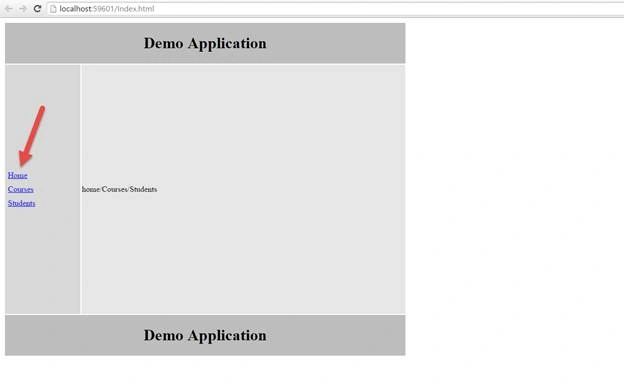
You can see, we got the links. Now, when you hover on those links at the bottom, you will see the URL. We actually don’t want that. We will remove those, using the routing templates by using the partial templates.
Now, we will be creating the partial templates for our courses and students views. We will be creating those in partial templates and we will add a new folder to our solution. We will name it as templates.
When you create a Template folder, create a new HTML Page in it and name it as home.html as, given below-
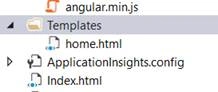
Now, in home.html, remove all the the tags. Here, I had copied SQL Server contents from Wikipedia, just to show you the demo.
Now, we will display at the top as Home Page, which will be from $scope object and and will display a message.
Thus, just add these lines of code in our home.html page as-
- <h1>{{message}}</h1>
- <div> In 1988, Microsoft joined Ashton-Tate and Sybase to create a variant of Sybase SQL Server for IBM OS/2 (then developed jointly with Microsoft), which was released the following year.[4] This was the first version of Microsoft SQL Server, and served as Microsoft's entry to the enterprise-level database market, competing against Oracle, IBM, and later, Sybase. SQL Server 4.2 was shipped in 1992, bundled with OS/2 version 1.3, followed by version 4.21 for Windows NT, released alongside Windows NT 3.1. SQL Server 6.0 was the first version designed for NT, and did not include any direction from Sybase.
- <ul>
- <li>The protocol layer implements the external interface to SQL Server. All operations that can be invoked on SQL Server are communicated to it via a Microsoft-defined format, called Tabular Data Stream (TDS). TDS is an application layer protocol, used to transfer data between a database server and a client. Initially designed and developed by Sybase Inc.</li>
- </ul>
- </div>
Now, in courses page, whatever courses are there, will come from courses controller, so we will be using here ng-repeat directive to bind those courses.
Thus, write this code in courses.html page, given below-
- <h1>Courses</h1>
- <div>
- <ul>
- <li ng-repeat="course in courses"> {{course}} </li>
- </ul>
- </div>
Code to create a table and insert script is given below-
Create Table script
- CREATE TABLE STUDENTS
- (id int primary key identity,
- name nvarchar(max),
- city nvarchar(max),
- gender nvarchar(max))
- insert into STUDENTS values('Akshay','Mumbai','Male')
- insert into STUDENTS values('Hari','Mumbai','Male')
- insert into STUDENTS values('Raghvan','Pune','Male')
- insert into STUDENTS values('Milind','nashik','Male')
- insert into STUDENTS values('Gopal','Delhi','Male')
- <configuration>
- <connectionStrings>
- <add name="Test" connectionString="Data Source=DESKTOP-QOMPPF7;Initial Catalog=TEST;Persist Security Info=True;User ID=sa;Password=p@ssw0rd" providerName="System.Data.SqlClient" /> </connectionStrings>
- <system.web>
- <compilation debug="true" targetFramework="4.0" />
- <webServices>
- <protocols>
- <add name="HttpGet" /> </protocols>
- </webServices>
- </system.web>
- </configuration>
Now, next step is to create a student class with its corresponding values.
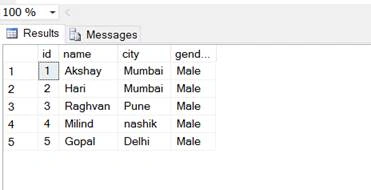
Thus, let's create a class called students and add the properties to it.
- public int id { get; set; }
- public string name { get; set; }
- public string city { get; set; }
- public string gender { get; set; }
- public void GetAllStudents()
- {
- List < Student > listStudents = new List < Student > ();
- string cs = ConfigurationManager.ConnectionStrings["Test"].ConnectionString;
- using(SqlConnection con = new SqlConnection(cs)) {
- SqlCommand cmd = new SqlCommand("select * from students", con);
- con.Open();
- SqlDataReader sdr = cmd.ExecuteReader();
- while (sdr.Read()) {
- Student student = new Student();
- student.id = Convert.ToInt32(sdr["id"]);
- student.name = sdr["Name"].ToString();
- student.gender = sdr["gender"].ToString();
- student.city = sdr["city"].ToString();
- listStudents.Add(student);
- }
- }
- using System.Web.Script.Serialization;
- JavaScriptSerializer js = new JavaScriptSerializer();
- Context.Response.Write(js.Serialize(listStudents));
- using System;
- using System.Collections.Generic;
- using System.Linq;
- using System.Web;
- using System.Web.Services;
- using System.Data;
- using System.Data.SqlClient;
- using System.Configuration;
- using System.Web.Script.Serialization;
- namespace WebApplication1 {
- /// <summary>
- /// Summary description for StudentServiceasmx
- /// </summary>
- [WebService(Namespace = "http://tempuri.org/")]
- [WebServiceBinding(ConformsTo = WsiProfiles.BasicProfile1_1)]
- [System.ComponentModel.ToolboxItem(false)]
- // To allow this Web Service to be called from script, using ASP.NET AJAX, uncomment the following line.
- [System.Web.Script.Services.ScriptService]
- public class StudentServiceasmx: System.Web.Services.WebService {
- [WebMethod]
- public void GetAllStudents() {
- List < Student > listStudents = new List < Student > ();
- string cs = ConfigurationManager.ConnectionStrings["Test"].ConnectionString;
- using(SqlConnection con = new SqlConnection(cs)) {
- SqlCommand cmd = new SqlCommand("select * from students", con);
- con.Open();
- SqlDataReader sdr = cmd.ExecuteReader();
- while (sdr.Read()) {
- Student student = new Student();
- student.id = Convert.ToInt32(sdr["id"]);
- student.name = sdr["Name"].ToString();
- student.gender = sdr["gender"].ToString();
- student.city = sdr["city"].ToString();
- listStudents.Add(student);
- }
- }
- JavaScriptSerializer js = new JavaScriptSerializer();
- Context.Response.Write(js.Serialize(listStudents));
- }
- }
- }
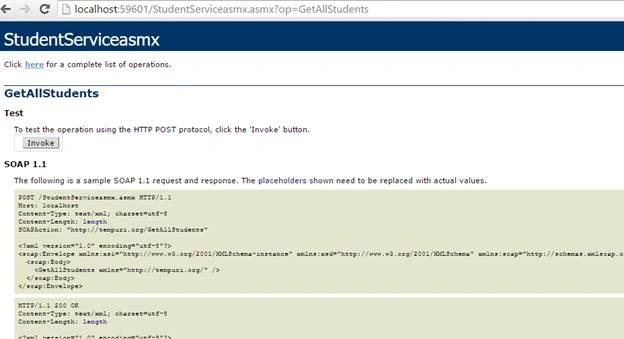
Let's invoke the Service-

We got the desired output. Now, let's create a page called Students.html in our Template folder and we will bind it.
Get rid of the code now. Here, in our student controller, we included h1 tag to display the list of students and we will use ng-repeat directive to loop in those records as, given below-
- <h1>List Of Students </h1>
- <ul>
- <li ng-repeat="student in students"> {{student.name}} </li>
- </ul>
In this file, we will name module name as DemoApp.
- var app = angular.module("Demo", ["ngRoute"])
- .config(function ($routeProvider) {
- $routeProvider
- .when("/home", {
- templateUrl: "Templates/home.html",
- controller:"homeController"
- })
- .when("/courses", {
- templateUrl: "Templates/courses.html",
- controller: "coursesController"
- })
- .when("/students", {
- templateUrl: "Templates/students.html",
- controller: "studentsController"
- })
- })
- .controller("homeController", function ($scope) {
- $scope.message = "Home Page";
- })
- .controller("coursesController", function ($scope) {
- $scope.courses = ["c#", "SQL", "Oracle"];
- })
- .controller("studentsController", function ($scope,$http) {
- $http.get("StudentService.asmx/GetAllStudents")
- .then(function(response)
- {
- $scope.students = response.data;
- })
- /// <reference path="angular.min.js" />
- var app = angular.module("Demo", ["ngRoute"]).config(function($routeProvider) {
- $routeProvider.when("/home", {
- templateUrl: "Templates/home.html",
- controller: "homeController"
- }).when("/courses", {
- templateUrl: "Templates/courses.html",
- controller: "coursesController"
- }).when("/students", {
- templateUrl: "Templates/students.html",
- controller: "studentsController"
- })
- }).controller("homeController", function($scope) {
- $scope.message = "Home Page";
- }).controller("coursesController", function($scope) {
- $scope.courses = ["c#", "SQL", "Oracle"];
- }).controller("studentsController", function($scope, $http) {
- $http.get("StudentService.asmx/GetAllStudents").then(function(response) {
- $scope.students = response.data;
- })
- })
Now, le'ts run the Application and we will see the screenshot, given below-

As you can see from the above output at the top of the URL, # appears, when you click on the URL. We will see, how to remove those and keep a clean URL.
In $locationprovider, provide the code, given below and set it to true-
- .config(function ($routeProvider,$locationProvider) {
- $locationProvider.html5Mode(true);
- <a href="home">Home</a>
- <a href="courses">Courses</a>
- <a href="students">Students</a>
- <system.webServer>
- <rewrite>
- <rules>
- <rule name="RewriteRules" stopProcessing="true">
- <match url=".*" />
- <conditions logicalGrouping="MatchAll">
- <add input="{REQUEST_FILENAME}" matchType="IsFile" negate="true" />
- <add input="{REQUEST_FILENAME}" matchType="IsDirectory" negate="true" />
- <add input="{REQUEST_URI}" pattern="^/(api)" negate="true" /> </conditions>
- <action type="Rewrite" url="/index.html" /> </rule>
- </rules>
- </rewrite>
- </system.webServer>
The last step is to include base in our page for a single Page Application, as given below-
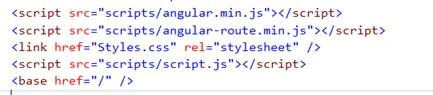
As the / says, it will search for the parent or the root directory and it will display index.html. Now, run the solution and you will see clean URL.
Now, we will see the default route in AngularJS. Here, we will use the otherwise function in Angular JS. In this, we will just write otherwise and redirect to the following-
- .otherwise({
- redirectTO : "/home"
- })
Now, we will see AngularJS Intellisense in Visual Studio. In script.js file, we already have a reference to our file. Now, we will add Angularjs route reference in our script.js file.
When we type a .module in our script file, we get an extension. When we type .when, we don’t get a proper intellisense. To get a proper intellisense, we need to browse the URL, given below-
https://github.com/jmbledsoe/angularjs-visualstudio-intellisense/blob/master/src/Scripts/angular.intellisense.js
When you open this URL, you will get the script. Select the script, copy it and save it as angular.intellisense.js.
Now, just copy this js file and paste in the folder, given below-
C:\Program Files (x86)\Microsoft Visual Studio 14.0\JavaScript\References
Now, go back to our script.js and type in the Angular Service code as .when you will get an intellisense.
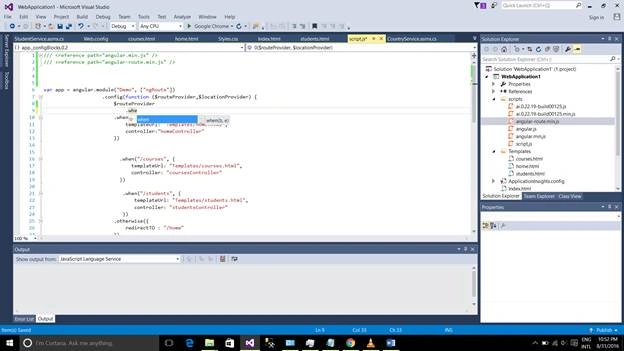
Also, you will get all the intellisense, so that was pretty easy to get an intellisense in a script file. These were three simple steps to get an intellisense.
Conclusion
Hence, this was about AngularJS routing with Webservice . Hope, this article was helpful !!
Prasanna MuraliPosted Sep 6, 2016, 1:25 PM
Nice post...