

In a few of my previous articles (listed below) we have learned how to automate the process of provisioning resources using Azure Resource Manager (ARM) template.
- Basics of Azure Resource Manage Template
- Azure Resource Manage Template: Create A Storage Account Using Blank Template
- Azure Resource Manager Templates Deployment Mode – Incremental
ARM templates are helpful for automating the process of provisioning and deploying the same to Azure. However, if you want to repeat some regular operational or maintenance tasks, the ARM template might help us a lot. For example: If you would like to stop a VM (or a set of VMs) after a task is complete, or you would like to scale vertically or horizontally the computer resources for a certain period of time, ARM might not help us.
This is where Azure Automation comes into the picture. Below is the definition from the Official documentation
Microsoft Azure Automation provides a way for users to automate the manual, long-running, error-prone, and frequently repeated tasks that are commonly performed in a cloud and enterprise environment. It saves time and increases the reliability of regular administrative tasks and even schedules them to be automatically performed at regular intervals.
Before we dive into how to automate regular administrative tasks, let’s look at a few of the concepts around Azure Automation.
Runbook
Basically, it’s like a container of Windows PowerShell Scripts which we can use to automate the tasks. These PowerShell scripts have access to all the cloud resources associated with the subscription.
Assets
Assets are entities that could be associated with multiple runbooks. Below are the assets that are currently supported.
- Variables
Asset Variables are similar to the variables that are usually used in the Programming languages. Variables are used to store a value that could be used in multiple places within the runbook. Azure Variables are accessible across multiple runbooks within the Azure Automation Account. You could use Variable to store the name of the VM that you would like to Start or Stop based on your requirement. You can access these variables within the PowerShell that you write within your runbook. While creating a variable, you can also specify if you would like it to be stored in encrypted format. Please also note that these variables are persisted so that you could use the same for multiple execution of the Runbooks. In general, you can retrieve the value of the variable using the cmdlet Get-AzureAutomationVariable. However, you need to use Get-AutomationVariable cmdlet to retrieve the encrypted variables. - Credentials
Asset Credentials are the entities that could be used to store your username and password of different resources. For example, you would like to install any patch in one of your VMs. For this, you would need to supply your credentials of the VM to the Azure Automation account for connecting to the VM and performing the required Administrative task. - Certificates
There might be cases where you might need secured certificates for connecting to some secured resources. These Azure Asset Certificates are helpful in those scenarios where you would like to connect to those secured resources. - Connections
Connections is nothing but the information that is required for creating a connection to your application or any resource. It’s like a combination of both the Credentials along with a certain URI. - Schedules
Azure Automation Schedules are used to schedule runbooks to run automatically. This could be either a single date and time for the runbook to run once, or it could be a recurring schedule to start the runbook multiple times. - Integration Modules
If you are familiar with PowerShell scripts, you will have downloaded a few Modules. These are similar to the Libraries or Namespaces that we use in .NET or any other programing language. Azure Automation Runbooks are dependent on the PowerShell cmdlets and these cmdlets are executed by the Azure Automation Worker Servers and these Worker Servers need those Modules in order to execute the PowerShell cmdlets.
Hybrid Worker
As explained above, Runbooks have access only to the Cloud Resources but not to the resources located on-premises. This is where Hybrid Workers are helpful. These workers allow us to run the runbooks on our local data center for managing the resources and performing the administrative tasks. In order to make this work, you need to install Hybrid Worker. For more details.
In order to automate the administrative tasks, we first need to have an Automation Account. Let’s go ahead and create one as shown in the below screen captures.
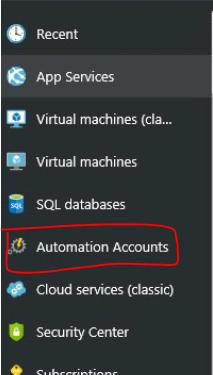
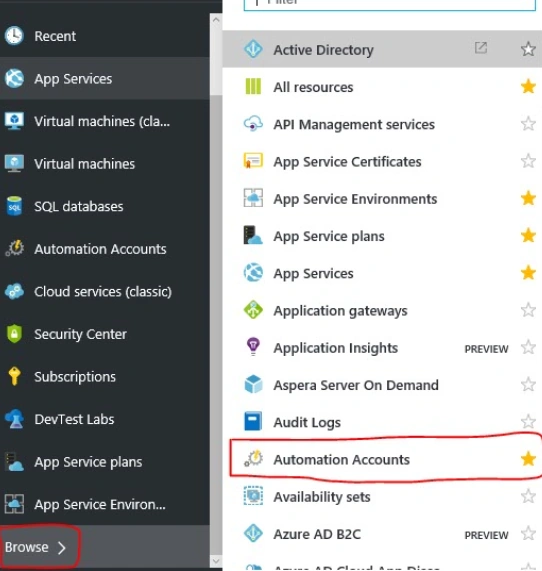
Click on the “Automation Accounts” link on the left hand menu as shown in the above screen capture. If you don’t see the link, click on “Browse” and search for “Automation Accounts" as shown below.
Clicking on the “Automation Accounts” will take you to the “Automation Accounts” blade as shown below.
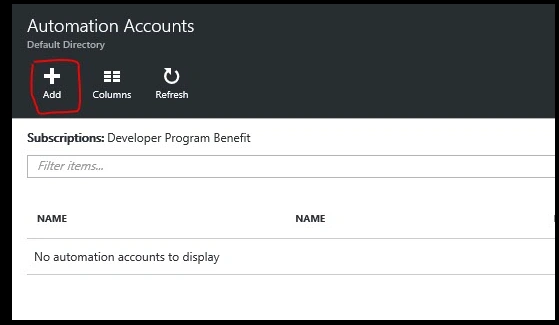
Currently, I don’t have any accounts. Let’s go ahead and create one by clicking on the “Add” of the above screen capture.
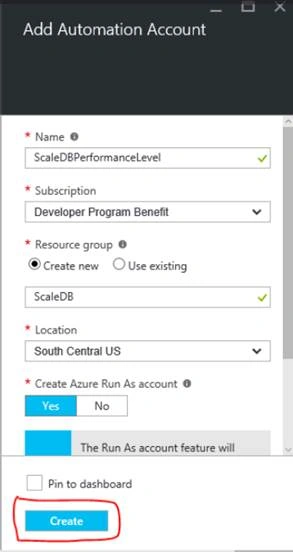
Please provide the name of the account and select a Resource Group and the location. It's suggested to select the same location where your resources are located to avoid the latencies.
Select “YES” in the “Create Azure Run As account” toggle button. Basically, this is used to impersonate a user for running the Automation Services. Now, click on “Create” button to create the Automation account.
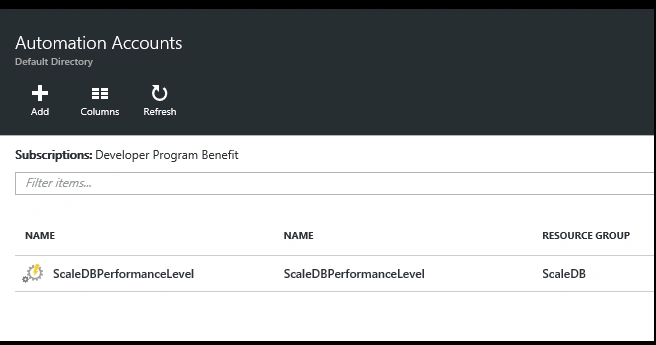
The above screen capture displays the new account that we just created. Hope you enjoyed the basics of the Automation account.
Praveen SreeramPosted Aug 2, 2016, 1:11 AM
Thanks Subash
SubashPosted Aug 2, 2016, 12:31 AM
Nice
Praveen SreeramPosted Jun 28, 2016, 9:30 AM
Thanks Vignesh Mani
Vignesh ManiPosted Jun 28, 2016, 8:31 AM
Good one
Praveen SreeramPosted Jun 27, 2016, 8:26 AM
Thanks Munesh Sharma
Munesh SharmaPosted Jun 27, 2016, 7:28 AM
Nice
Praveen SreeramPosted Jun 27, 2016, 4:20 AM
Thanks Debasis Saha
Praveen SreeramPosted Jun 27, 2016, 4:20 AM
Thanks kalu singh rao
Praveen SreeramPosted Jun 27, 2016, 4:19 AM
Thanka Ravi Patel
Praveen SreeramPosted Jun 27, 2016, 4:19 AM
Thanks Raja Ganapathy
Debasis SahaPosted Jun 27, 2016, 2:54 AM
Nice one..
kalu singh raoPosted Jun 27, 2016, 1:44 AM
Nice...
Ravi PatelPosted Jun 27, 2016, 12:53 AM
Nice article
RajaPosted Jun 27, 2016, 12:27 AM
Nice Share
Praveen SreeramPosted Jun 26, 2016, 9:54 PM
Thanks Prasanna M
Praveen SreeramPosted Jun 26, 2016, 9:54 PM
Thanks Vignesh Mani
Prasanna MuraliPosted Jun 26, 2016, 8:51 PM
Nice one...
Vignesh ManiPosted Jun 26, 2016, 4:32 PM
Nice