

Xamarin.Forms is a cross platform that allows us to easily create a user interface layout that can be shared across Android, iOS and Windows Phone. We can share most of the code across Mobile platforms. If our resources are limited and you are mostly going to focus on the functionality rather than the design, Xamarin.Forms is the best to develop a cross platform.
Let’s start.
We will try to create a sample Application in this session, how to create a login page, and how to navigate from one form to another. In the coming articles, we will focus on the menu and toolbar.
We will try to create a sample Application in this session, how to create a login page, and how to navigate from one form to another. In the coming articles, we will focus on the menu and toolbar.
Step 1
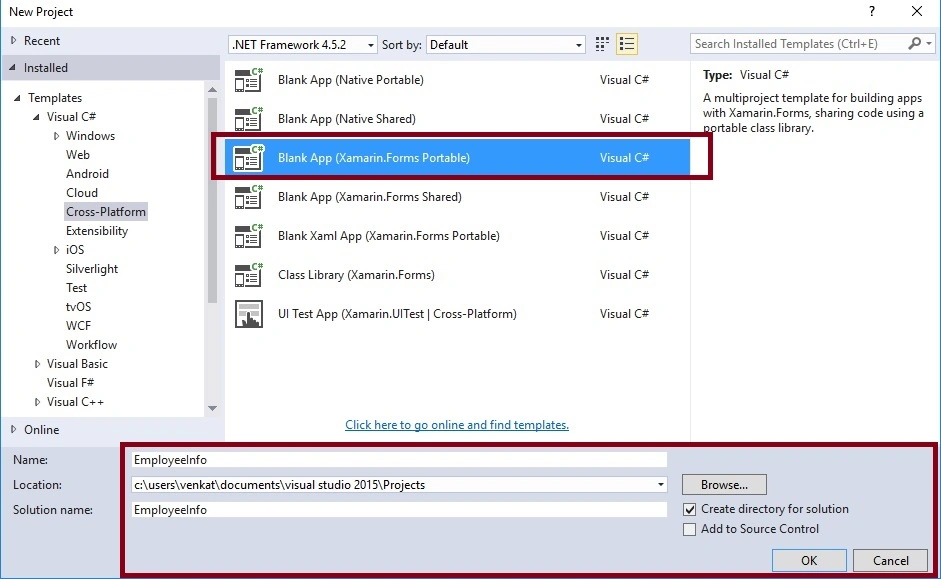
File->New Project ->Templates ->Visual C# ->Cross platform ->Blank App(Xamarin.Froms.Portable).
Select blank app, the project name and project location.
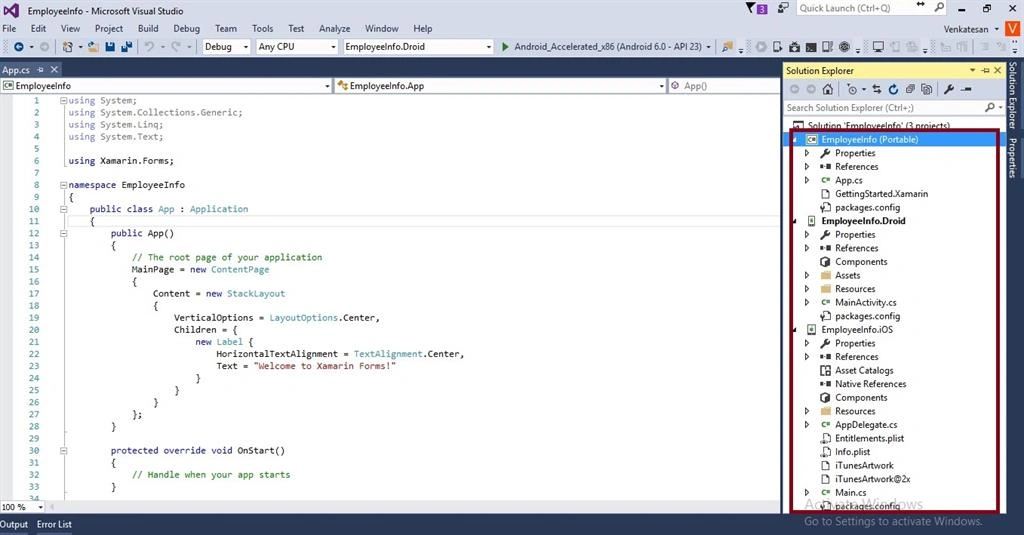
Once the application is created, it will look as given below. EmployeeInfo is our shared project. We can place our code and design and this project is going to be shared by both Android and iOS.
Step 2
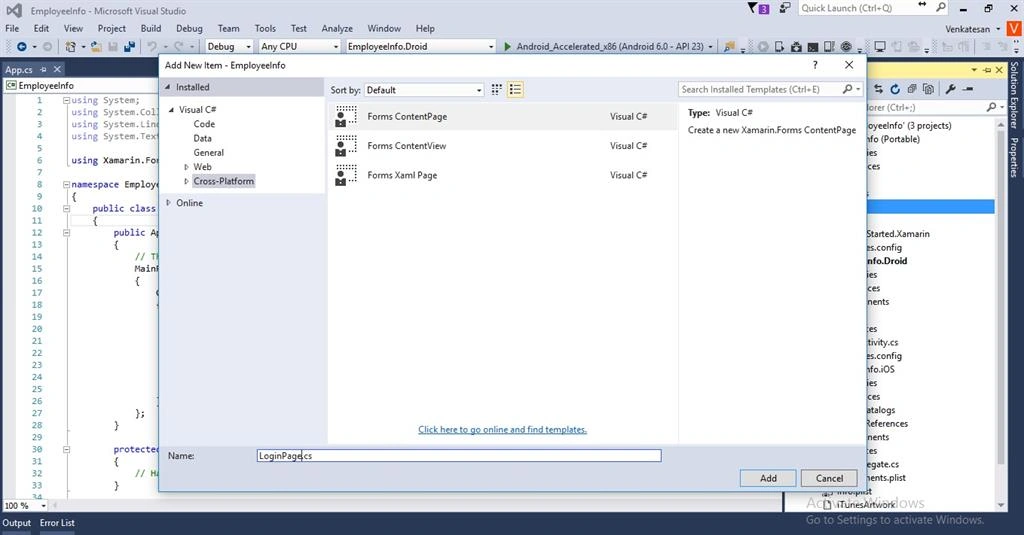
Before doing anything, I just created some folders for my convenience and now, we have to create a login page. For this, right click in View folder and Select Add-->New Item.
Select Cross-Platform under Visual C# --> Forms ContentPage, add a name and click OK. Likewise,create MainPage.
Step 3: We can add a login form and the code is given below:
MainPage.cs
Before doing anything, I just created some folders for my convenience and now, we have to create a login page. For this, right click in View folder and Select Add-->New Item.
Select Cross-Platform under Visual C# --> Forms ContentPage, add a name and click OK. Likewise,create MainPage.
Step 3: We can add a login form and the code is given below:
MainPage.cs
- public class MainPage : ContentPage
- {
- public MainPage()
- {
- Content = new StackLayout
- {
- VerticalOptions = LayoutOptions.Center,
- Children = {
- new Label {
- HorizontalTextAlignment = TextAlignment.Center,
- Text = "Welcome to EmployeeInfo Xamarin Forms!"
- }
- }
- };
- }
LoginPage.cs
- public class LoginPage : ContentPage
- {
- private readonly Entry _userName;
- private readonly Entry _password;
- public LoginPage()
- {
- var add = new Button
- {
- Text = "Login",
- TextColor = Color.White
- };
- _userName = new Entry { Placeholder = "UserName" };
- _password = new Entry { Placeholder = "Password", IsPassword = true };
- add.Clicked += Add_Clicked;
- var stackLayout = new StackLayout
- {
- Spacing = 20,
- Padding = 50,
- VerticalOptions = LayoutOptions.Center,
- Children =
- {
- _userName,
- _password ,
- add
- }
- };
- Content = stackLayout;
- }
- private void Add_Clicked(object sender, EventArgs e)
- {
- if (_userName.Text == "a" && _password.Text == "a")
- {
- Application.Current.MainPage = new MainPage();
- }
- else if (string.IsNullOrEmpty(_userName.Text) || string.IsNullOrEmpty(_password.Text))
- {
- DisplayAlert("Error", "Username and Password are required", "Re-try");
- }
- else
- {
- DisplayAlert("Failed", "Invalid User", "Login Again");
- }
- }
- }
App.cs
- public class App : Application
- {
- public App()
- {
- MainPage = new LoginPage();
- }
- protected override void OnStart()
- {
- // Handle when your app starts
- }
- protected override void OnSleep()
- {
- // Handle when your app sleeps
- }
- protected override void OnResume()
- {
- // Handle when your app resumes
- }
- }
Step 4: Run the Application.
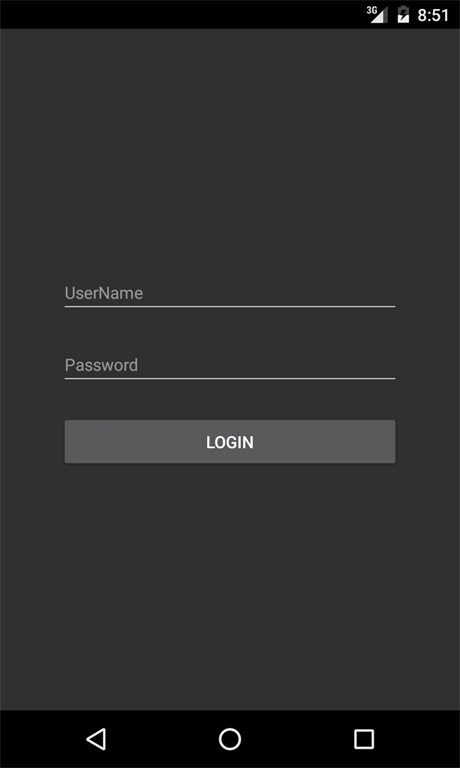
Enter the username, password and click Login.
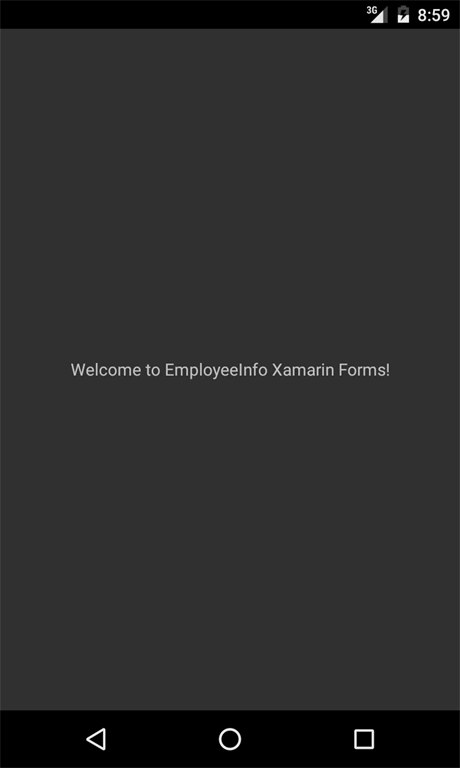
We created a sample EmployeeInfo Application and added Login page and added some code to navigate around the Application. In the coming articles, we will focus on the Menu and Toolbar.
Enter the username, password and click Login.
We created a sample EmployeeInfo Application and added Login page and added some code to navigate around the Application. In the coming articles, we will focus on the Menu and Toolbar.
Guest UserPosted Apr 2, 2017, 3:30 PM
Are you coding the UI and the code behind at the same time?
Bhimashankar GangadePosted Sep 3, 2016, 4:36 AM
When i run the application that time "there were deployment errors" message getting
Bhagat SinghPosted Aug 11, 2016, 8:07 AM
Yes, Using Xamarin form develop cros-platform app
Bhagat SinghPosted Aug 11, 2016, 7:38 AM
Can you give me full example.because i want to use this wcf in PCI not in android and use with interface.just in PCL
Bhagat SinghPosted Aug 11, 2016, 7:27 AM
How to use wcf in PCl
VenkatPosted Jul 20, 2016, 4:01 AM
Thanks all :)
Shobana JPosted Jul 19, 2016, 2:51 AM
Nice one
Vignesh ManiPosted Jul 18, 2016, 6:25 PM
Nice
Kishor Bikram OliPosted Jul 18, 2016, 10:01 AM
Great
Humayun Kabir MamunPosted Jul 18, 2016, 9:05 AM
Nice...
Vikram ChaudharyPosted Jul 18, 2016, 8:59 AM
Nice post..How can I get the cross platform project option in Visual studio. Do I need to install some plugin or package ? Thanks.
Hussain KhawajaPosted Jul 18, 2016, 6:47 AM
Good one.
Asad AliPosted Jul 18, 2016, 3:09 AM
Nice one
kalu singh raoPosted Jul 18, 2016, 1:33 AM
Nice...