

Introduction
Please have a look at the following articles to understand more about the basics of Storage Account.
- Azure Storage – Basics
- Azure Resource Manage Template: Create A Storage Account Using Blank Template
Let’s start by creating a new Storage Account and understanding the properties of the Storage Account while creating it.
Navigate to the Azure Management Portal and go to Storage Accounts blade, as shown below.
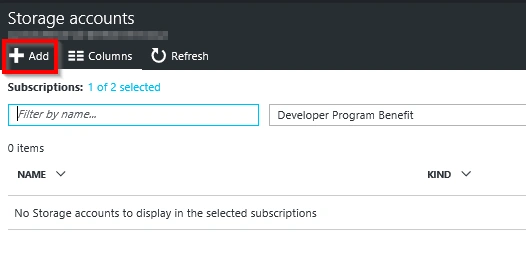
Click on "Add" button in the above blade to navigate to the "Create Storage Account" blade.
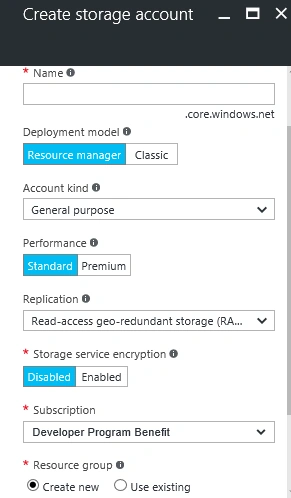
Please provide the following details.
| Field Name | Description |
| Name | Name of the Storage Account |
| URL | <Storage Account Name>.core.windows.net |
| Deployment Model | Select Resource Manager – Recommended by Microsoft |
| Account Kind | Select General Purpose – This is used for creating and storing Blobs / Tables / Queues. (We will learn about how to create these programmatically in the upcoming articles.) |
| Performance | Select Standard. (Premium is only for storing VHDs for Virtual Machines) |
| Replication | Select LRS |
| Storage Service Encryption | Disabled (If you select Enabled, all the data that you write to the Storage will be in encrypted format and will be decrypted automatically when you read it. There might be a slight performance hit if you choose Enabled. |
| Subscription | Choose the required Subscription |
| Resource Group | Choose the required Resource Group – Please make sure that the Applications and Virtual Machines that access this storage account are in the same Resource Group to reduce the latency issues. |
| Location | Choose the required Data Center Location – Please make sure that the Applications and Virtual Machines that access this storage account are in the same Location to reduce the latency issues. |
Once you are ready, click on "Create" button to create the Storage Account. After a few seconds, the Storage Account gets created, as shown below.
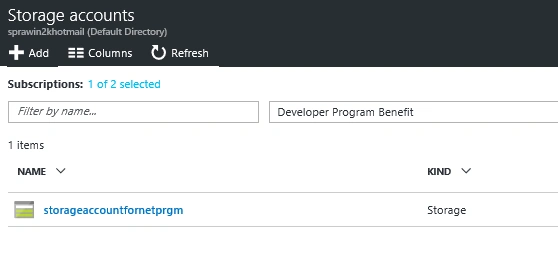
Clicking on the storage account, you will be taken to its details page, as shown below.
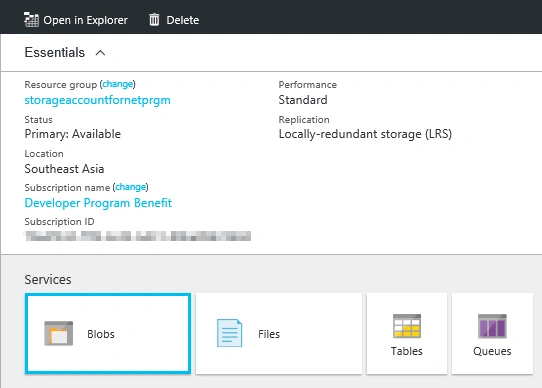
Now that we have created the Storage Account successfully, we need to understand how to access it programmatically.
Before we learn about the APIs related to Storage Account, we need to understand a few basics about the details that are required for programmatic access of the Service.
- Storage Service End Point
Each Storage Account name is unique within Azure and it has a unique URL in the format.<storageaccountname>.core.windowsazure.net - Access Keys
As these URLs are publicly accessible, we need a mechanism to securely access the resources. These Access Keys are used for authentication purposes for the applications that access the Storage Accounts and its services, like Blobs, Queues, and File Shares. - Nuget Package
We can use WindowsAzure.Storage package to Connect, Read, and Write to the Storage Services.
In order to view the Access Keys, navigate to the Access Keys blade, as shown below.
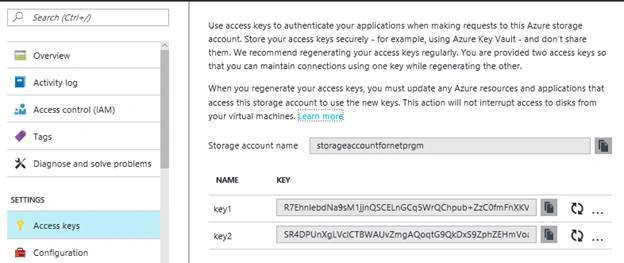
We need to provide a Connection String to the "Storage Account" as an input to the WindowAzure.Storage library functions.
Click on the ellipses that are available in the keys, shown below.

Now, click on "View Connection String" to open the actual connection string.
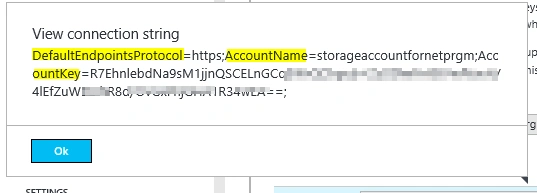
The connection string has the following.
- DefaultEndPointsProtocol
The protocol that is used while connecting to the Storage Account end-point. In most cases, you don’t need to change this. - Account name
It’s just the name of the Storage Account – You need to replace it with the name of your Storage Account. - AccountKey
Use one of the keys, available in the Access Keys tab.
Summary
We have learned the following.
- Create a new Storage Account using Azure Management Portal.
- Attributes of Storage Account.
- Components required for accessing the Storage Account services programmatically.
- Access Keys.
- Connection String for the Storage Account.
Hope you enjoyed reading the article. Your feedback is appreciated.
Join the conversation! Your thoughts help the community grow.