

In the following article, we will be seeing the concept of creating an internal load balancer in between two virtual machines which are hosted in the same network. The reason behind the creation of load balancer in the virtual machines is to handle the huge number of requests which are given to a VM when it becomes difficult for the VM to handle these. To proceed with this article, I need you guys to create two virtual machines in the same virtual network. To know how to create these, see the following articles.
- Creating Virtual Machine In Azure Portal In A Virtual Network
- Creating Virtual Network In Microsoft Azure
Once you create two different virtual machines in the same virtual network, proceed to creating and configuring the load balancer with its set of rules.
Internal load balancer
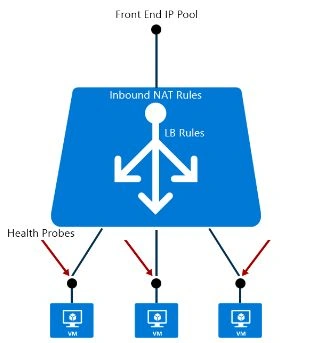
An internal load balancer is used to manage and divert the requests from the clients to different VMs which are found in the same network. When a VM receives many requests from the client, there will be some conjunction occurring in the VM. To handle this conjunction, we can make use of the load balancer concept where the requests from the users will be mutually shared in between the two different VMs which are configured in the VNet. The request will be shared in between the VMs based on the configuration set by us when we design a load balancer.
Creating the load balancer
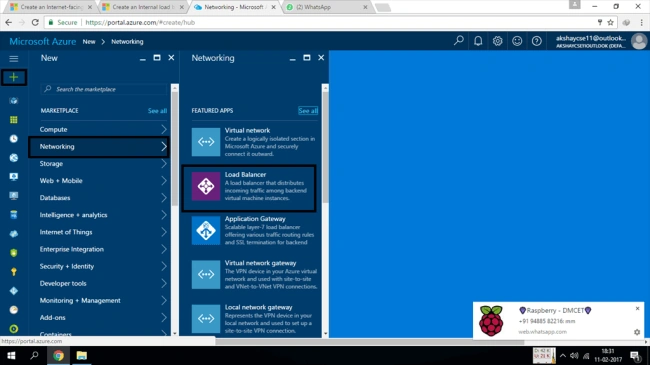
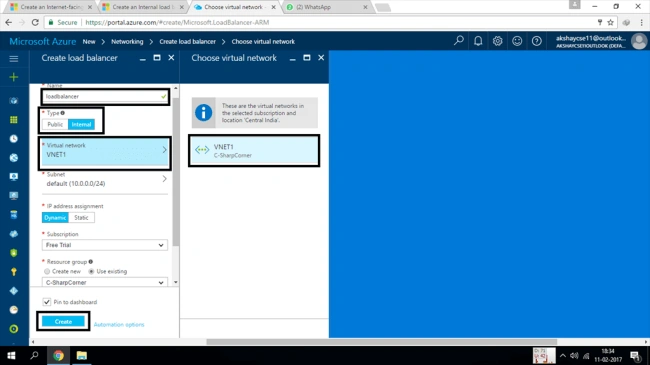
The next step after creating two different VMs in the same VNET is creating a new load balancer.
Configuring the back-end pools
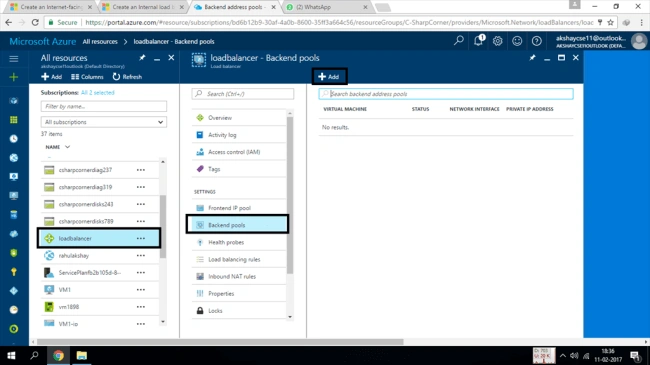
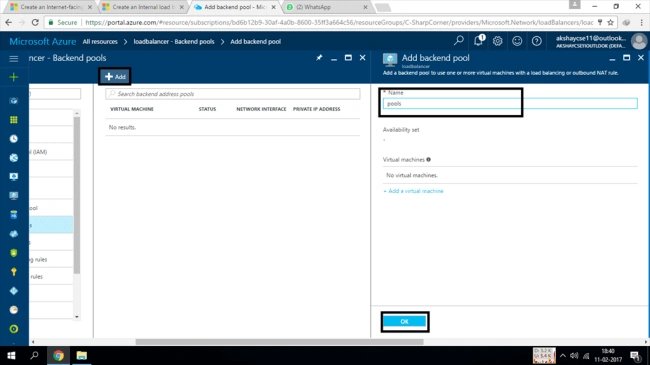
Go to all resources and then choose the load balancer which you have created. Once you click on it, you will be shown a set of configuration options. Then, choose the option called Backend pools. This will show you a new window. There, click on the +Add button. You will be asked to enter the name of the pool. Give some name for your pool and click on the OK button. This will create a new back-end pool.
Creating health probes
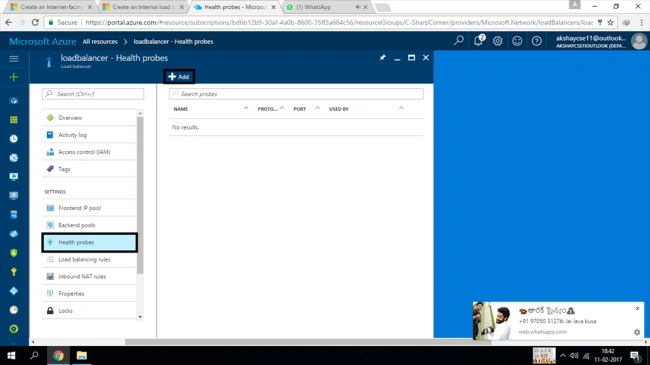
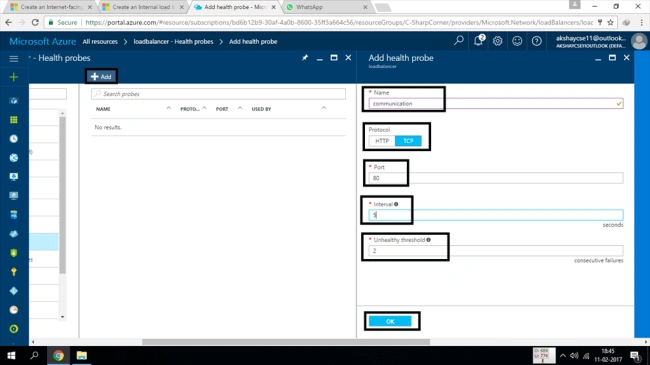
Now, click on the health probes and click on the +Add button. There, you need to configure the details for your health probe. Give the name you need to have for your probe.
Creating load balancing rules
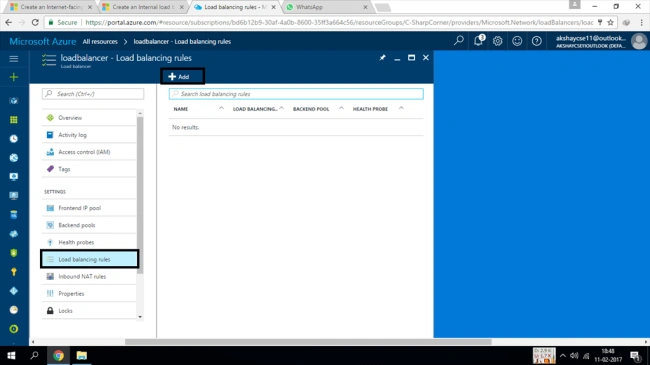
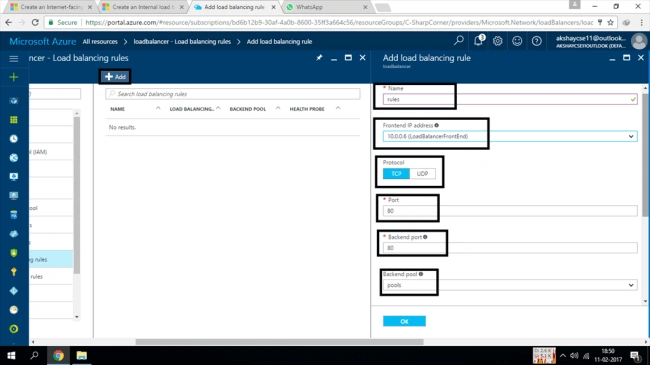
In the same way, click on the Load balancing rules and click on the +Add button in the top. Again you will be asked to enter a name for your load balancer. Enter some name, select some IP range you need and then select the port and all other configurations.
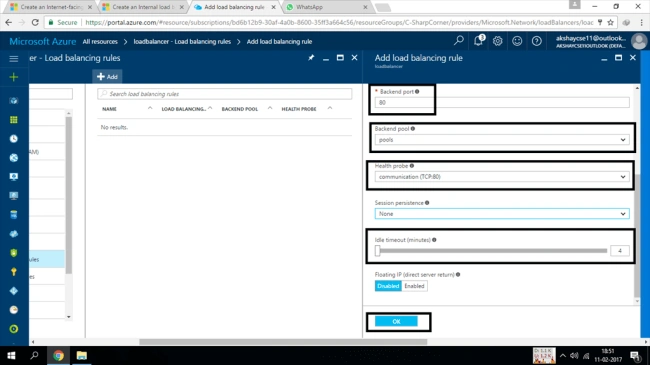
Thus, you have successfully created an internal load balancer for the virtual machines in your virtual network. Whenever your machine gets a request from the client, the load balancer will mutually share the load in between the machines. Hope, this will help you to make an efficient application or website which can be accessed in a faster instance. Hope you learned something new in this article.
Join the conversation! Your thoughts help the community grow.