

In this article, we will learn, how to publish or deploy ASP.NET MVC Applications to Windows Azure. In previous ASP.NET MVC tutorials of this series, we saw,
- Creating First Application In ASP.NET MVC
- Pass Parameter Or Query String In Action Method In ASP.NET MVC
- Passing Data from Controller To View In ASP.NET MVC
- Strongly Typed View Vs Dynamically Typed View In ASP.NET MVC
- Working With Built-In HTML Helper Classes In ASP.NET MVC
- Inline and Custom HTML Helpers In ASP.NET MVC
- CRUD Operation In ASP.NET MVC Using AJAX And Bootstrap
- HandleError Action Filter In ASP.NET MVC
Note: You must have a Window Azure Account in order to perform the steps, given below. You can create an account on Windows Azure , using the link.
Let’s Begin,
Create ASP.NET MVC Web Application.
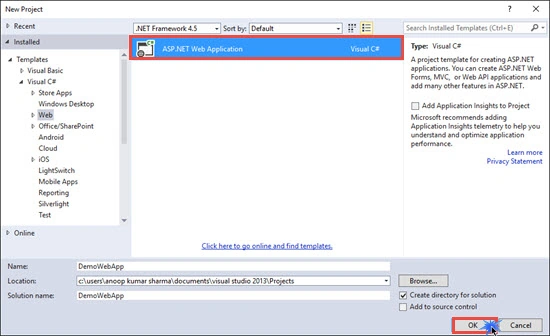
I have created a simple Application in ASP.NET MVC, which is used for the deployment purpose in this example.
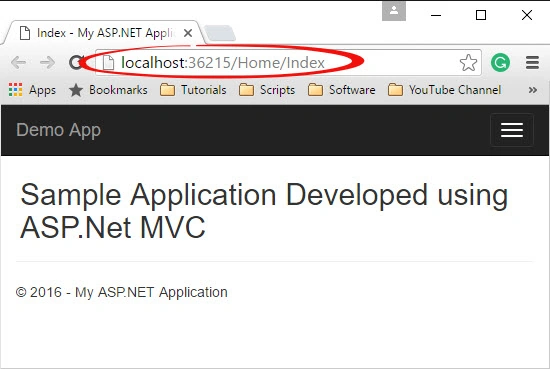
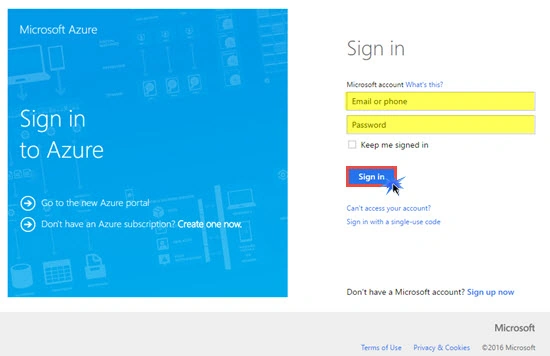
Now, go to Azure portal and log in with your credentials.
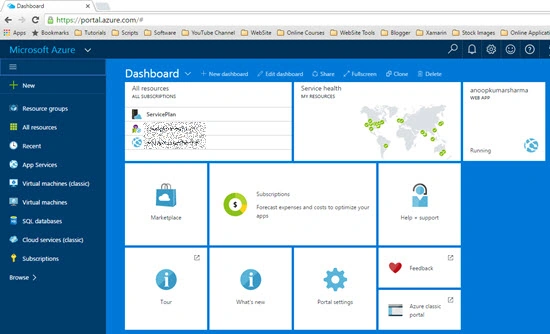
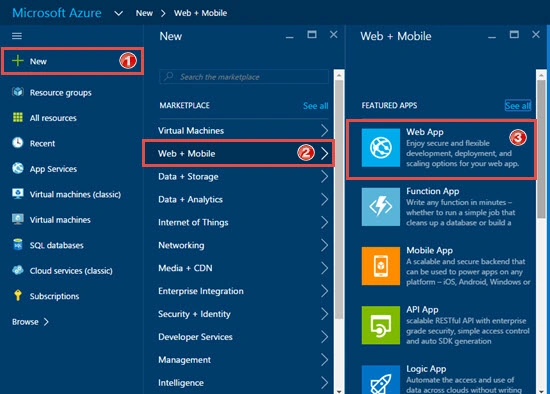
Click New on Azure Dashboard. Go to Web + Mobile in marketplace section, click Web App.
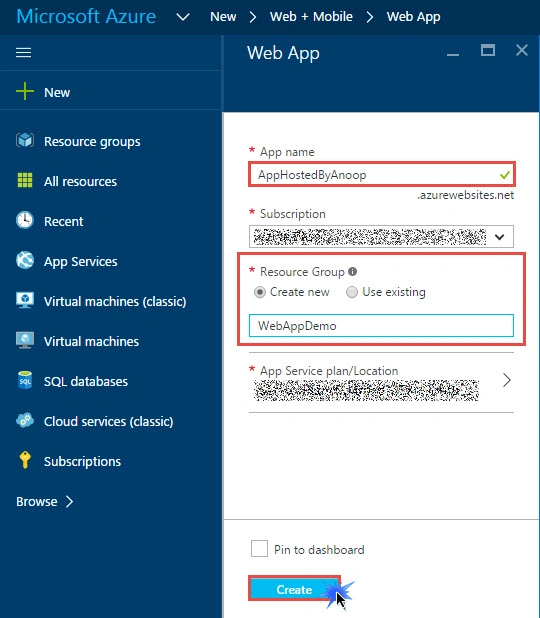
Select an app name for your Web app and select resource group (A resource group is a collection of resources, which shares the same lifecycle, permissions, policies) and click create.
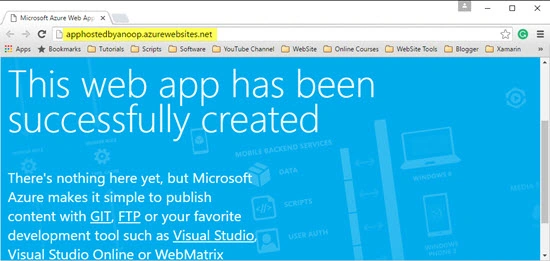
Within a few seconds, you will see your Web app is ready. For checking whether our app is ready or not, just visit the URL of the Web app, which we have created in the steps, mentioned above.
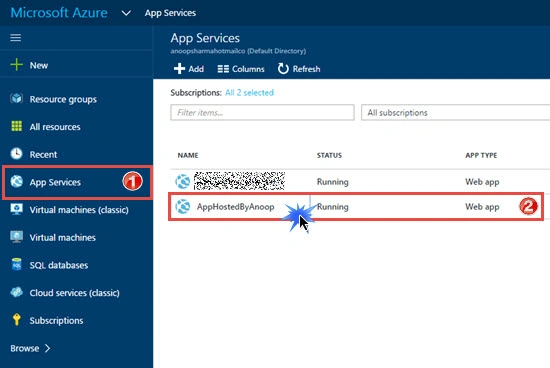
Now, click app Services, click on the app on which we want to deploy your Application. (I have selected the Web app, which we have created in the steps, mentioned above).
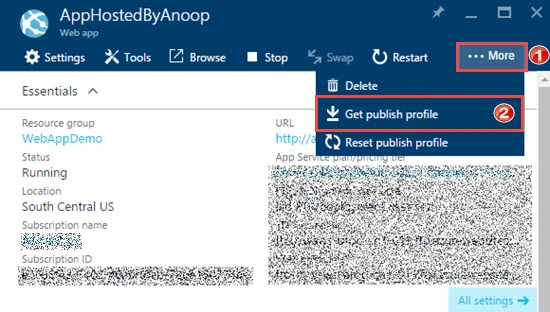
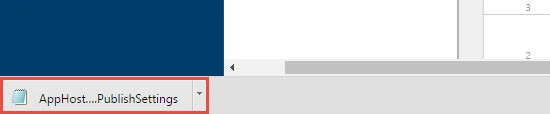
Click More link and subequently click on Get publish profile. After clicking, you will get your Publish setting file, which is required for publishing the Application.
Create ASP.NET MVC Web Application.
I have created a simple Application in ASP.NET MVC, which is used for the deployment purpose in this example.
Now, go to Azure portal and log in with your credentials.
Click New on Azure Dashboard. Go to Web + Mobile in marketplace section, click Web App.
Select an app name for your Web app and select resource group (A resource group is a collection of resources, which shares the same lifecycle, permissions, policies) and click create.
Within a few seconds, you will see your Web app is ready. For checking whether our app is ready or not, just visit the URL of the Web app, which we have created in the steps, mentioned above.
Now, click app Services, click on the app on which we want to deploy your Application. (I have selected the Web app, which we have created in the steps, mentioned above).
Click More link and subequently click on Get publish profile. After clicking, you will get your Publish setting file, which is required for publishing the Application.
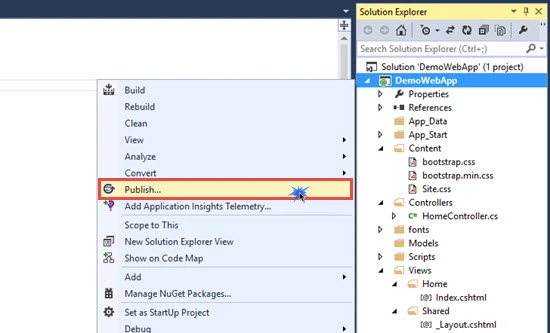
Now, right click on your project in Visual Studio and click Publish.
Now, click Import in Publish Web dialog.
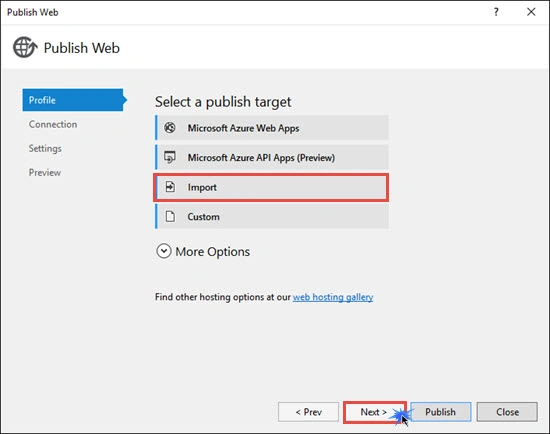
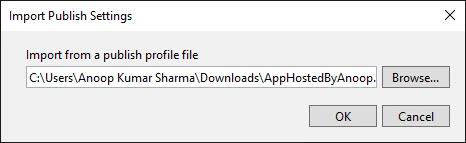
Browse the Publish setting file, which we have downloaded and click OK.
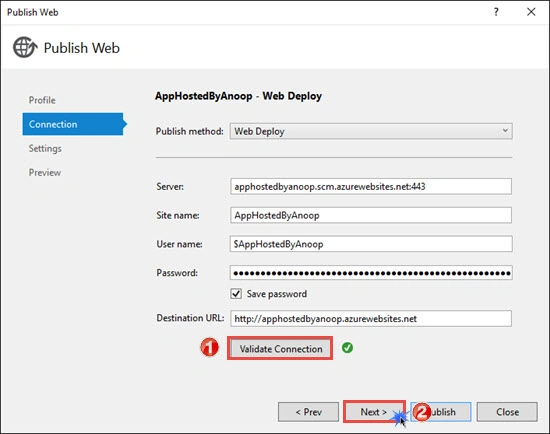
Click Validate connection for validating the connection.
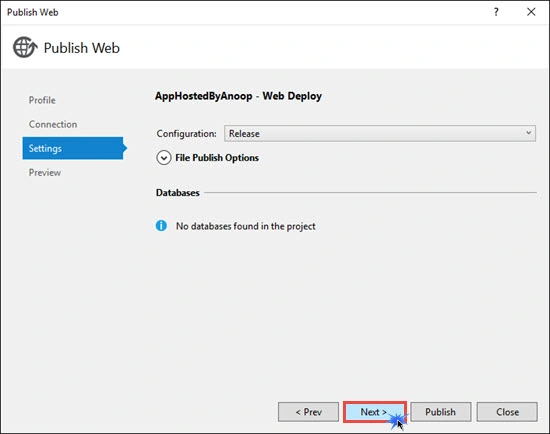
We haven’t added or used the database in this Application. I will show you how to publish the Applications with the database in my next article. Click Next.
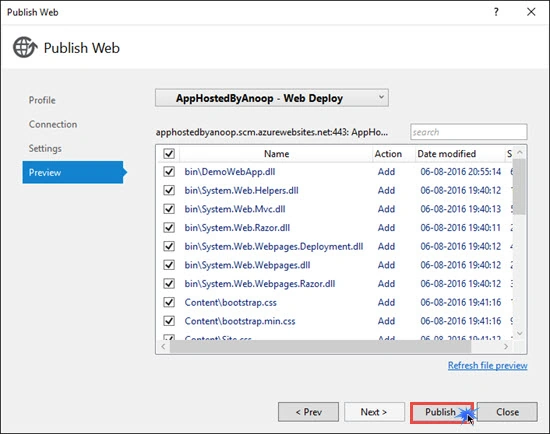
Click Publish.
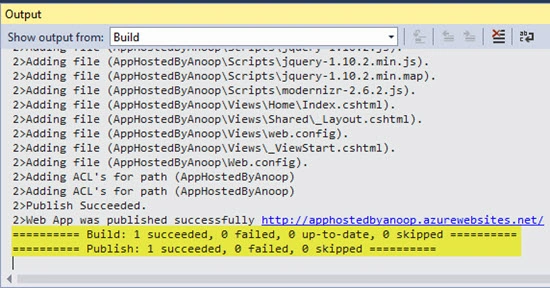
If everything goes fine, you will see a message, stating that the Web app was published successfully in the output Window of Visual Studio.
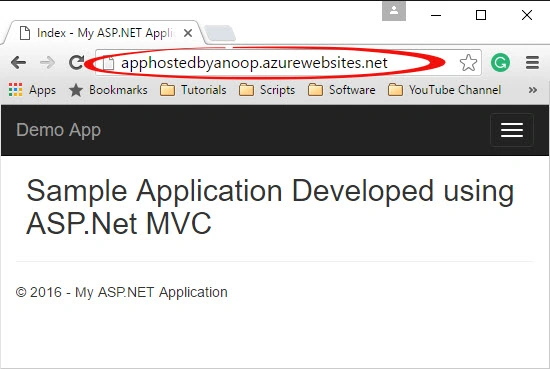
Now, visit the URL of your Application. Our application is live on the Web, using Microsoft Azure.
Pratik PimplePosted Jul 24, 2020, 8:38 AM
After 12 months of an azure free subscription, is azure charge us automatically? or azure upgrade itself?
Hamid KhanPosted Mar 7, 2019, 3:39 AM
Very good explanation...…..
Delpin Susai RajPosted Aug 28, 2016, 10:53 AM
Good
Amit KumarPosted Aug 16, 2016, 11:42 PM
Nice Article Dear.
Manas MohapatraPosted Aug 8, 2016, 8:59 AM
Good one
Humayun Kabir MamunPosted Aug 8, 2016, 12:51 AM
Helpful...
Vignesh ManiPosted Aug 7, 2016, 2:07 PM
Nice
Prasanna MuraliPosted Aug 7, 2016, 12:19 PM
Nice info...