

Overview
Notifications have a very important role in any mobile development application. It is a faster way of communication to provide information to the user. Today, we get notifications for almost every time when a user does any kind of transaction, either on social media apps or any financial/services related apps.
Before starting a discussion on notifications, below are some useful links to start programming in Android applications from scratch.
- Android Programming - Day One
- Android Programming - Day Two
- How To Display A Dialog Windows In Android
- How To Display A Progress Dialog Window In Android
- Intent In Android
- Return Data Using Intent Object In Android Applications
- Passing Data Using An Intent Object In Android Applications
- Fragments In Android Applications
- Adding Fragments Dynamically In Android Application
- Fragment Life Cycle In Android Application
- Interaction Between Two Fragments
- Calling In-Built Functions in Android Application
- Intent Object and Intent Filters in Android Application
Introduction
You have already aware of using the Toast class to display a message to the user. This class is a handy way to show user alerts, it is not persistent. It flashes on the screen for a few seconds and then disappears. Users may easily miss important information if they are not looking at the screen.
Messages are more important, so we need to use a more persistent method. For this, you can use the NotificationManager class to display a persistent message at the top of the device which is known as a status bar.
Code
Create a new project named ShowNotification.
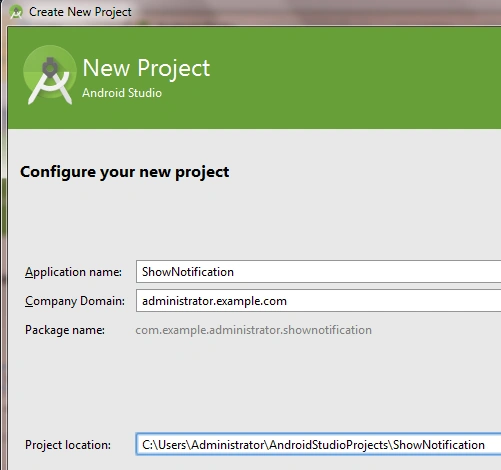
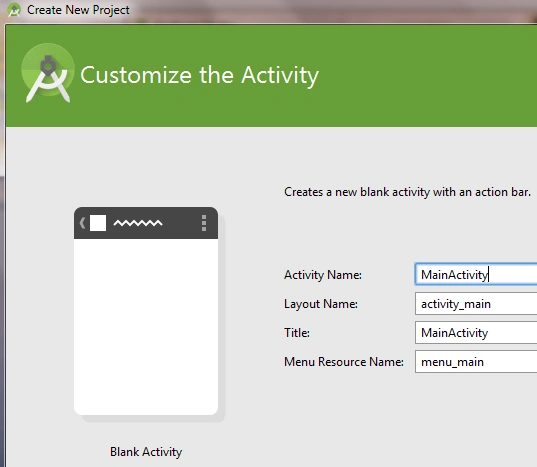
Create a blank activity called MainActivity.
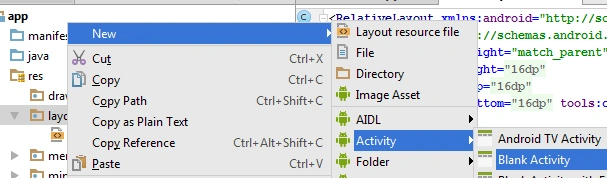
Add a new blank activity.
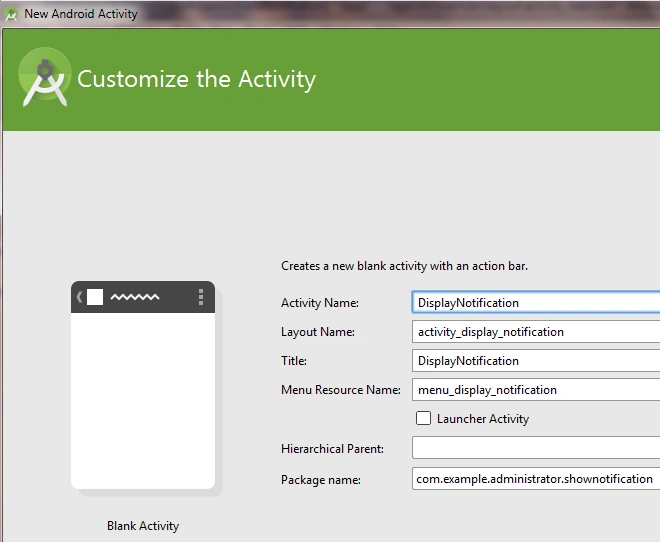
And name it DisplayNotification.
Add code in this class
- package com.example.administrator.shownotification;
- import android.app.NotificationManager;
- import android.support.v7.app.ActionBarActivity;
- import android.os.Bundle;
- import android.view.Menu;
- import android.view.MenuItem;
- public class DisplayNotification extends ActionBarActivity {
- @Override
- protected void onCreate(Bundle savedInstanceState) {
- super.onCreate(savedInstanceState);
- setContentView(R.layout.activity_display_notification);
- //Look up the notification manager service
- NotificationManager notificationManager=(NotificationManager)getSystemService(NOTIFICATION_SERVICE);
- // Cancel the notification that we started
- notificationManager.cancel(getIntent().getExtras().getInt("NotificationID"));
- }
- @Override
- public boolean onCreateOptionsMenu(Menu menu) {
- // Inflate the menu; this adds items to the action bar if it is present.
- getMenuInflater().inflate(R.menu.menu_display_notification, menu);
- return true;
- }
- @Override
- public boolean onOptionsItemSelected(MenuItem item) {
- // Handle action bar item clicks here. The action bar will
- // automatically handle clicks on the Home/Up button, so long
- // as you specify a parent activity in AndroidManifest.xml.
- int id = item.getItemId();
- //noinspection SimplifiableIfStatement
- if (id == R.id.action_settings) {
- return true;
- }
- return super.onOptionsItemSelected(item);
- }
- }
Add <intent-filter> and <uses-permisson> in the AndroidMenifest.xml file
- <?xml version="1.0" encoding="utf-8"?>
- <manifest xmlns:android="http://schemas.android.com/apk/res/android"
- package="com.example.administrator.shownotification"
- android:versionCode="1"
- android:versionName="1.0"
- >
- <uses-sdk android:minSdkVersion="20"/>
- <uses-permission android:name="android.permission.VIBRATE"/>
- <application
- android:allowBackup="true"
- android:icon="@mipmap/ic_launcher"
- android:label="@string/app_name"
- android:theme="@style/AppTheme" >
- <activity
- android:name=".MainActivity"
- android:label="@string/app_name" >
- <intent-filter>
- <action android:name="android.intent.action.MAIN" />
- <category android:name="android.intent.category.LAUNCHER" />
- </intent-filter>
- </activity>
- <activity
- android:name=".DisplayNotification"
- android:label="@string/title_activity_display_notification" >
- <intent-filter>
- <action android:name="android.intent.action.MAIN"/>
- <category android:name="android.intent.category.DEFAULT"/>
- </intent-filter>
- </activity>
- </application>
- </manifest>
Activity_main.xml file looks like this
- <LinearLayout xmlns:android="http://schemas.android.com/apk/res/android"
- xmlns:tools="http://schemas.android.com/tools"
- android:orientation="vertical"
- android:layout_width="fill_parent"
- android:layout_height="fill_parent" tools:context=".MainActivity">
- <Button android:id="@+id/buttondisplaynotification"
- android:layout_width="fill_parent"
- android:layout_height="fill_parent"
- android:text="Show Notification"
- android:onClick="onClickShowNotification"
- />
- </LinearLayout>
- package com.example.administrator.shownotification;
- import android.app.Notification;
- import android.app.NotificationManager;
- import android.app.PendingIntent;
- import android.app.TaskStackBuilder;
- import android.content.Context;
- import android.content.Intent;
- import android.support.v4.app.NotificationCompat;
- import android.support.v7.app.ActionBarActivity;
- import android.os.Bundle;
- import android.view.Menu;
- import android.view.MenuItem;
- import android.view.View;
- public class MainActivity extends ActionBarActivity {
- int notificationId=10;
- @Override
- protected void onCreate(Bundle savedInstanceState) {
- super.onCreate(savedInstanceState);
- setContentView(R.layout.activity_main);
- }
- public void onClickShowNotification(View view)
- {
- displayNotification();
- }
- protected void displayNotification(){
- NotificationCompat.Builder mBuilder =
- new NotificationCompat.Builder(this)
- .setSmallIcon(R.drawable.ic_launcher)
- .setContentTitle("System Alarm")
- .setContentText("Meeting with client at 4 PM!!");
- // Creates an explicit intent for an Activity
- Intent resultIntent = new Intent(this, DisplayNotification.class);
- // The stack builder object will contain an artificial back stack for the started Activity.
- // This ensures that navigating backward from the Activity leads out of
- // the application to the Home screen.
- TaskStackBuilder stackBuilder = TaskStackBuilder.create(this);
- // Adds the back stack for the Intent except Intent itself
- stackBuilder.addParentStack(DisplayNotification.class);
- // Adds the Intent that starts the Activity to the top of the stack
- stackBuilder.addNextIntent(resultIntent);
- PendingIntent resultPendingIntent =
- stackBuilder.getPendingIntent(
- 0,
- PendingIntent.FLAG_UPDATE_CURRENT
- );
- mBuilder.setContentIntent(resultPendingIntent);
- NotificationManager mNotificationManager =
- (NotificationManager) getSystemService(Context.NOTIFICATION_SERVICE);
- // notificationId allows to update the notification later on.
- mNotificationManager.notify(notificationId, mBuilder.build());
- }
- @Override
- public boolean onCreateOptionsMenu(Menu menu) {
- // Inflate the menu; this adds items to the action bar if it is present.
- getMenuInflater().inflate(R.menu.menu_main, menu);
- return true;
- }
- @Override
- public boolean onOptionsItemSelected(MenuItem item) {
- // Handle action bar item clicks here. The action bar will
- // automatically handle clicks on the Home/Up button, so long
- // as you specify a parent activity in AndroidManifest.xml.
- int id = item.getItemId();
- //noinspection SimplifiableIfStatement
- if (id == R.id.action_settings) {
- return true;
- }
- return super.onOptionsItemSelected(item);
- }
- }
- Intent resultIntent = new Intent(this, DisplayNotification.class);
- // The stack builder object will contain an artificial back stack for the started Activity.
- // This ensures that navigating backward from the Activity leads out of
- // the application to the Home screen.
- TaskStackBuilder stackBuilder = TaskStackBuilder.create(this);
- // Adds the back stack for the Intent except Intent itself
- stackBuilder.addParentStack(DisplayNotification.class);
- // Adds the Intent that starts the Activity to the top of the stack
- stackBuilder.addNextIntent(resultIntent);
- PendingIntent resultPendingIntent =
- stackBuilder.getPendingIntent(
- 0,
- PendingIntent.FLAG_UPDATE_CURRENT
- );
To associate the PendingIntent created in the last step with a gesture, call the appropriate method of NotificationCompat.Builder. To start an activity when the user clicks the notification text in the notification drawer, add the PendingIntent by calling setContentIntent().
- mBuilder.setContentIntent(resultPendingIntent);
At last, time to issue the notification. For this, get an instance of NotificationManager class. Use the notify() method. When you call notify(), specify a nofiticationid. You can use this ID to update notification later on. Call build(), which returns a Notification object containing your specifications.
- NotificationManager mNotificationManager =
- (NotificationManager) getSystemService(Context.NOTIFICATION_SERVICE);
- // notificationId allows you to update the notification later on.
- mNotificationManager.notify(notificationId, mBuilder.build());
Result
Run the application by pressing the button Shift + F10.
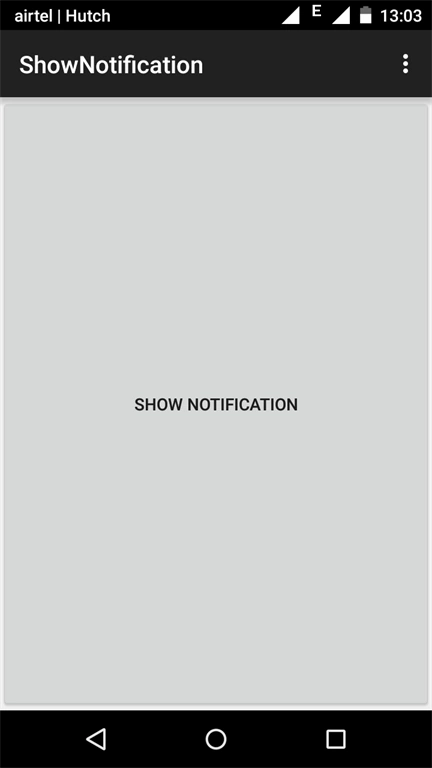
Touch or click the text Show Notification display in the center of the above screen.
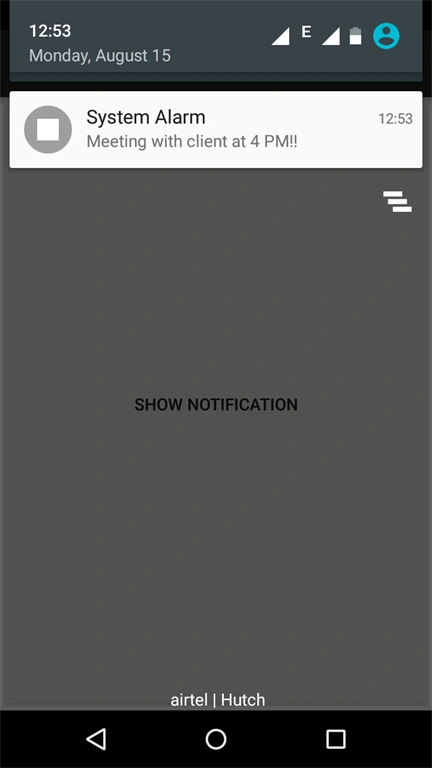
It displays the notification on the UI screen.
Conclusion
In this article, I explained about displaying notifications using the concept of a stack which means that all notifications are the in a queue. In the next article, I will explain the user interface in Android applications. If you have any questions or comments, post me a message in the C# Corner comments section.
Roshan GuragainPosted Oct 16, 2016, 6:42 AM
Nice..
Vignesh ManiPosted Aug 17, 2016, 7:51 AM
Nice
kalu singh raoPosted Aug 17, 2016, 1:59 AM
Nice share