

Overview
I hope you got a chance to read my previous articles about developing an Android app. I have covered some topics, the links of which are here.
- Android Programming-Day One
- Android Programming-Day Two
- How To Display a Dialog Window in Android Application
- How To Display a Progress Dialog Window in Android Application
- Intent in Android
- Return Data Using Intent Object in Android Applications
- Passing Data Using an Intent Object in Android Application
In this article, we will learn about working with fragments in Android applications.
Introduction
First of all, what is a fragment? The fragment is nothing but another form of activity. We create fragments to contain Views, just like activities. An activity typically fills the entire screen, displaying the various Views that make up the user interface of an application. When an activity is displayed in a large screen device, such as on a tablet, it is somewhat out of place. Due to the bigger screen size, all the Views in an activity must be arranged to make full use of the increased space. So, by using mini activities, each activity can have its own set of Views. During run time, an activity can contain one or more of these mini activities and it depends on the screen orientation of the device. These mini activities are nothing but fragments.
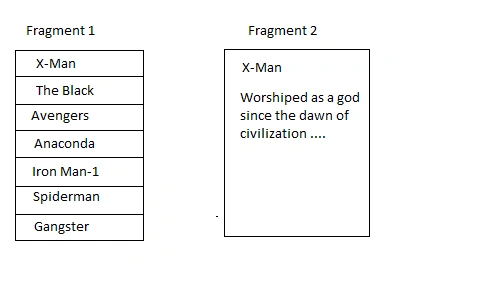
Fragments are always embedded in an activity. The following image shows two fragments. In Fragment 1, ListView is showing a list of movie titles. Fragment 2 shows the details of the movie and contains some TextViews and ImageViews showing text and images respectively.
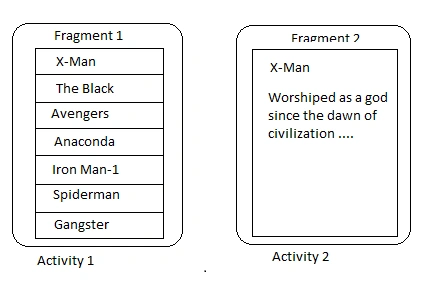
If the application is running either on an Android tablet in portrait mode or on an Android smartphone, Fragment 1 may be embedded in one activity, however, Fragment 2 may be embedded in another activity. When a user selects an item in the list in Fragment 1, activity 2 will be started.
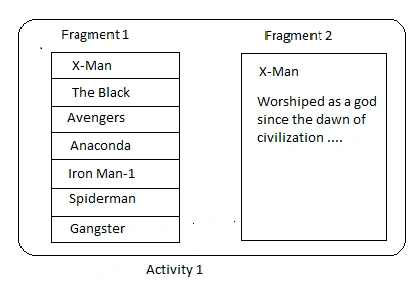
 If the application is running in a tablet in landscape mode, both fragments 1 and 2 can be embedded within a single activity.
 So, we saw that fragments have an important role to create the user interface of an Android application. Fragments can be added dynamically to the activities, in order to create the best user experience for the target device.
Coding
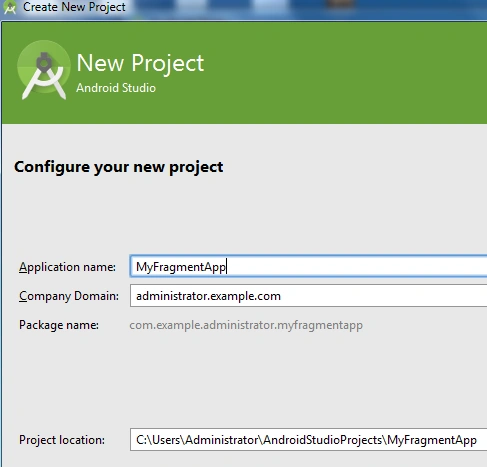
Configure a new Android project called MyFragmentApp by selecting File-> New-> New Project option.
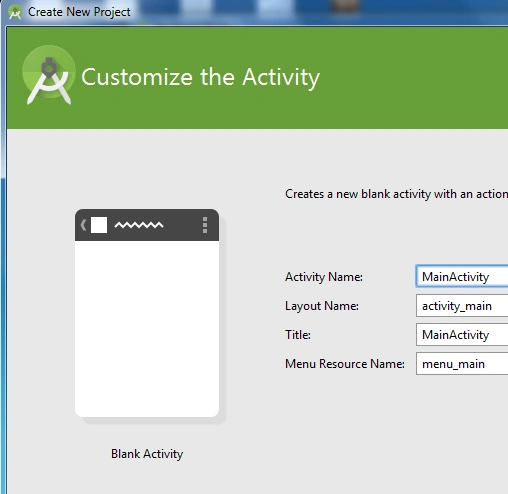
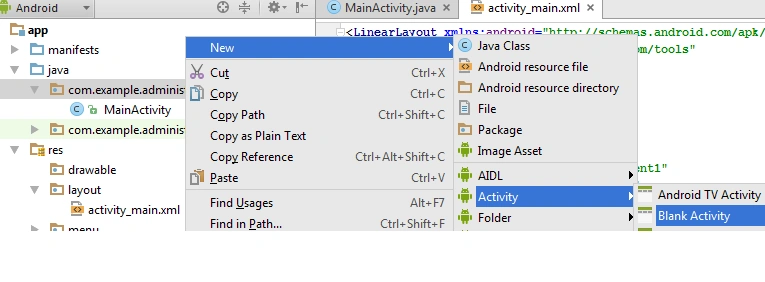
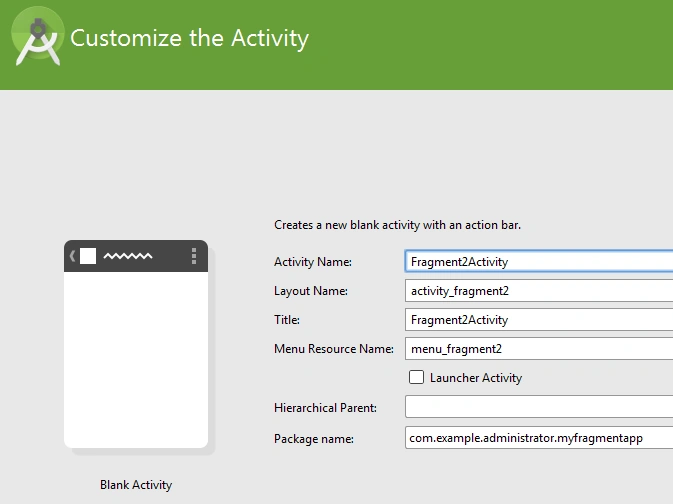
- <LinearLayout xmlns:android="http://schemas.android.com/apk/res/android"
- xmlns:tools="http://schemas.android.com/tools"
- android:layout_width="fill_parent"
- android:layout_height="fill_parent"
- android:orientation="vertical"
- android:background="#00FF00"
- tools:context="com.example.administrator.myfragmentapp.Fragment1Activity">
- <TextView android:text="This is Ist Fragment!"
- android:layout_width="fill_parent"
- android:layout_height="wrap_content"
- android:textColor="#000FFF"
- android:layout_marginTop="20dp"
- android:textSize="30dp"
- />
- </LinearLayout>
Layout of the activity_fragment2.xml file is,
- <LinearLayout xmlns:android="http://schemas.android.com/apk/res/android"
- xmlns:tools="http://schemas.android.com/tools"
- android:layout_width="fill_parent"
- android:layout_height="fill_parent"
- android:orientation="vertical"
- tools:context="com.example.administrator.myfragmentapp.Fragment2Activity">
- <TextView android:text="This is 2nd Fragment!"
- android:layout_width="fill_parent"
- android:layout_height="wrap_content"
- android:layout_marginTop="20dp"
- android:textSize="30dp"/>
- </LinearLayout>
Add a method onCreateView() in the Java class file of above activities,
- package com.example.administrator.myfragmentapp;
- import android.app.Fragment;
- import android.os.Bundle;
- import android.view.LayoutInflater;
- import android.view.Menu;
- import android.view.MenuItem;
- import android.view.View;
- import android.view.ViewGroup;
- public class Fragment1Activity extends Fragment {
- @Override
- public View onCreateView(LayoutInflater inflater, ViewGroup container, Bundle savedInstanceState)
- {
- return inflater.inflate(R.layout.activity_fragment1,container,false);
- }
- }
- package com.example.administrator.myfragmentapp;
- import android.app.Fragment;
- import android.support.v7.app.ActionBarActivity;
- import android.os.Bundle;
- import android.view.LayoutInflater;
- import android.view.Menu;
- import android.view.MenuItem;
- import android.view.View;
- import android.view.ViewGroup;
- public class Fragment2Activity extends Fragment {
- @Override
- public View onCreateView(LayoutInflater inflater, ViewGroup container, Bundle savedInstanceState)
- {
- return inflater.inflate(R.layout.activity_fragment2,container,false);
- }
- }
Layout of the activity_main.xml file is,
- <LinearLayout xmlns:android="http://schemas.android.com/apk/res/android"
- xmlns:tools="http://schemas.android.com/tools"
- android:layout_width="fill_parent"
- android:layout_height="fill_parent"
- android:orientation="horizontal"
- android:background="#FFFFFF"
- tools:context=".MainActivity">
- <fragment
- android:name="com.example.administrator.myfragmentapp.Fragment1Activity"
- android:id="@+id/fragment1"
- android:layout_width="0px"
- android:layout_height="match_parent"
- android:layout_weight="2"/>
- <fragment
- android:name="com.example.administrator.myfragmentapp.Fragment2Activity"
- android:id="@+id/fragment2"
- android:layout_width="0px"
- android:layout_height="match_parent"
- android:layout_weight="2"/>
- </LinearLayout>
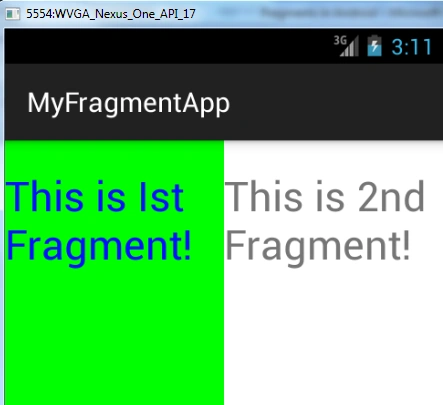
Explanation
As we have already seen that fragment behaves very much like activity, it has a Java class and loads its UI from an XML file. The Java class for a fragment needs to extend the Fragment base class.
- public class Fragment1Activity extends Fragment {}
- To draw the UI
- for a fragment, just override the onCreateView() method and it returns a View object
- public View onCreateView(LayoutInflater inflater, ViewGroup container, Bundle savedInstanceState)
- {
- return inflater.inflate(R.layout.activity_fragment1, container, false);
- }
- <LinearLayout xmlns:android="http://schemas.android.com/apk/res/android"
- xmlns:tools="http://schemas.android.com/tools"
- android:layout_width="fill_parent"
- android:layout_height="fill_parent"
- android:orientation="horizontal"
- android:background="#FFFFFF"
- tools:context=".MainActivity">
- <fragment
- android:name="com.example.administrator.myfragmentapp.Fragment1Activity"
- android:id="@+id/fragment1"
- android:layout_width="0px"
- android:layout_height="match_parent"
- android:layout_weight="2"/>
- <fragment
- android:name="com.example.administrator.myfragmentapp.Fragment2Activity"
- android:id="@+id/fragment2"
- android:layout_width="0px"
- android:layout_height="match_parent"
- android:layout_weight="2"/>
- </LinearLayout>
Conclusion
In this article, we saw how to add the fragment to an activity, statically. In the next article, I will explain how to add fragment, dynamically.
Amit VermaPosted Jul 29, 2016, 7:16 AM
very useful learning material
Vignesh ManiPosted Jul 27, 2016, 12:10 PM
Nice one
ArnavPosted Jul 26, 2016, 6:53 AM
Wow, great learning material for android
Prasanna MuraliPosted Jul 25, 2016, 9:19 PM
Nice share
kalu singh raoPosted Jul 25, 2016, 2:24 PM
Thank you for sharing