

Introduction
Prerequisites
Basic knowledge of ASP.NET WebAPI, jQuery, Kendo UI.
This article flows, as per the following.
- Set up the table
- Creating an ASP.NET Web API Application.
- Creating a Controller.
- Testing REST API.
- Creating HTML page and implementing the multi column header in Kendo Grid
Set up the table
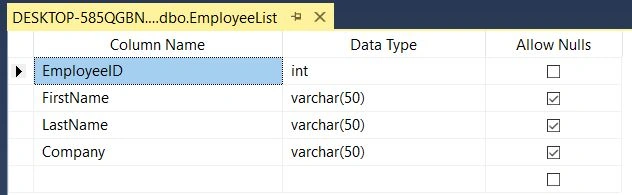
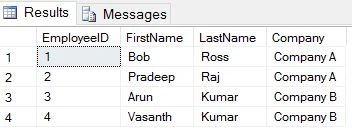
Employee List Table
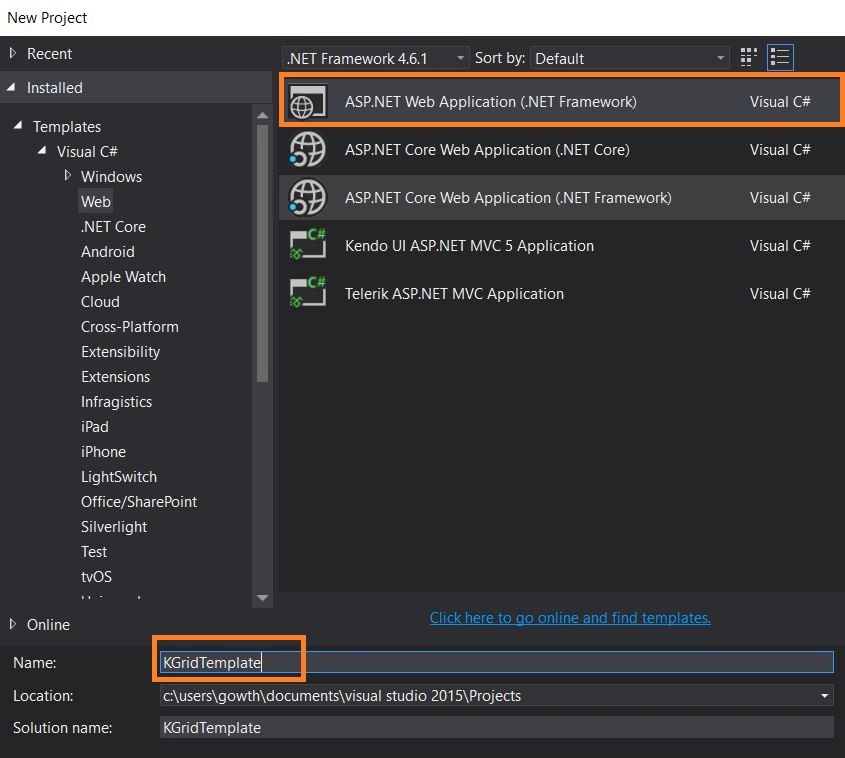
Creating an ASP.NET WEB API Application
Create a Web API Application, using an installed Web template in Visual Studio, as shown below. In my case, I named the Application “KGridTemplate".
Creating model classes
Now, we will create Entity Framework models from the database tables.
Step 1
Right-click Models folder, select Add -> ADO.NET Entity Data Model or select Add->New Item. In Add New Item Window, select data in the left pane and ADO.NET Entity Data Model from the center pane. Name the new model file (In my case, I made it a Employee) and click Add.
Step 2
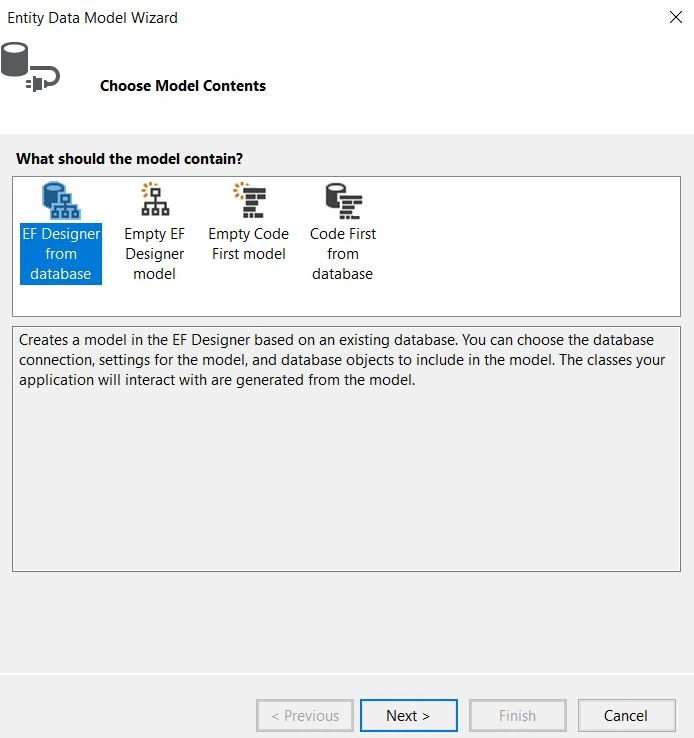
In Entity Data Model wizard, select EF Designer from the database and click Next.
Step 3
Click New Connection button. The Connection Properties Window will open.
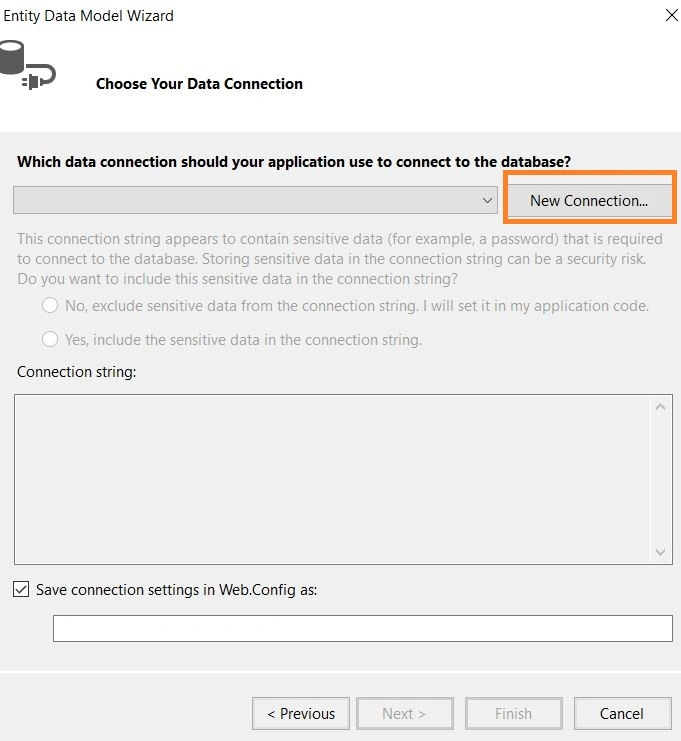
Step 4
In Connection Properties Window, provide the name of the local Server, where the database was created (in this case, (DESKTOP-585QGBN)). After providing the Server name, select Employee from the available databases and click OK.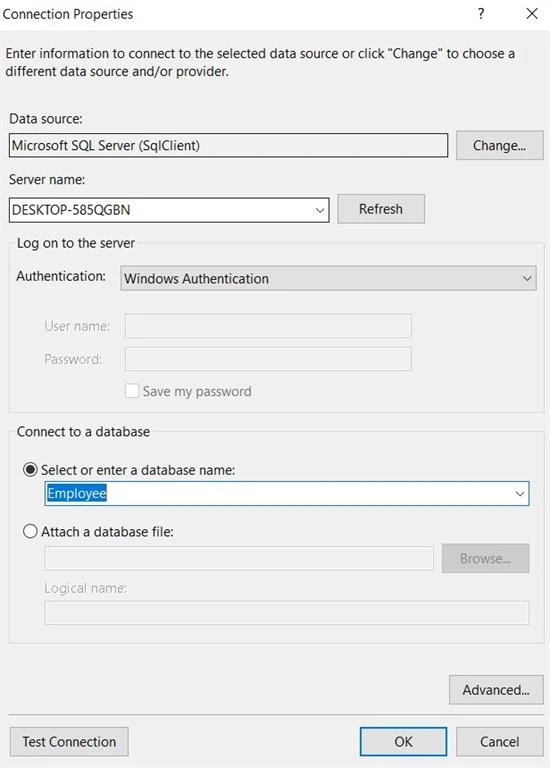
Step 5
You can use the default name for the connection to save Web.Config file. Now, click Next.
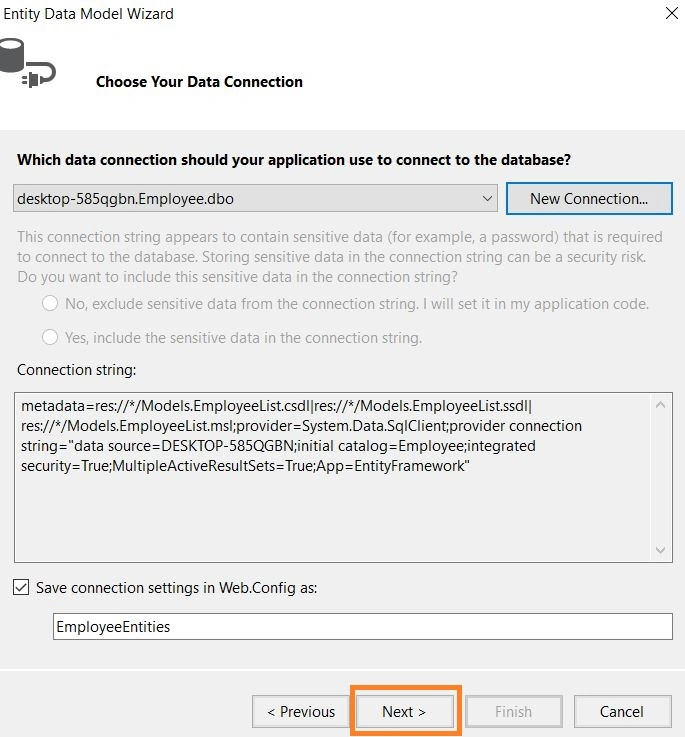
Step 6
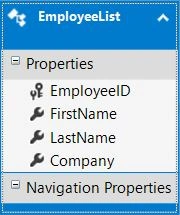
Select the table to generate the models for EmployeeList table and click Finish.
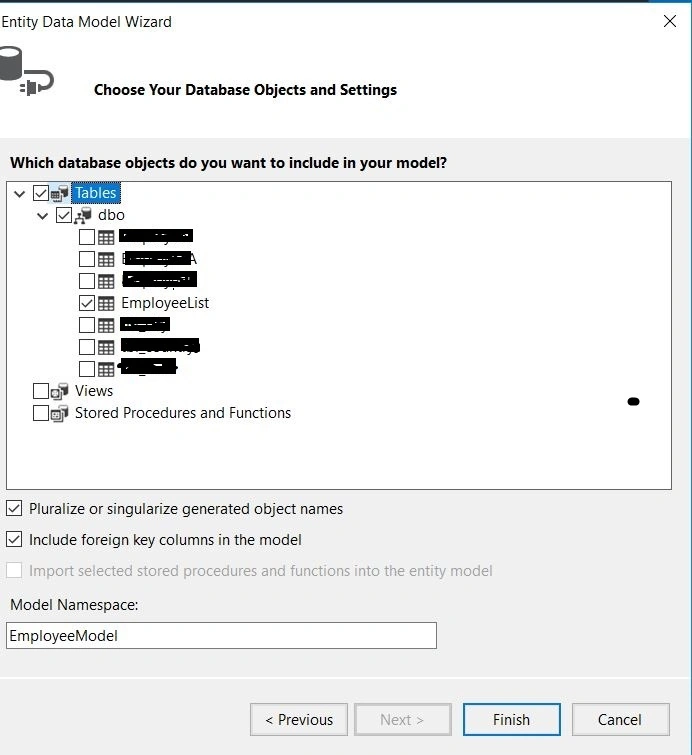
My database schema is shown in the figure given below.
Creating a Controller
Right click on Controller folder and add a new Web API 2 controller- Empty, as shown in the Figure 11. In my case, I named it as EmployeesController.cs.
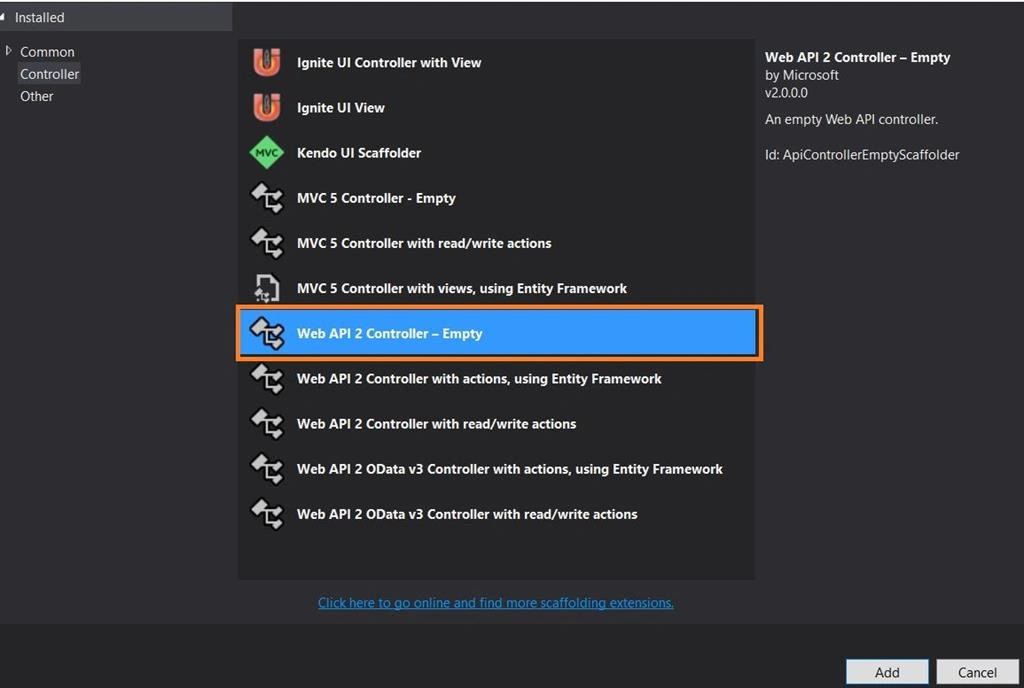
Figure 11
Write the code given below in EmployeeController.cs.
- [RoutePrefix("api/Employee")]
- public class EmployeeController : ApiController
- {
- EmployeeEntities db = new EmployeeEntities();
- [HttpGet]
- [AllowAnonymous]
- [Route("EmployeeList")]
- public HttpResponseMessage GetEmployeeList()
- {
- try
- {
- return Request.CreateResponse(HttpStatusCode.OK, db.EmployeeLists, Configuration.Formatters.JsonFormatter);
- }
- catch(Exception ex)
- {
- return Request.CreateResponse(HttpStatusCode.OK, ex.Message, Configuration.Formatters.JsonFormatter);
- }
- }
- }
Testing the API in Postman
- API End Point /API/ Employee/ EmployeeList.
- Type GET.
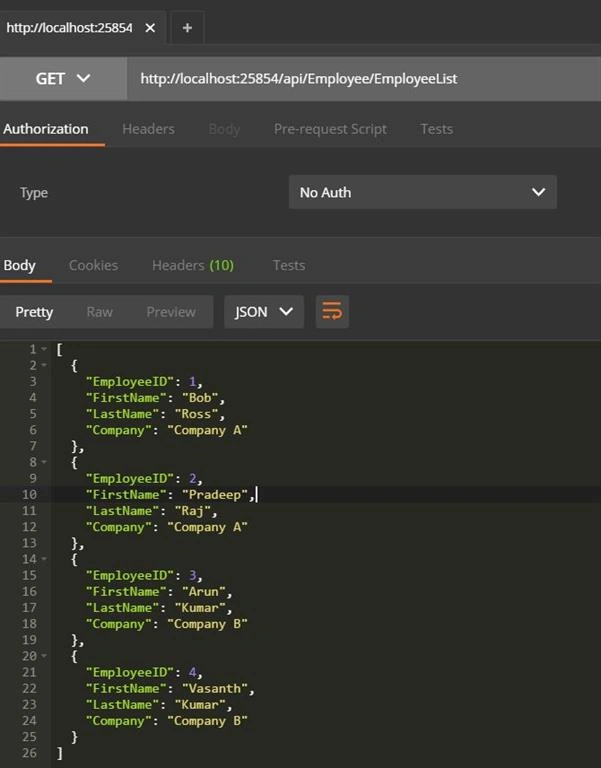
Now, our API is ready, let's create a Kendo Grid DataSource, using API.
Creating HTML page
Create one new HTML page in the Application, where we are going to implement Kendo Grid, using the RESTful Service. In my case, I named it as KendoGrid.html.
- <!DOCTYPE html>
- <html>
- <head>
- <title>Kendo Grid</title>
- <meta charset="utf-8" />
- <link rel="stylesheet" href="http://kendo.cdn.telerik.com/2017.1.118/styles/kendo.common.min.css" />
- <link rel="stylesheet" href="http://kendo.cdn.telerik.com/2017.1.118/styles/kendo.rtl.min.css" />
- <link rel="stylesheet" href="http://kendo.cdn.telerik.com/2017.1.118/styles/kendo.silver.min.css" />
- <link rel="stylesheet" href="http://kendo.cdn.telerik.com/2017.1.118/styles/kendo.mobile.all.min.css" />
- <script src="http://code.jquery.com/jquery-1.12.4.min.js"></script>
- <script src="http://kendo.cdn.telerik.com/2017.1.118/js/kendo.all.min.js"></script>
- <script src="Scripts/GridViewModel.js"></script>
- </head>
- <body>
- <div id="example">
- <div id="grid"></div>
- </div>
- </body>
- </html>
- $(document).ready(function () {
- $("#grid").kendoGrid({
- dataSource: {
- type: "json",
- transport: {
- read: "/api/Employee/EmployeeList"
- },
- schema: {
- model: {
- fields: {
- EmployeeID: {
- type: "number"
- },
- EmployeeName: {
- type: "string"
- },
- Designation: {
- type: "string"
- },
- Company: {
- type: "string"
- }
- }
- }
- },
- },
- filterable: true,
- sortable: true,
- pageable: true,
- columns: [{
- field: "EmployeeID",
- filterable: false
- }, {
- field: "EmployeeName",
- title: "EmployeeName",
- filterable: { multi: true, search: true }
- }, {
- title: "Other Details",
- columns: [{
- field: "Designation",
- title: "Designation"
- }, {
- field: "Company",
- title: "Company",
- }]
- }]
- });
- });
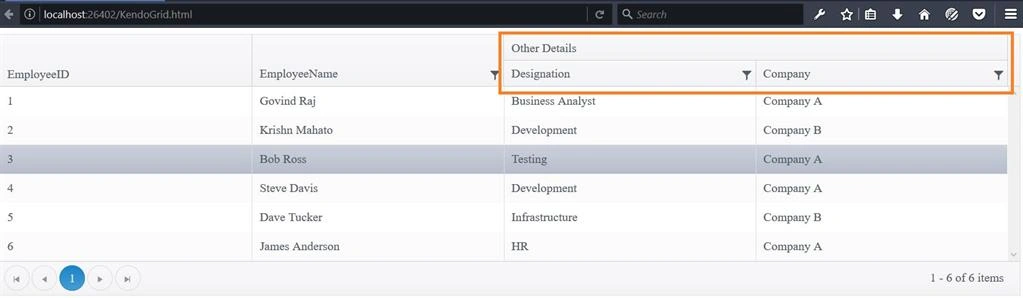
Figure 13
Join the conversation! Your thoughts help the community grow.