

Introduction
The Bot Framework enables you to build bots that support different types of interactions with users. You can design conversations in your bot to be freeform. Your bot can also have more guided interactions where it provides the user choices or actions. The conversation can use simple text strings, the message with an attachment like the image, File (pdf, word, excel, ppt), mp3, Video or more complex rich cards.

In this article, I will help you to send a reply message with the different types of media file attachment.
Prerequisites
I have explained about Bot framework Installation, deployment, and implementation in the below articles.
- Getting Started with Chatbot Using Azure Bot Service
- Getting Started with Bots Using Visual Studio 2017
- Deploying A Bot to Azure Using Visual Studio 2017
- How to Create ChatBot In Xamarin
- Getting Started with Dialog Using Microsoft Bot Framework
- Getting Started with Prompt Dialog Using Microsoft Bot Framework
- Getting Started With Conversational Forms And FormFlow Using Microsoft Bot Framework
- Getting Started With Customizing A FormFlow Using Microsoft Bot Framework
Create a new Bot application
Let's create a new bot application using Visual Studio 2017. Open Visual Studio > Select File > Create New Project (Ctrl + Shift +N) > select Bot application.

The Bot application template was created with all the components and all required NuGet references installed in the Solution.

Create A New AttachmentDialog Class
Step 1
You can create a new AttachmentDialog class for showing the attachment dialog. Right-click Project > select Add New Item > create a class that is marked with the [Serializable] attribute (so the dialog can be serialized to state) and implement the IDialog interface.
- using System;
- using System.Threading.Tasks;
- using Microsoft.Bot.Builder.Dialogs;
- using Microsoft.Bot.Connector;
- using System.IO;
- using System.Web;
- using System.Collections.Generic;
- namespace BotAttachment.Dialogs
- {
- [Serializable]
- public class AttachmentDialog : IDialog<object>
- {
Step 2
IDialog interface has only StartAsync() method. StartAsync() is called when the dialog becomes active. The method passes the IDialogContext object, used to manage the conversation.
- public async Task StartAsync(IDialogContext context)
- {
- context.Wait(this.MessageReceivedAsync);
- }
Step 3
Create a MessageReceivedAsync method and write the following code for the welcome message and show the list of demo options dialog.
- private readonly IDictionary<string, string> options = new Dictionary<string, string>
- {
- { "1", "1. Attach Local-Image " },
- { "2", "2. Attach Internet Image" },
- {"3" , "3. File Attachment" },
- {"4" , "4. Get local PDF" },
- {"5" , "5. Video Attachment" },
- {"6" , "6. Youtube video Attachment" },
- {"7" , "7. MP3 Attachment" },
- };
- public async virtual Task MessageReceivedAsync(IDialogContext context, IAwaitable<IMessageActivity> result)
- {
- var message = await result;
- var welcomeMessage = context.MakeMessage();
- welcomeMessage.Text = "Welcome to bot Attachment Demo";
- await context.PostAsync(welcomeMessage);
- await this.DisplayOptionsAsync(context);
- }
- public async Task DisplayOptionsAsync(IDialogContext context)
- {
- PromptDialog.Choice<string>(
- context,
- this. SelectedOptionAsync,
- this.options.Keys,
- "What Demo / Sample option would you like to see?",
- "Please select Valid option 1 to 6",
- 6,
- PromptStyle.PerLine,
- this.options.Values);
- }
- public async Task SelectedOptionAsync(IDialogContext context, IAwaitable<string> argument)
- {
- var message = await argument;
- var replyMessage = context.MakeMessage();
- Attachment attachment = null;
- switch (message)
- {
- case "1":
- attachment = GetLocalAttachment();
- replyMessage.Text = "Attach Image from Local Machine";
- break;
- case "2":
- attachment = GetInternetAttachment();
- replyMessage.Text = "Attach Image from Internet";
- break;
- case "3":
- attachment = GetinternetFileAttachment();
- replyMessage.Text = "Click Link for navigate PDF internet location";
- break;
- case "4":
- attachment = GetLocalFileAttachment();
- replyMessage.Text = "Click Link for navigate PDF local location";
- break;
- case "5":
- attachment = GetinternetVideoAttachment();
- replyMessage.Text = "Click on play button ";
- break;
- case "6":
- attachment = GetinternetYoutubeAttachment();
- replyMessage.Text = "Showing video from Youtube ";
- break;
- case "7":
- attachment = GetinternetMP3Attachment();
- replyMessage.Text = "Showing MP3 from internet ";
- break;
- }
- replyMessage.Attachments = new List<Attachment> { attachment };
- await context.PostAsync(replyMessage);
- await this.DisplayOptionsAsync(context);
- }
After user enters the first message, the Bot will reply with a welcome message and list of demo options, and wait for the user input like below.

Step 4 Local Image Attachment
The following code is showing the reply message with an image. To add the image as an attachment to a message, create an Attachment object for the message activity and set the following.
- ContentType
- ContentUrl
- Name
- /// <summary>
- /// dispaly local image
- /// </summary>
- /// <returns></returns>
- private static Attachment GetLocalAttachment()
- {
- var imagePath = HttpContext.Current.Server.MapPath("~/images/demo.gif");
- var imageData = Convert.ToBase64String(File.ReadAllBytes(imagePath));
- return new Attachment
- {
- Name = "demo.gif",
- ContentType = "image/gif",
- ContentUrl = $"data:image/gif;base64,{imageData}"
- };
- }
After the user provides input, the Bot will reply with a message with local image.

Internet Image Attachment
The internet image option is the simplest but requires the image to be already on the Internet and be publicly accessible. Provide a content URL pointing to the image URL path.
- /// <summary>
- /// Dispaly image from internet
- /// </summary>
- /// <returns></returns>
- private static Attachment GetInternetAttachment()
- {
- return new Attachment
- {
- Name = "architecture-resize.png",
- ContentType = "image/png",
- ContentUrl = "https://docs.microsoft.com/en-us/bot-framework/media/how-it-works/architecture-resize.png"
- };
- }
The following output screen shows up. After the user provides the input, the bot will fetch the image from internet and display that in emulator.

Internet File Attachment
You can refer to the following code for adding a hyperlink to fetch the file from the internet and attach to reply message. The same code will be reused for all the types of the document but we need to change the content type and content URL.
- /// <summary>
- /// attach internet file
- /// </summary>
- /// <returns></returns>
- public static Attachment GetinternetFileAttachment()
- {
- Attachment attachment = new Attachment();
- attachment.ContentType = "application/pdf";
- attachment.ContentUrl = "https://qconlondon.com/london-2017/system/files/presentation-slides/microsoft_bot_framework_best_practices.pdf";
- attachment.Name = "Microsoft Bot Framework Best Practices";
The following is the output screen. After the user provides input, the bot will reply with a message with hyperlink for document. The user needs to click a hyperlink for opening the document.

Local File Attachment
You can add pdf file into your project and add the following code for attaching a local pdf document in reply message.
- /// <summary>
- /// Get local file
- /// </summary>
- /// <returns></returns>
- public static Attachment GetLocalFileAttachment()
- {
- var pdfPath = HttpContext.Current.Server.MapPath("~/File/BotFramework.pdf");
- Attachment attachment = new Attachment();
- attachment.ContentType = "application/pdf";
- attachment.ContentUrl = pdfPath;
- attachment.Name = "Local Microsoft Bot Framework Best Practices";
- return attachment;
- }
The following output shows the reply message with hyperlink with download link to the attached pdf document.

Video Attachment
The following code is showing the reply message with attached video file.
- /// <summary>
- /// Dispaly video from internet
- /// </summary>
- /// <returns></returns>
- public static Attachment GetinternetVideoAttachment()
- {
- Attachment attachment = new Attachment();
- attachment = new VideoCard("Build a great conversationalist", "Bot Demo Video", "Build a great conversationalist", media: new[] { new MediaUrl(@"https://bot-framework.azureedge.net/videos/skype-hero-050517-sm.mp4") }).ToAttachment();
- return attachment;
- }
The following output gets showing. After the user provides an input, our bot will reply with a message with video attachment.

YouTube Video Attachment
The following code shows the reply message with attached YouTube video. You need to provide the content type and content URL in the attachment property.
- /// <summary>
- /// Display Youtube Video
- /// </summary>
- /// <returns></returns>
- public static Attachment GetinternetYoutubeAttachment()
- {
- Attachment attachment = new Attachment();
- attachment.ContentType = "video/mp4";
- attachment.ContentUrl = "https://youtu.be/RaNDktMQVWI";
- return attachment;
- }
The following output is showing a message with YouTube video attachment.

MP3 File Attachment
The following code is showing the attached mp3 file in a reply message. The attachment type is in the Content Type property, which should be a valid mime type is “image/mpeg3” or “audio/mp3”.
- /// <summary>
- /// attach internet file
- /// </summary>
- /// <returns></returns>
- public static Attachment GetinternetMP3Attachment()
- {
- Attachment attachment = new Attachment();
- attachment.ContentType = "audio/mpeg3";
- attachment.ContentUrl = "http://video.ch9.ms/ch9/f979/40088849-aa88-45d4-93d5-6d1a6a17f979/TestingBotFramework.mp3";
- attachment.Name = "Testing the Bot Framework Mp3";
- return attachment;
- }
The output is showing a reply message with attached mp3 file.

Run Bot Application
The emulator is a desktop application that lets us test and debug our bot on localhost. Now, you can click on "Run the application" in Visual Studio and execute in the browser.
You can follow the below steps to test your bot application.
- Open Bot Emulator.
- Copy the above localhost url and paste it in emulator e.g. - http://localHost:3979
- You can append the /api/messages in the above url; e.g. - http://localHost:3979/api/messages.
- You won't need to specify Microsoft App ID and Microsoft App Password for localhost testing, so click on "Connect".
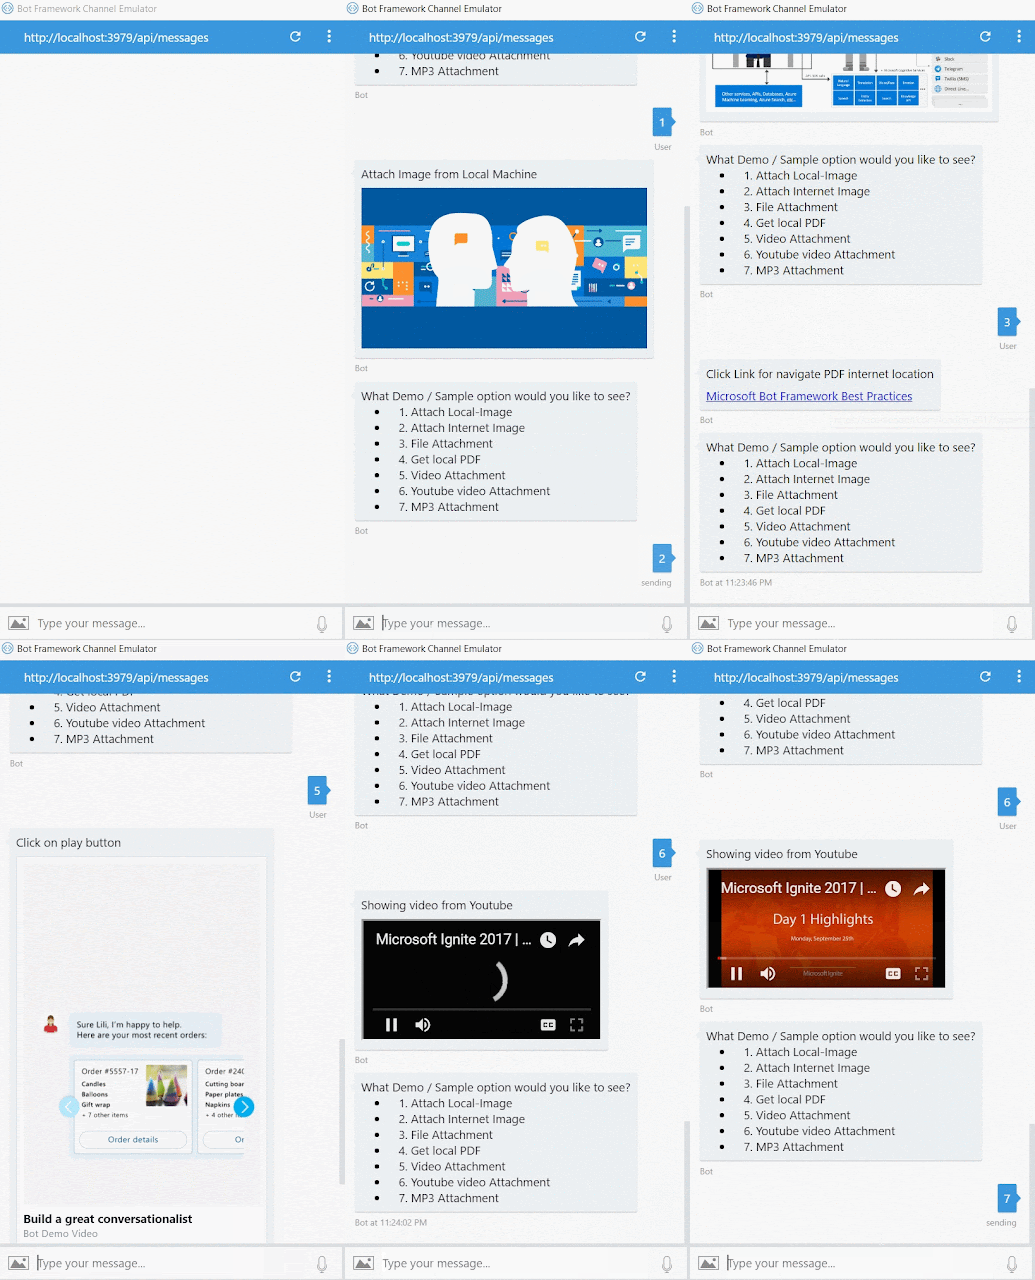
Summary
In this article, you learned how to create a Bot application using Visual Studio 2017 and send a reply message with the different type of media file attachments. If you have any questions/feedback/ issues, please write in the comment box.
sinson francisPosted Oct 15, 2020, 5:11 AM
I am trying to achieve the same for the attachment as excel file. This is not working in the teams channel, I am getting the error. the same code working in the webchat and emulator. any suggestions? ContentType = "application/excel"
Ganapathy ArvindanPosted Jul 15, 2020, 3:36 AM
Good Article Suthahar, i am looking for Bus ticket booking kind of a bot, Name,Emailid,Source,destination with db connection once it is booked we need pdf as output, using Bot any ideas or coding will help, please reply
tharak nadhPosted Nov 12, 2018, 2:14 AM
I am trying to place two more buttons on Video Card, Can I know how to place 2 buttons on Video Card
Jobin JosephPosted Oct 31, 2018, 3:33 AM
Great article Suthahar, I have one query is it possible to receive attachment from the user and save with the form flow state data ?
Dinesh RohraPosted Oct 22, 2018, 8:39 AM
Hi Suthahar , great article. Just one query, does this work on all the following clients - Wechat , Skype , Slack , Yammer ? Looking forward for your response.
Nayana RMPosted Sep 12, 2018, 12:54 AM
Hi suthahar. This is a good article. For Local File Attachment -- file is not downloading when I click on the link and in this demo also that part is not shown.
Martin OdongoPosted May 16, 2018, 7:31 AM
Very Helpful. Thank you.
Mohan GokavarapuPosted Apr 25, 2018, 12:45 AM
Hi Suthahar, is there any way to attchment type on emulator.For Ex if the attachement is PPT then it should be PPT Icon followed by name of the file name (currently it is showing only name of file )
Srikanth KanduriPosted Oct 17, 2017, 10:32 AM
Suthahar, I got the below line when i inspect on the link after deploying. <a href="D:\inetpub\WEBSITES\GTKBOT\HTTPS\Attachments\microsoft_bot.pdf" title="D:\inetpub\WEBSITES\GTKBOT\HTTPS\Attachments\microsoft_bot.pdf" target="_blank">Local Microsoft Bot Framework Best Practices</a>
Srikanth KanduriPosted Oct 16, 2017, 6:15 AM
Hello Suthahar, Article is really very nice and Useful. But in Local File Attachment -- file is not downloading when we click on the link, is there anything we have to write to download? Also, please let me know where can we find the ContentTypes for all types of files. Currently i am looking for XLSX files