

In this article, we will learn how to enable sorting, grouping, pagination, reordering, show and hide columns and many other things for data, using Kendo Grid and simple Restful API, which has been created, using ASP.NET Core.
- Create a simple ASP.NET Core Web Application project.
- Create Web API returning list of data.
- Add Kendo UI to the project.
- Use Kendo Grid to show the data, using Web API.

- Sorting in Kendo Grid.
- Grouping in Kendo Grid.
In my previous article, we learned how to create a simple API in ASP.NET Core Web Application and parse the data received from API in HTML table,
Today, we will use Kendo Grid to parse the data into the Grid in ASP.NET Core Application.
Kendo UI is a UI Library for HTML, JavaScript and Angular development. Kendo UI for jQuery delivers everything you need to build a modern Web Application under tight deadlines. Choose from more than 70 UI components and easily combine them to create beautiful and responsive apps, while speeding the development time by up to 50 percent. [Definition from Kendo UI]
You can use both paid and free versions of Kendo UI.
Here is the link for an open source and free version of Kendo UI.
Creating Web API in ASP.NET Core
Add Model
Step 1
Create a new folder under Models folder named Student.
Step 2
Add New class named as PersonalDetail.
Step 3
Add the lines of codes given below to PersonalDetail class.
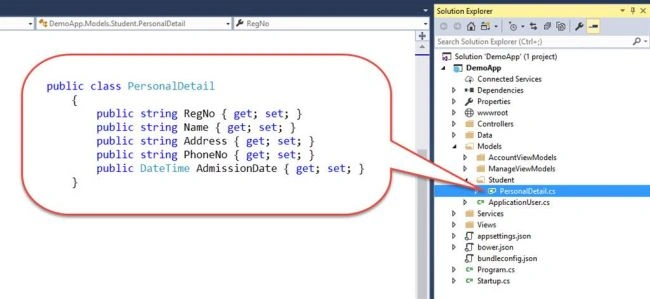
- public class PersonalDetail
- {
- [Key]
- public string RegNo {
- get;
- set;
- }
- public string Name {
- get;
- set;
- }
- public string Address {
- get;
- set;
- }
- public string PhoneNo {
- get;
- set;
- }
- public DateTime AdmissionDate {
- get;
- set;
- }
- }
Add Web API
Step 1
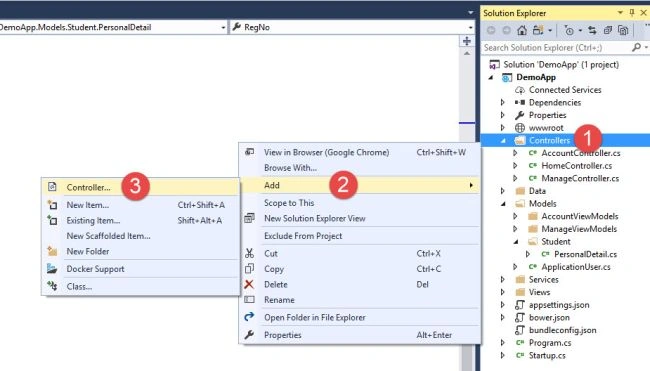
Right click on Controller folder and Add => Controller.
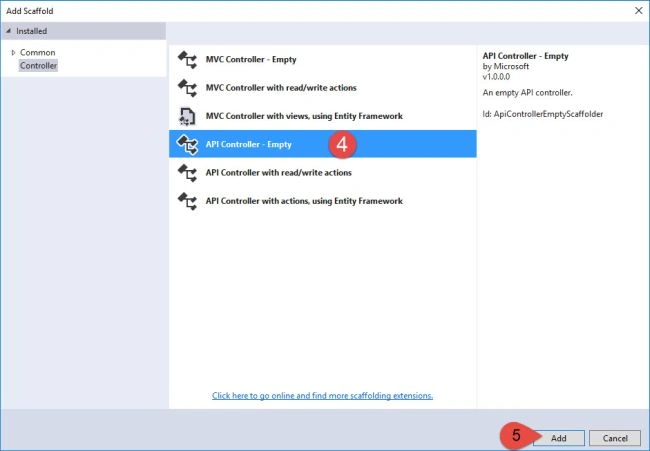
Select API Controller - Empty.
Step 3
Click Add.
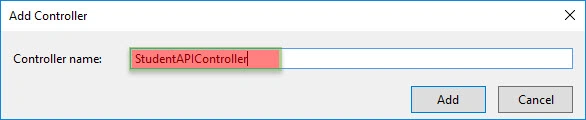
Name the Web API as StudentAPI.
Now, create a method called GetAllStudents().
Your method should look like, as shown below.
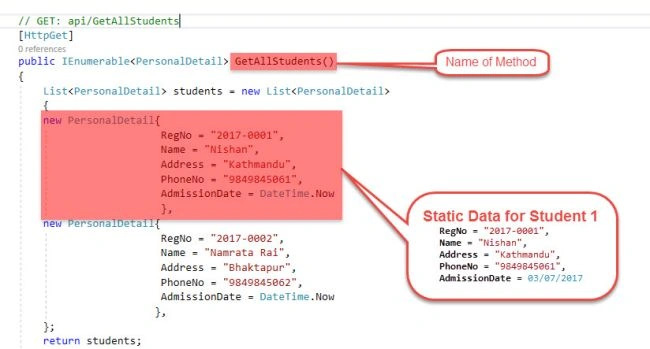
- // GET: api/StudentAPI/GetAllStudents
- //[HttpPost]
- [Route("api/StudentAPI/GetAllStudents")]
- public IEnumerable < PersonalDetail > GetAllStudents() {
- List < PersonalDetail > students = new List < PersonalDetail > {
- new PersonalDetail {
- RegNo = "2017-0001",
- Name = "Nishan Aryal",
- Address = "Kathmandu",
- PhoneNo = "9849845061",
- AdmissionDate = DateTime.Now
- },
- new PersonalDetail {
- RegNo = "2017-0002",
- Name = "Namrata Rai",
- Address = "Bhaktapur",
- PhoneNo = "9849845062",
- AdmissionDate = DateTime.Now
- },
- new PersonalDetail {
- RegNo = "2017-0003",
- Name = "Junge Rai",
- Address = "Pokhara",
- PhoneNo = "9849845063",
- AdmissionDate = DateTime.Now
- },
- new PersonalDetail {
- RegNo = "2017-0004",
- Name = "Sunita Ghimire",
- Address = "Kathmandu",
- PhoneNo = "9849845064",
- AdmissionDate = DateTime.Now
- },
- new PersonalDetail {
- RegNo = "2017-0005",
- Name = "John ",
- Address = "Bhaktapur",
- PhoneNo = "9849845065",
- AdmissionDate = DateTime.Now
- },
- };
- return students;
- }
Now, let's navigate to WebAPI URL to check the data.
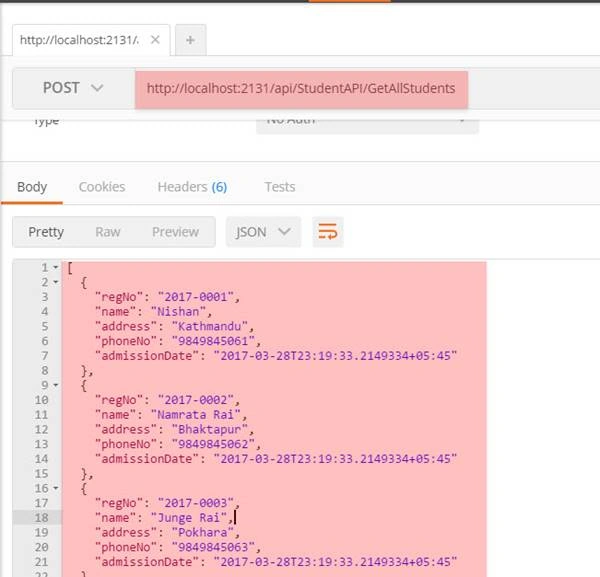
Adding a new View to place Kendo Grid
Step 1
Let's create a new method called ListData at HomeController, as shown below.
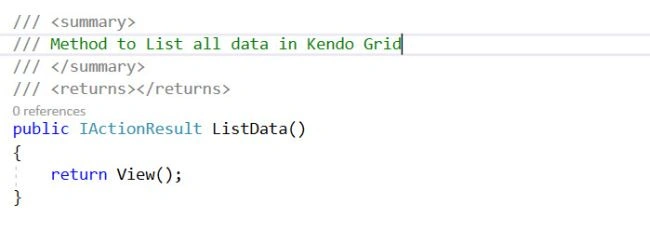
- /// <summary>
- /// Method to List all data in Kendo Grid
- /// </summary>
- /// <returns></returns>
- public IActionResult ListData()
- {
- return View();
- }
Add Empty View for the method.
Step 3
Add references to CSS, JS and add a Bootstrap panel, as shown below.
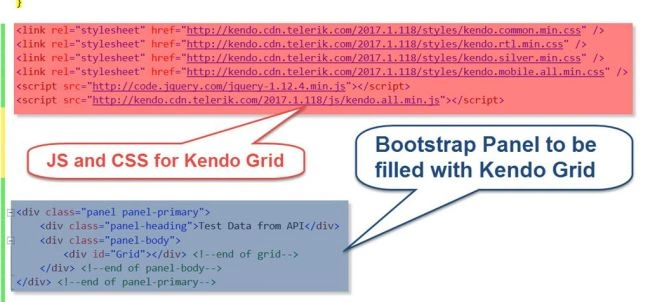
Code snippet
- <link rel="stylesheet" href="http://kendo.cdn.telerik.com/2017.1.118/styles/kendo.common.min.css" />
- <link rel="stylesheet" href="http://kendo.cdn.telerik.com/2017.1.118/styles/kendo.rtl.min.css" />
- <link rel="stylesheet" href="http://kendo.cdn.telerik.com/2017.1.118/styles/kendo.silver.min.css" />
- <link rel="stylesheet" href="http://kendo.cdn.telerik.com/2017.1.118/styles/kendo.mobile.all.min.css" />
- <script src="http://code.jquery.com/jquery-1.12.4.min.js"></script>
- <script src="http://kendo.cdn.telerik.com/2017.1.118/js/kendo.all.min.js"></script>
- <div class="panel panel-primary">
- <div class="panel-heading">Test Data from API</div>
- <div class="panel-body">
- <div id="Grid"></div> <!--end of grid-->
- </div> <!--end of panel-body-->
- </div> <!--end of panel-primary-->
Add the scripts given below to
- Get the data from Web API.
- Format received data to the respective types (string, numbers, date, etc).
- Enable filtering, sorting and grouping.
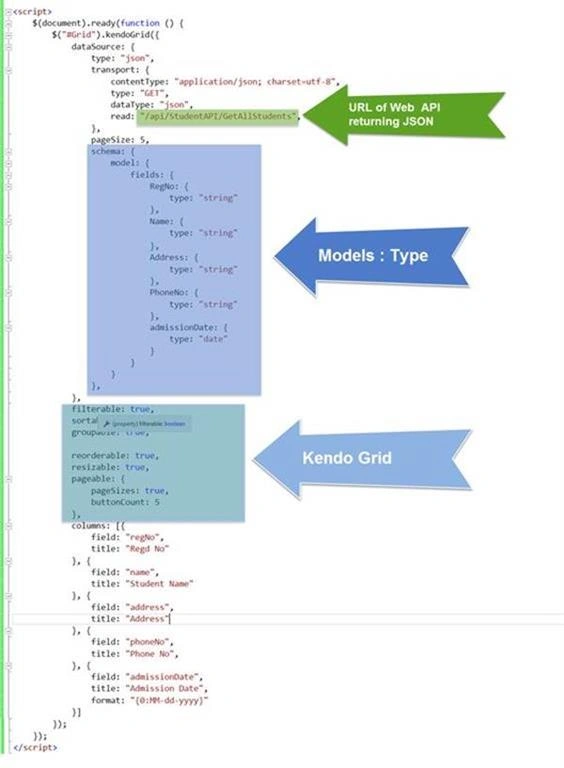
Code snippet
- <script>
- $(document).ready(function() {
- $("#Grid").kendoGrid({
- dataSource: {
- type: "json",
- transport: {
- contentType: "application/json; charset=utf-8",
- type: "GET",
- dataType: "json",
- read: "/api/StudentAPI/GetAllStudents",
- },
- pageSize: 5,
- schema: {
- model: {
- fields: {
- RegNo: {
- type: "string"
- },
- Name: {
- type: "string"
- },
- Address: {
- type: "string"
- },
- PhoneNo: {
- type: "string"
- },
- admissionDate: {
- type: "date"
- }
- }
- }
- },
- },
- filterable: true,
- sortable: true,
- groupable: true,
- reorderable: true,
- resizable: true,
- pageable: {
- refresh: true,
- pageSizes: true,
- buttonCount: 5
- },
- columns: [{
- field: "regNo",
- title: "Regd No"
- }, {
- field: "name",
- title: "Student Name"
- }, {
- field: "address",
- title: "Address"
- }, {
- field: "phoneNo",
- title: "Phone No",
- }, {
- field: "admissionDate",
- title: "Admission Date",
- format: "{0:MM-dd-yyyy}"
- }]
- });
- });
- </script>
Now, rebuild the solution and run it.
Navigate to ListData Method of Home Controller (http://localhost:2131/Home/ListData).
You will be able to see the screen given below.
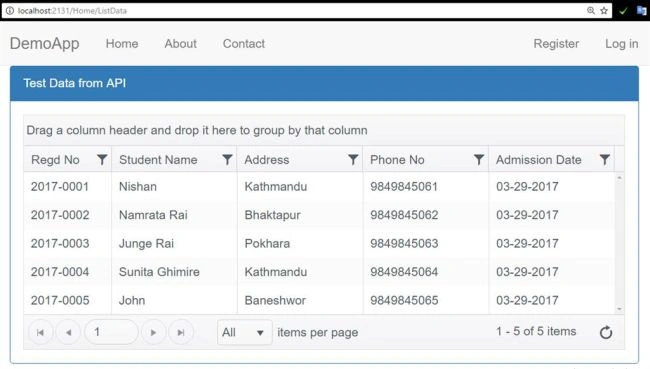
Now, you can enjoy Kendo Grid.

Sorting in Kendo Grid
Grouping in Kendo Grid
Summary
Thus, we have learned,
- How to create a simple ASP.NET Core Web Application.
- How to create a simple Web API in ASP.NET Core.
- Pass JSON data via Web API.
- How to use Web API in Kendo Grid.
- Sorting and grouping in Kendo UI.
Ricardo AranibarPosted May 3, 2017, 7:46 AM
Hi Nishan Aryal, I will like to kwnow about the use of licence of use Telerik Grid, is free?