

Introduction
In this article, you will see the use of the WebImage helper in the Web API. For using the WebImage helper we use the "System.Web.Helper" namespace. The WebImage helper is used for displaying and managing the image on the Web Page,.
The following are the properties of the WebImage Helper:
- FileName: It gets and sets the file name to the object of the WebImage Helper.
- ImageFormat: It Gets the format of the image, such as .jpg, .png, .jpeg
- Height: Gets the height of the Image in pixels.
- Width: Gets the width of the image in pixels.
The following are the methods of the WebImage Helper:
- Resize: Its use for resizing the image.
- RotateLeft: This method rotate the image to the left.
- RotateRight: This method rotate the image to the right.
- Clone: It copies the WebImage object.
- Crop: It crops the image.
Let's see an example.
Step 1
Create a Web API application as in the following:
- Start Visual Studio 2012.
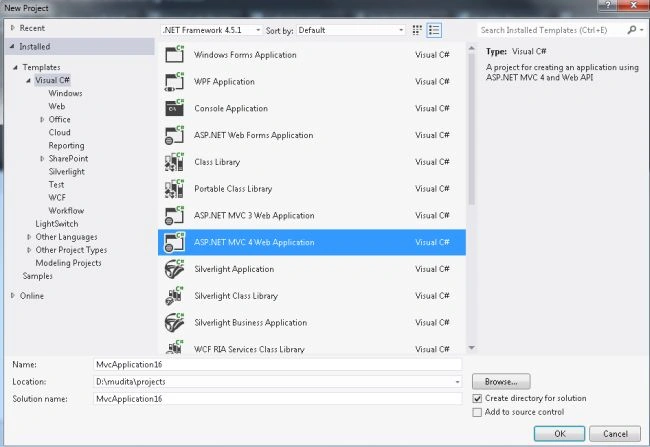
- From the Start window select "Installed" -> "Visual C#" -> "Web".
- Select "ASP.NET MVC4 Web Application" and click on the "Ok" button.
- From the "MVC4 Project" window select "Web API".
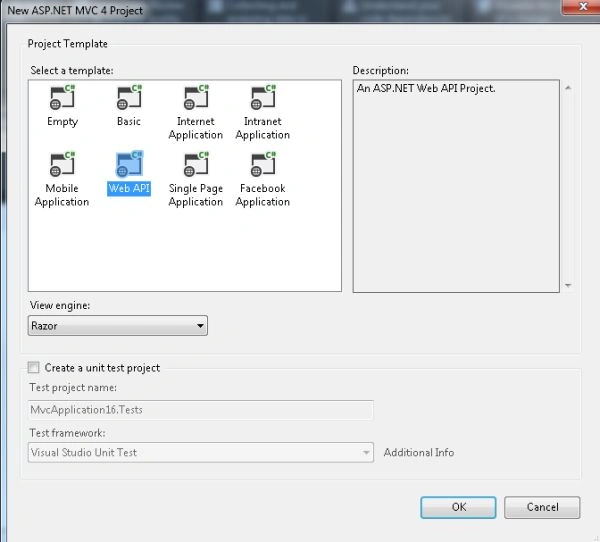
- Click on the "OK" button.
Step 2
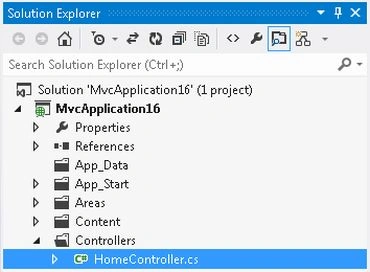
Now select the "HomeController".
- In the "Solution Explorer".
- Expand the Controller folder.
- Select the "HomeController".
Add the following code:
- using System;
- using System.Collections.Generic;
- using System.Linq;
- using System.Web;
- using System.Web.Helpers;
- using System.Web.Mvc;
- namespace MvcApplication16.Controllers
- {
- public class HomeController : Controller
- {
- public ActionResult Index()
- {
- return View();
- }
- public void SelectPicture()
- {
- WebImage img = new WebImage("~/images/Image1.jpg");
- img.Resize(200,200);
- img.FileName= "Image1.jpg";
- img.Write();
- }
- public void SelectPicture1()
- {
- WebImage img = new WebImage("~/images/Image2.jpg");
- img.Resize(250, 250);
- img.FileName = "Image2.jpg";
- img.Write();
- }
- public void SelectPicture2()
- {
- WebImage img = new WebImage("~/images/Desert.jpg");
- img.Resize(200, 200);
- img.FileName = "Desert.jpg";
- img.RotateLeft();
- img.Write();
- }
- }
- }
Step 3
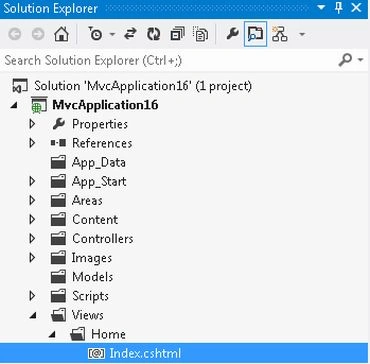
Now write some HTML code in the "index.cshtml" file. This file exists:
-
In the "Solution Explorer".
-
Expand "Views" folder.
-
Select "Home" -> "index.cshtml".
Add the following code:
- <html>
- <head>
- <title>Index</title>
- </head>
- <body>
- <div>
- <img src="@Url.Action("SelectPicture")" alt="" />
- <img src="@Url.Action("SelectPicture1")" alt="" />
- <img src="@Url.Action("SelectPicture2")" alt="" />
- </div>
- </body>
- </html>
Step 4
Execute the application as in the following:

Maq SaidPosted Jul 26, 2018, 9:52 PM
This WebImage Helper won't work with .net core. Do we have alternative solution.
Khaled SaiPosted Oct 20, 2015, 5:58 AM
Very useful