

In this article I demonstrate how to create a simple web part for SharePoint
2010 using
Visual studio 2010.
- Open Visual Studio 2010 -> File-> New Project
- You will get a screen as shown below
- From the below screen select Visual Web Part from SharePoint category
- Give proper name for your web part
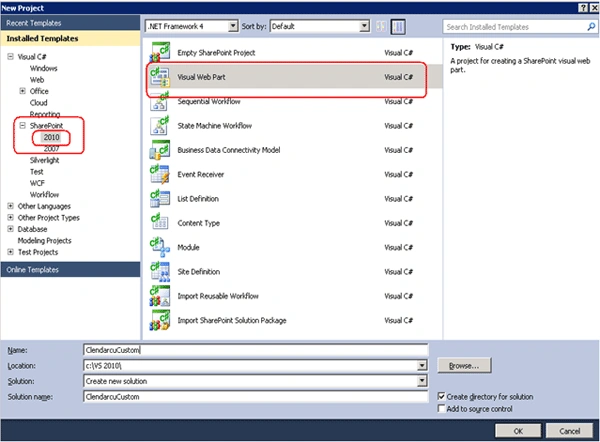
- Click OK
- Next you have to give the URL of the site where you want to debug or deploy
your webpart
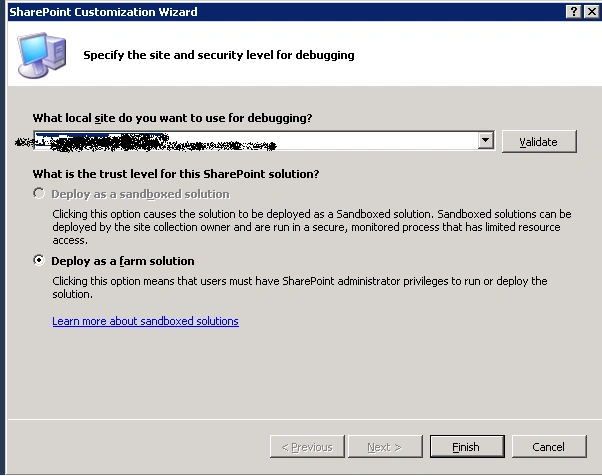
- Click Finish
- You will get the below Screen
- Just click on the Design Mode
- You will get the Design mode similar to normal ASP.net application
- You can Drag and Drop any control in to your page I just put a SharePoint
Calendar control
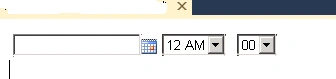
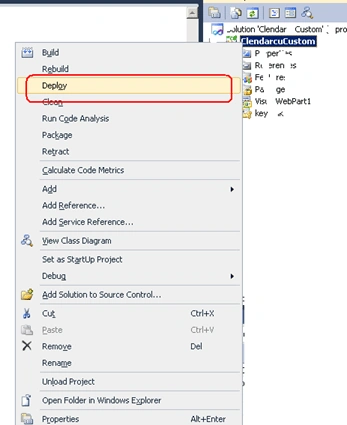
- You done with the web part .Now we can deploy it and test it
- Just right Click on the solution and click Deploy
- Now go to the site where you deployed.
- Just open the page in Edit Mode
- Then click on Add web part
- Just click on Custom, you can see your web part Add the webpart
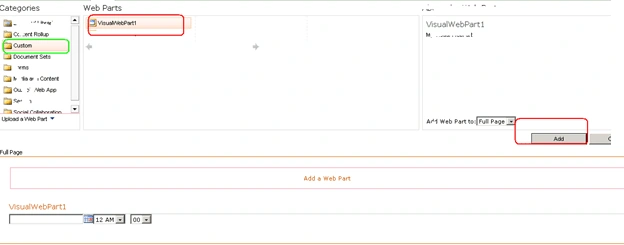
- You have deployed your web part and tested the same
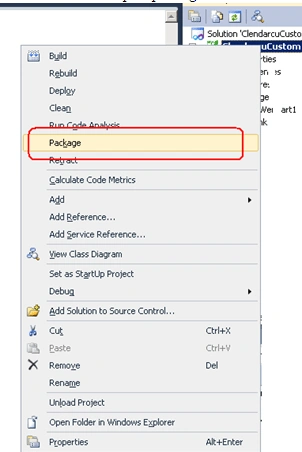
- Now next part, how to make it as a Package very easy just right click on the
solution
- It will make a web part package in the folder where we created this web part
- It's very simple to work with Visual studio 2010 to develop a web part for SharePoint 2010.
Rikam PalkarPosted May 4, 2020, 12:07 PM
Nice one article!! Keep contributing..
Gowtham RajamanickamPosted Apr 26, 2016, 3:14 AM
good article
Supreeth JPosted Oct 29, 2015, 1:06 AM
Helpfull thank you...!
Gymson VientePosted Nov 16, 2010, 3:52 AM
from the sharepoint viewpoint, im just thinking is it possible to install via vmware and access thru your local desktop?.. just for development purposes.