

My previous article was about how to pass parameters into screens in a LightSwitch application. Here we shall discuss how to make reference tables i.e. how to make a relationship among LightSwitch internal tables.
What is Data Relationship in LightSwitch Beta 2?
A relationship among Data helps you to create screens in which the related data work together.
For example, a screen that shows both Employees and their Projects. We can create, modify, or delete relationships between data by using the data designer in LightSwitch.
Multiplicity Settings in Relationship:
Multiplicity settings are used to specify how you want these tables to be related.
|
Entity one |
Entity two |
Description |
|
One |
Zero or one |
An "Entity one" can have one or no "Entity two", but an "Entity two" must have an "Entity one". |
|
One |
Many |
An "Entity one" can have many "Entity two" instances, but an "Entity two" must have an "Entity one". |
|
Zero or one |
One |
An "Entity one" must have an "Entity two", but an "Entity two" can have one or no "Entity one". |
|
Zero or one |
Many |
An "Entity one" can have many "Entity two" instances, and an "Entity two" can have one or no "Entity one". |
|
Many |
One |
An "Entity one" must have an "Entity two", but an "Entity two" can have many "Entity one" instances. |
|
Many |
Zero or one |
An "Entity one" can have one or no "Entity two", and an "Entity two" can have many "Entity one" instances. |
Deletion Behaviour Settings:
The following table describes the options that you can set to govern what happens when a user tries to delete a record that is part of a relationship. Some options may not be available for certain kinds of relationships
|
On Delete Behaviour Value |
Description |
|
Cascade delete |
When a "Table1" is deleted, delete all related "Table2" instances. |
|
Restricted |
"Table1" cannot be deleted if there are related "Table2" instances. For example, select Restricted to specify that a customer cannot be deleted if there are related orders in the database.
|
Navigation Property in Relationship:
Navigation properties help users navigate between areas of a screen that display related data. Navigation properties also appear as objects in IntelliSense, and you can use these objects to construct LINQ expressions in code.
For example,
Consider we are having two tables namely "Table1" and "Table2" and navigation property "NP1" and "NP2" respectively. Here the "NP1" represents the relationship on the table "Table1" to the application as like this the "NP2" represents the relationship which we created on the table "Table2" to the application.
Somehow we have discussed about the relationship among tables in LightSwitch.
Let us create a Demo LightSwitch application to show how to create reference tables. In this demo application we are going to create three tables namely "Employee", "Designation" and "Project". The "Designation" and "Project" table will be referenced by the "Employee" table.
Preparing the Solution:
Open Visual Stuido 2010; create a LightSwitch Desktop application with the name "CreatingReferenceTablesInLSBeta2" as shown in the figure.
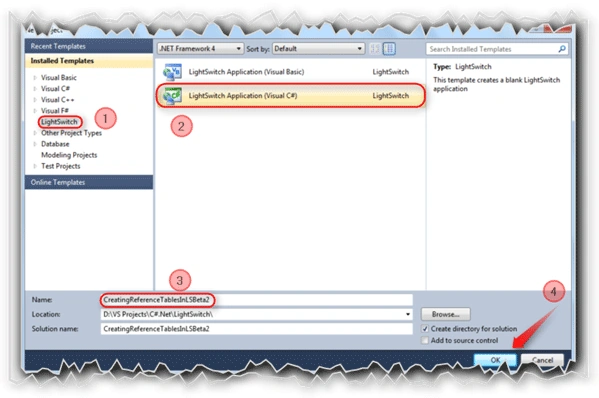
Follow the No: # to create the LightSwitch desktop application.
The Entity Designer:
Let us create a Table.

This is a new screen for Beta 2 which is not available in Beta 1. Select the rounded option to create a new table.
After clicking on the "Create new table" option, the Entity Designer will be displayed to create the Entity required.
For our demo application we need to create three tables to make the relationship among them.
Employee Table:
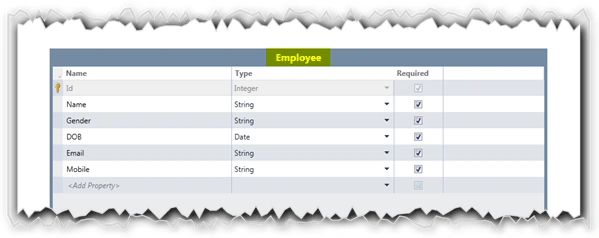
Note that, we have not created the Designation and Project fields in the Employee table.
Designation Table:
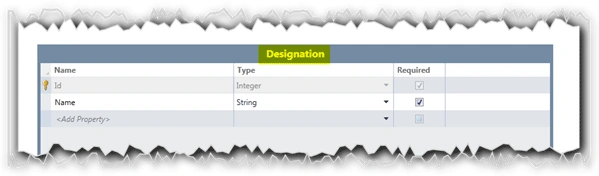
Project Table:
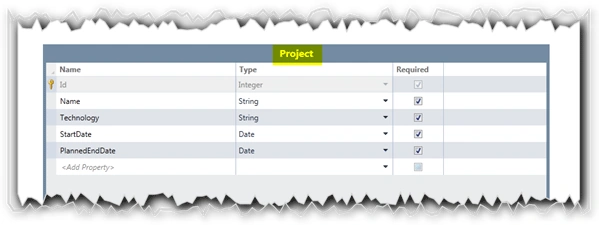
So we have created the three tables. Let us make the relationship among them.
To add the Relationship among tables just open the table to which we need to create a references. In our case, open the Employee table to make the reference of Designation and Project tables.
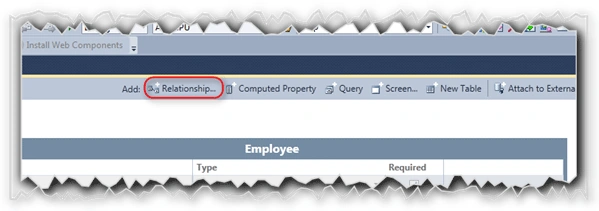
As shown in the above figure, click on the Relationship button at the top of the Entity designer.
Adding "Designation" Reference to Employee Table:
After clicking on the Relationship button, we will have the dialog window as like the following one.
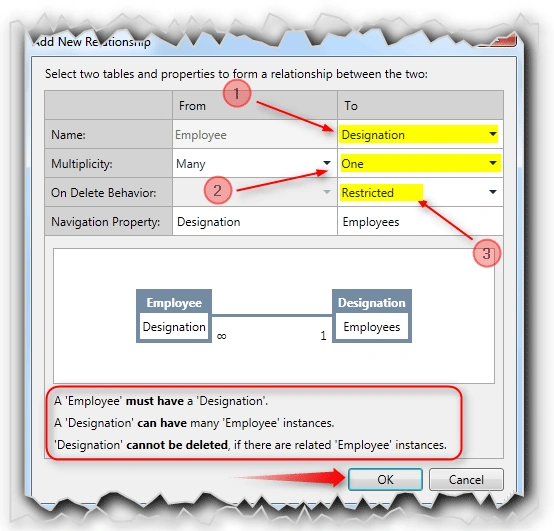
Here,
- The Employee Table will be selected in the "From" column. We need to select the table which is referenced by the Employee table. Here, for our demo application we have selected "Designation table.
- Select the Multiplicity property. We have selected "Many" for Employee table and "One" to Designation table. For more details refer the Multiplicity Settings table given above.
- Select the Deletion behaviour. We have selected "Restricted".
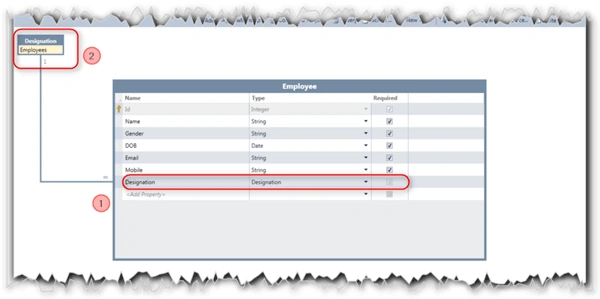
After adding the Relationship to the Employee table we will see a property called "Designation" and link specifying the reference added to the Table.
Adding "Project" Reference to Employee Table:
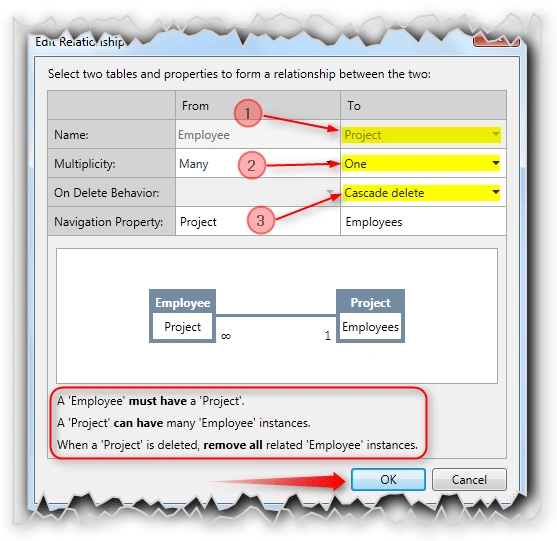
In this above figure, the only change here is the On Delete Behaviour. We have selected "Casecade Delete" for the Project relationship with Employee. If you delete the Project, the LightSwitch will delete all the employees who are committed with the Project.
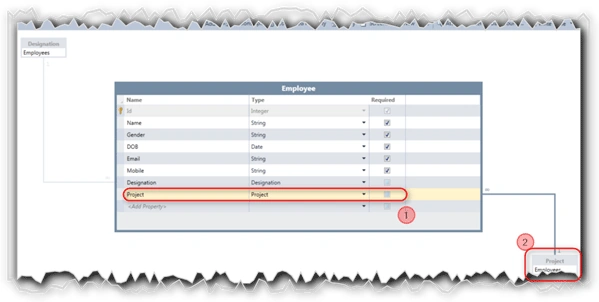
The above figure shows us the relationship among three tables.
Quick Note:
We cannot specify a one-to-one, zero or one-to-zero or one, and many-to-many relationship by using the LightSwitch data designer.
Adding the Screens:
As we have three tables, we need to create three screens.
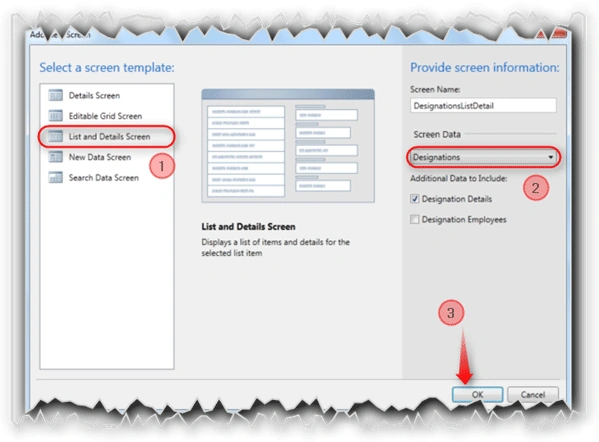
Follow the No: # to create a List and Details screen for the Designation table.
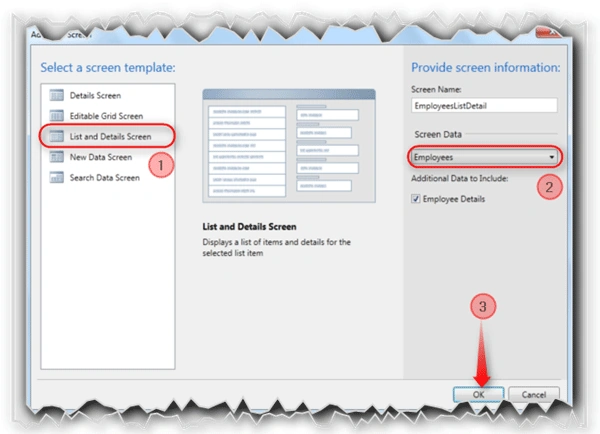
To create List and Details screen for the table Employee, follow the No: # specified.
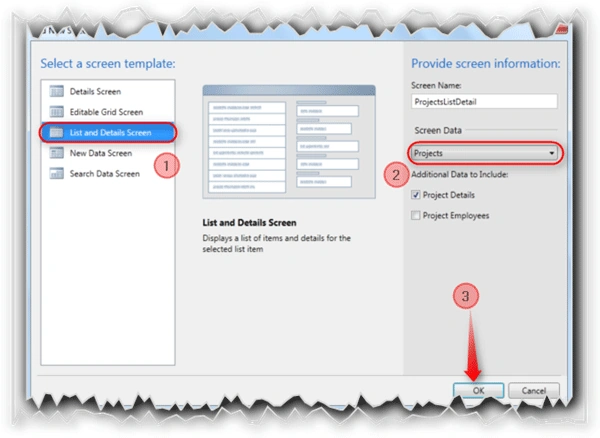
As shown in the figure, create a List and Details screen for the Project table.
That's It. Without a single line of code we have created an application to store the employee information.
Press F5 to see the application in action.
Application in Action:
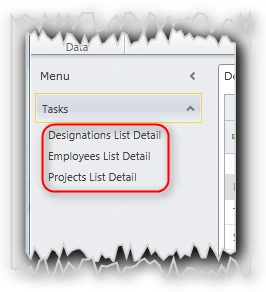
Add some records to the database using those three screens.
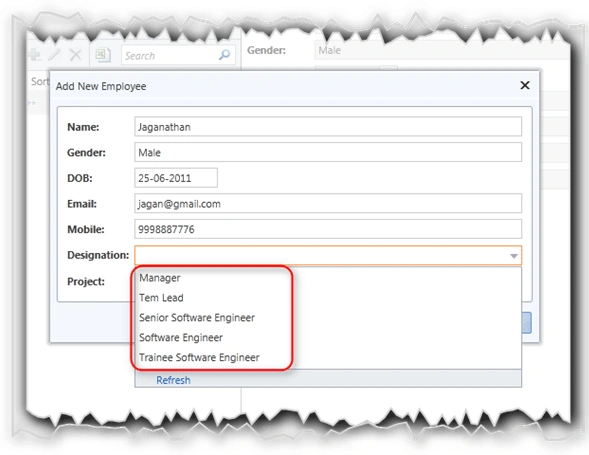
After adding the Designation and Project records, just add three records to Employee table. Here the Designation property will have the collection of Designation as we have referenced to the Designation table.
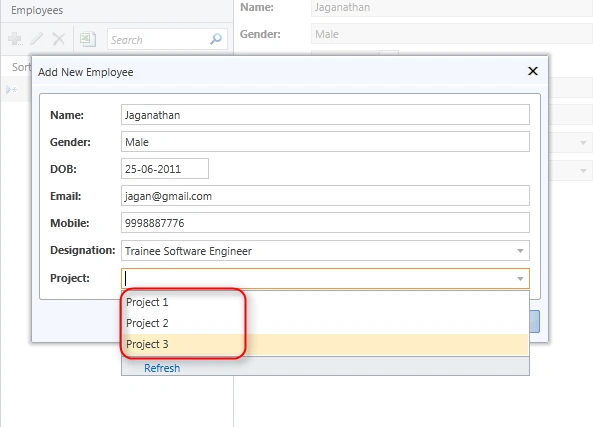
Here the Project collection is displayed for the Project property in the Employee screen as we have referenced to the Project table.
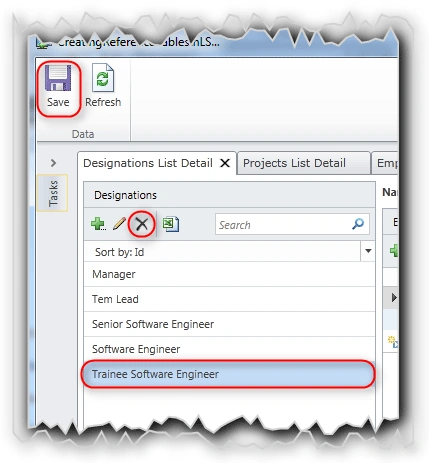
As shown in the figure, go to the Designations List Details screen and Delete an Item as shown in the above figure.
As it has the "Restricted" On Deletion Behavior it won't allow you to delete.
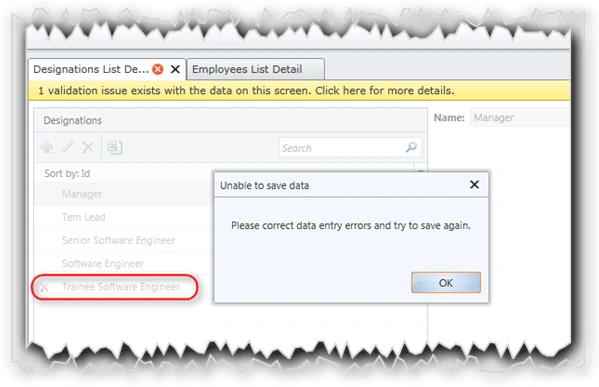
The above figure shows the validation error as the result of reference table.
Now delete the Project1 entry in the Project table. It will delete the two employees in the Project1.
As we have selected the "Casecade Delete" for On Deletion Behavior setting in the relationship among Employee table and Project table the employee records were deleted when deleted the Project1.
Summary:
In this article, we have seen how to create and use the reference tables in a LightSwitch application.
Thanks for spending your precious time here. Please provide your valuable feedbacks and comments, which enable me to give a better article the next time.
Thanks.
jose martinPosted Jul 15, 2013, 12:22 PM
The issue is that you have to create everything from scratch again, i mean custom forms, different ways to present the data, that is not the same as the default when you create the screen, and takes time, so what i want is just add a new relation, usually a new entity related with the main entity and add it to the screen i am working on. But when i do that, the related data doesn?t seems to refresh.
Jaganathan BantheswaranPosted Jul 5, 2013, 5:16 AM
Why do you want to relate the data after creating screen?. In this case, delete & create the screen again. Is there any issue in this?
jose martinPosted Jul 4, 2013, 4:37 PM
Hello Jaganathan great article, one question, how can i relate the data on the screen if this screen is already created, i mean i can create the relationship but the data doesn?t seem to refresh the related data if i do the relationship after making the screen. Thank you very much Carlos