Introduction
This post explains how to create a basic Web application that uses ASP.NET Dynamic Data. ASP.NET Dynamic Data provides the Web application scaffolding that enables you to build rich data-driven Web applications.
scaffolding is mechanism that enhance the functionality of the existing ASP.NET Framework by adding the ability to dynamically display pages based on the data model of the database.
Creating a Dynamic Data Web site
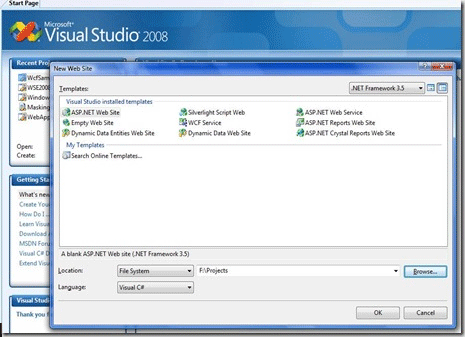
We can use web site template to create a Dynamic Data Web Site.
The following steps explains the procedure
- Start Visual Studio 2008.
- Go to File menu, click New Web Site, New web site dialogue box is displayed.

- Select the Dynamic Data Web Site Template from the above dialogue box.
- In the Location box type the name for the web site and click ok.
Adding the Data to Web site
Add a database to the project and create the database model.
To Add the database file to project.
- In solution explorer, Right click the App_Data folder and click Add Existing Item.
- Enter the AdventureWorks_Data.mdf name location file in location box.
The next step is create the Data model
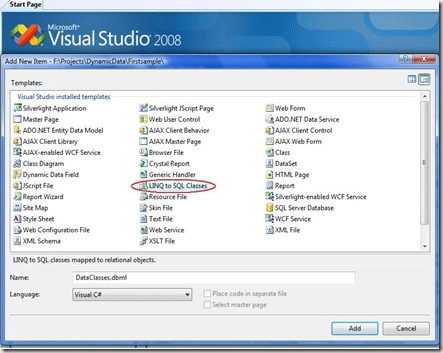
To create the data model using LINQ to SQL
- Right click the solution explorer and then click Add New Item.

- Click Add the following dialogue will appear

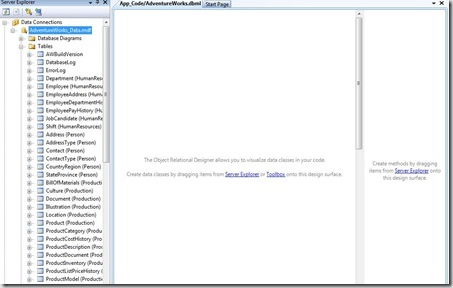
Object Relational Designer is displayed. In the O/R Designer, Click the Server Explorer link
- From Database Explorer, under data connections, expand the database file node and then table node.
- Drag all tables into the O\R designer. Each table represented as entity.
Register the data context
- Open the Global.asax file.
- model.RegisterContext(typeof(AdventureWorksDataContext),
new ContextConfiguration() { ScaffoldAllTables = true });
- The above line in Global.asax file registers the LINQ to SQL data context for Dynamic data web site.
Testing Dynamic Data web site
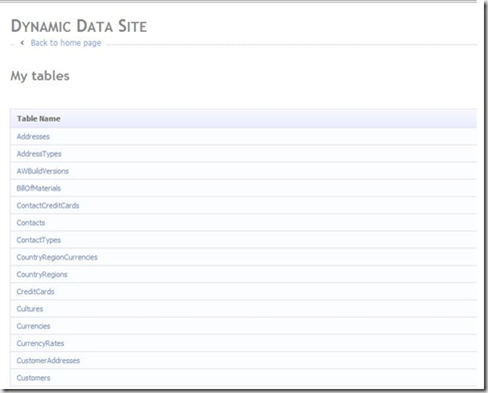
- In Solution explorer, right-click the Default.aspx page, and then click on view in browser.
- The following screen shows the browse page

- Using the above site you can add/edit/delete the data in a particular table.