Introduction:
Here we will learn how we can insert a file into a database and then how we can retrieve the file from the database.
On this I have seen so many people that face problems such as inserting a file and then retrieving that file from the database. This article will demonstrate the basic idea and a basic method to perform our task.
Background:
First inserting files into the database is not as easy as inserting a string or integer data. Whenever we want to insert files or images we must convert them into a byte array to be inserted into the Database.
This article also explains for you how to use a muulti-tier architecture design with which we can avoid unnecessary errors. I will explain how to perform this task and everything step-by-step; follow the steps bellow.
Step's:
Create Database and table named Articles and TblUploadDownLoad with the following script.
Create Table TblUploadDownLoad
(
FileId Int Primary Key,
[FileName]Varchar(200),
Extension char(10),
FileData VarBinary(max)
)
Also create a stored procedure for adding files, getting filename and id and for getting data of file on the basis of fileid.
1. For adding Files
Create Procedure Sp_AddFiles
(
@fname Varchar(200),
@ext char(10),
@fdata VarBinary(max)
)
As
Begin
Insert Into TblUploadDownLoad(FileName,Extension,FileData)
Values(@fname,@ext,@fdata)
End
2. For retriving filename and id of file.
Create Procedure Sp_GetFileNames
As
Begin
Select FileId,FileName From TblUploadDownLoad
End
3. For Retriving File Data and extension of the file
Create Procedure Sp_GetFile
(
@fid int
)
As
Begin
Select FileData,Extension From TblUploadDownLoad Where FileId=@fid
End
Now our database work has been done. Now we will create our Data Access Layer Class which will transfer our data from our Logic Class to DataBase and retrieve the Data From Database. Here are three methods written for a particular task; we will see how they work. Before any task cover your application configuration. Here I'm storing my connection string in web.config file. Just go to config file and change the connection string according to your settings.
Web.config
<connectionStrings>
<add name="sqlcn" providerName="System.Data.SqlClient" connectionString="Data Source=Server2;User Id=sa;Password=123;DataBase=ARTICLES"/
</connectionStrings>
1. Declaration:
static SqlConnection sqlcn;
static SqlCommand sqlcmd;
static SqlDataAdapter sqlda;
static SqlDataReader sqldr;
static int _records;
static string _ext;
public static string Ext
{
get { return DataHelper._ext; }
set { DataHelper._ext = value; }
}
static DataHelper()
{
sqlcn = new SqlConnection(ConfigurationManager.ConnectionStrings["sqlcn"].ConnectionString);// this is stored in web.confige file.
}
public static int Records
{
get { return DataHelper._records; }
set { DataHelper._records = value; }
}
2. Method To Execute The Stored Procedure for adding file to our database. Which will take name of the procedure and required parameter as input.
public static void ExecuteProcedure(string _procedurename, SqlParameter[] sqlparam)
{
try
{
sqlcn.Open();//opening connection
sqlcmd = new SqlCommand(_procedurename, sqlcn);//preparing command //object
foreach (SqlParameter p in sqlparam)
{
sqlcmd.Parameters.Add(p);
//attaching parameters required to procedure.
}
sqlcmd.CommandType = CommandType.StoredProcedure;
_records = sqlcmd.ExecuteNonQuery();
//executing the query
}
catch (Exception)
{
throw;
}
finally
{
sqlcn.Close();
}
}
3. Method to retrieve resultset only filenames and id from Database which will return dataset object. You might have a doubt about what is ResultSet; it's nothing new; whenever we make a request for data to Database, first the Database will prepare a Resultset object and it returns this ResultSet object.
public static DataSet GetFileNames(string _sql, SqlParameter[] Param)
{
try
{
sqlcmd = new SqlCommand(_sql, sqlcn);
foreach (SqlParameter p in Param)
{
sqlcmd.Parameters.Add(p);
}
sqlcmd.CommandType = CommandType.StoredProcedure;
sqlcn.Open();
DataSet ds = new DataSet();
sqlda = new SqlDataAdapter(sqlcmd);
sqlda.Fill(ds);
return ds;
}
catch (Exception)
{
throw;
}
finally
{
sqlcn.Close();
}
}
4. Method to retrieve the filedata which is in binary form from Database. Which will take Name of the procedure and required parameter as input.
public static byte[] GetFileFromDB(SqlParameter[] Param, string _procname)
{
try
{
byte[] file = null;
sqlcn.Open();
SqlCommand sqlcmd = new SqlCommand(_procname, sqlcn);
sqlcmd.CommandType = CommandType.StoredProcedure;
foreach (SqlParameter para in Param)
{
sqlcmd.Parameters.Add(para);
}
sqldr = sqlcmd.ExecuteReader();
if (sqldr.Read())
{
file = (byte[])sqldr[0];
_ext = sqldr[1].ToString();
}
return file;
}
catch (Exception)
{
throw;
}
finally
{
sqldr.Close();
sqlcn.Close();
}
}
Now our DataHelper Class is also ready. Now we are ready to consume our DataHelper class. In what way you want to consume it you can. Here I'm using it through one more layer class i.e. Upload.cs which also contain methods to transfer the data from our presentation layer to Data Layer. This class contain three methods for particular task. Like adding file, getting filenames and id and retrieving filedata.
These methods perform their work of transfering data only. Now we will see how those methods work.
1. For adding files, you can see here how you can prepare parameter which are required for our stored procedure.
public bool UploadFile(string _filename, byte[] _filedata, string _ext)
{
string _spname = "Sp_AddFiles";// our Sp name
SqlParameter[] Param = new SqlParameter[3];
Param[0] = new SqlParameter("@fname", SqlDbType.VarChar, 200);
Param[0].Value = _filename;
Param[1] = new SqlParameter("@ext", SqlDbType.Char, 10);
Param[1].Value = _ext;
Param[2] = new SqlParameter("@fdata", SqlDbType.VarBinary);
Param[2].Value = _filedata;
DataHelper.ExecuteProcedure(_spname, Param);
if (DataHelper.Records > 0)
return true;
else
return false;
}
2. For retrieving filenames and Id of files. Here you can see how you can collect the Dataset object return by our DataHelper class.
public DataSet GetFileNames()
{
string _sql = "Sp_GetFileNames";
SqlParameter[] Param = new SqlParameter[0];
DataSet ds = DataHelper.GetFileNames(_sql, Param);
return ds;
}
3. This method is for retrieving actual file content which are present in binary form in our database. Our DataHelper class only returns the byte array of that binary data. This method takes the field as input and again return the byte array.
public byte[] GetFile(int _fid)
{
byte[] _file = null;
SqlParameter[] Param = new SqlParameter[1];
Param[0] = new SqlParameter("@fid", SqlDbType.Int);
Param[0].Value = _fid;
_file = DataHelper.GetFileFromDB(Param, "Sp_GetFile");
_ext = DataHelper.Ext;
return _file;
}
Now our business logic class is also ready; now we are ready to transfer and to retrive data from DataHelper and Presentation Layer. Now we will move to Presentation Layer.
1. Design Screen to Add files to Data like bellow.

In button click write this code to read the file selected by user into a byte array. And pass this data to our business logic class. First create the object of our business logic class like:
Upload obj = new Upload();
Button_click event.
try
{
if (FileUpload1.HasFile)
{
Int32 intfileSize = 0;
Stream fileStream = null;
// Gets the Size of the File
intfileSize = FileUpload1.PostedFile.ContentLength;
// Reads the File
fileStream = FileUpload1.PostedFile.InputStream;
byte[] fileContent = new byte[intfileSize + 1];
int intStatus = 0;
intStatus = fileStream.Read(fileContent, 0, intfileSize);
string ext=System.IO.Path.GetExtension(FileUpload1.FileName.ToString());
if (obj.UploadFile(FileUpload1.FileName.ToString(),fileContent,ext))
{
Label1.Visible = true;
Label1.Text = "File Uploaded";
}
}
}
catch (Exception)
{
Throw;
}
This will read the file data and prepare the byte array as well; it calls the Method of our business logic class for inserting the data.
Now we will see how we can retrieve this uploaded file again; just design the screen like bellow.
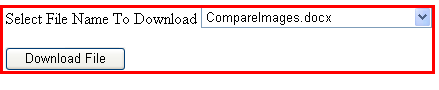
Now in Page_Load bind the DropDownList with filenames and Id of that file like bellow.
if (!IsPostBack)
{
DataSet ds = obj.GetFileNames();
DropDownList1.DataSource = ds.Tables[0];
DropDownList1.DataTextField = "FileName";
DropDownList1.DataValueField = "FileId";
DropDownList1.DataBind();
}
And in button click write following line of code.
try
{
byte[] fileData = obj.GetFile(int.Parse(DropDownList1.SelectedValue));
Response.ClearContent();
Response.AddHeader("Content-Disposition", "attachment; filename=" + DropDownList1.SelectedItem.Text.ToString());
BinaryWriter bw = new BinaryWriter(Response.OutputStream);
bw.Write(fileData);
bw.Close();
Response.ContentType = ReturnExtension(obj.Ext);
Response.End();
}
catch (Exception)
{
throw;
}
It will ask you what you want to do, either open that file or save that file. And now take a look at the ReturnExtension Method.
private string ReturnExtension(string fileExtension)
{
switch (fileExtension)
{
case ".htm":
case ".html":
case ".log":
return "text/HTML";
case ".txt":
return "text/plain";
case ".docx":
return "application/ms-word";
case ".tiff":
case ".tif":
return "image/tiff";
case ".asf":
return "video/x-ms-asf";
case ".avi":
return "video/avi";
case ".zip":
return "application/zip";
case ".xls":
case ".csv":
return "application/vnd.ms-excel";
case ".gif":
return "image/gif";
case ".jpg":
case "jpeg":
return "image/jpeg";
case ".bmp":
return "image/bmp";
case ".wav":
return "audio/wav";
case ".mp3":
return "audio/mpeg3";
case ".mpg":
case "mpeg":
return "video/mpeg";
case ".rtf":
return "application/rtf";
case ".asp":
return "text/asp";
case ".pdf":
return "application/pdf";
case ".fdf":
return "application/vnd.fdf";
case ".ppt":
return "application/mspowerpoint";
case ".dwg":
return "image/vnd.dwg";
case ".msg":
return "application/msoutlook";
case ".xml":
case ".sdxl":
return "application/xml";
case ".xdp":
return "application/vnd.adobe.xdp+xml";
default:
return "application/octet-stream";
}
}
You may wonder why we have taken the extension field in DataBase and again we are using this extension here only to specify the file type; either it is text, word or another file.
Conclusion:
In this way you can prepare your Upload/Download of file to Sql Server. You may think again why I wrote this article; there are so many articles that already exist. The reason is how to explain how you can do these things easily and how you can avoid the general errors occurring while inserting or retrieving data from DataBase. Any comments and queries are heartily appreciated.