This step by step tutorial shows how to build a class library (DLL) for Silverlight 2.0 using Visual Studio 2008 and C# and how to use it in a client application. First part of this tutorial creates a class library and second part creates a Silverlight Web application that consumes the class library.
Part 1. Create a Silverlight Class Library
In the first part, we will create a class library for Silverlight. This library will have some mathematical function including random number generator, addition, power, and square root.
Step 1. Create a Silverlight Class Library Project
Select New Project menu item in Visual Studio 2008 and select Visual C# or Visual Basic .NET in the left side project types and Silverlight Class Library in the right side templates. At the bottom of the dialog, enter your class library name and click OK button. I give my class library name SilverlightMathLibrary as you can see in Figure 1.
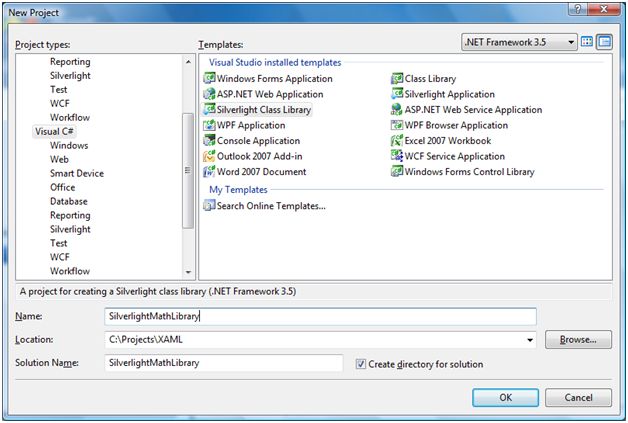
Figure 1. Create a Silverlight Class Library project
Clicking OK button will create a class library for you and bring you in the code editor and class called Class1. First thing I do is change class name from Class1 to McMathLibrary.
public class McMathLibrary
{
public string AddString(string firstString, string secondString)
{
return firstString + ", " + secondString;
}
}
Step 2. Adding Class Library Methods
Now, there are two ways to add class library properties and methods – by hand or using the Visual Studio 2008 designer. If you are an expert programmer, you can start adding your code to the class by hand. But if you are not an expert programmer, designer is a big help.
Here is an example of me adding a method AddString to the class library by hand.
namespace SilverlightMathLibrary
{
public class Class1
{
public string AddString(string firstString, string secondString)
{
return firstString + ", " + secondString;
}
}
}
Now let’s see how we can use the designer.
First, you need to click on View Class Diagram button in the Solution Explorer. See Figure 2.
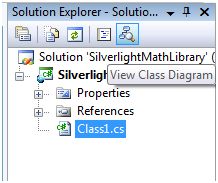
Figure 2. View Class Diagram
This option creates a ClassDiagram.cd file and opens it in the class diagram designer as you can see in Figure 3. If you right click on the class name, you will see options to add methods, properties, fields, events and other class members. You will also see options to refactor the class, set intellisense options, show base and derived classes, and so on.
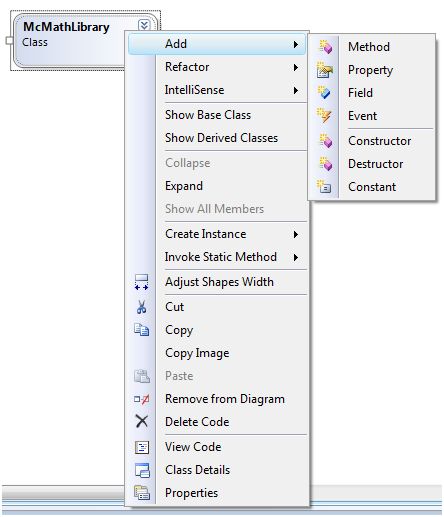
Figure 3. Class Diagram options
If you click on Add Method menu item, you will see Figure 4. I type a method name RandomNumber .

Figure 4. Add Method
As soon you are done editing, you will see the class members grid and methods, properties, fields, and events. If you do not see the grid by default, right click on the method name and select Class Details meni item.
If you expand RandonNumber, you can add parameters to it. I add two int type parameters to the method as seen in Figure 5.

Figure 5. Add Method Parameters
This option adds the following code to your class.
public int RandomNumber(int min, int max)
{
}
Now , I add random number generator code to the RandomNumber method, which looks like following.
public int RandomNumber(int min, int max)
{
Random random = new Random();
return random.Next(min, max);
}
Personally, I like typing and found it faster than using the designer to generate code for me. I add one more method called RandomString to the library with two parameters – int and bool. This method generates a random string for the given size and if lowercase value is true, generates the string in lowercase.
public string RandomString(int size, bool lowerCase)
{
StringBuilder builder = new StringBuilder();
Random random = new Random();
char ch;
for (int i = 0; i < size; i++)
{
ch = Convert.ToChar(Convert.ToInt32(Math.Floor(26 * random.NextDouble() + 65)));
builder.Append(ch);
}
if (lowerCase)
return builder.ToString().ToLower();
return builder.ToString();
}
Step 3. Adding Class Library Properties
Similarly, if you select Add Property option, you will see property name and related type and modifiers as shown in Figure 6.
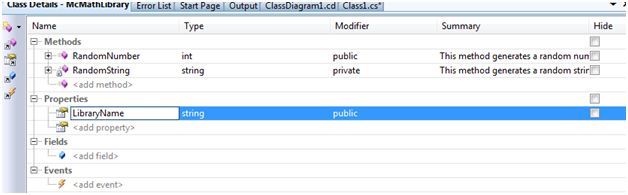
Figure 6. Add a Property
Here is the code generated for the property.
public string LibraryName
{
get
{
throw new System.NotImplementedException();
}
set
{
}
}
I change the above code with the following code to implement the fully functional property.
protected string libName = "McMathLibrary";
public string LibraryName
{
get
{
return libName;
}
set
{
libName = value;
}
}
Step 4. Build the Project
Now you just build your project and your class library is ready to use.
Part 2. Create a Silverlight Class Library Consumer Application
This second part of this tutorial shows how to create a Silverlight consumer application to consume the class library we created in the earlier step.
Right click on the solution and add a new project by selecting Add >> New Project from the menu. On the Add New Project page (see Figure 7), select Visual C# in the left side pane and Silverlight Application in the right side pane, give name of the project to ConsumerApp and click OK.
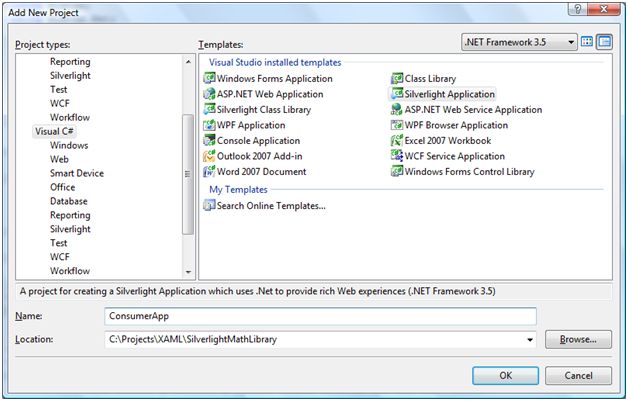
Figure 7. Create a Silverlight Application
Now, we need to add reference to the class library we just created in the earlier step.
Select ConsumerApp project and right click on the References folder in the Solution Explorer. Now select Add Reference and choose SilverlightMathLibrary from the Projects tab (See Figure 8). Alternatively, you can go to the Browse tab and browse the SilverlightMathLibrary.dll from the folder where you created the class library on your machine.
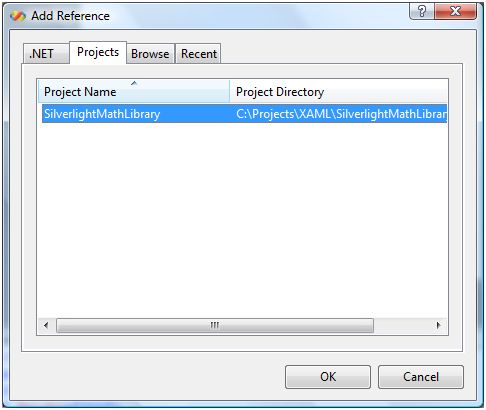
Figure 8. Add a Reference to SilverlightMathLibrary
Now, open Page.xaml and add a TextBox and two button controls and add the click event handlers for both of the buttons. The below code adds a TextBox and two Button controls and their click event handlers.
<Grid x:Name="LayoutRoot" Background="White">
<StackPanel Margin="20,10,0,0" Orientation="Horizontal" HorizontalAlignment="Left" VerticalAlignment="Top" >
<TextBox x:Name="OutputTextBox" Width="200" Height="30"></TextBox>
<Button x:Name="StringButton" Width="100" Height="30" Content="Generate String"
Click="StringButton_Click" >
</Button>
<Button x:Name="NumberButton" Width="100" Height="30" Content="Generate Number"
Click="NumberButton_Click" >
</Button>
</StackPanel>
</Grid>
Next, open the code behind of Page.xaml and add reference to the SilverlightMathLibrary by adding the following line at the top of the class.
using SilverlightMathLibrary;
Now your library is ready to use. If you type following code, you will see available methods and properties and their syntaxes in the Intellisense.
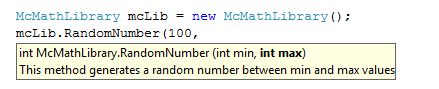
Figure 9.
On StringButton and NumberButton click event handlers, I call RandomString and RandomNumber methods of the class library to generate a random string and random number and display the result in the TextBox.
private void StringButton_Click(object sender, RoutedEventArgs e)
{
McMathLibrary mcLib = new McMathLibrary();
OutputTextBox.Text = mcLib.RandomString(5, false).ToString();
}
private void NumberButton_Click(object sender, RoutedEventArgs e)
{
McMathLibrary mcLib = new McMathLibrary();
OutputTextBox.Text = mcLib.RandomNumber(100, 1000).ToString();
}
Now let’s build and run the application.
When I click on Generate String button, the output looks like Figure 10 and when I click on Generate Number, the output looks like Figure 11.

Figure 10.

Figure 11.
Summary
In this step by step tutorial, we learned how to create a class library (DLL) for Silverlight 2.0 using Visual Studio 2008 and C# and how to use it from a Silverlight consumer application.