This article has been excerpted from book "A Programmer's Guide to ADO.NET in C#".
Let's take a quick look at OleDb data adapters. Actually, all data adapters (Sql, OleDb, and ODBC) Work exactly the same way. I'll take you through a quick step-by-step tutorial on how to use Old Db data adapters. To give you more of you more of a variety, you're going to use OleDb with an Access 2000 database.
As you already know, the first step in working with ADO.NET is to add a new connection using the Server Explorer. For the purpose of consistency, I've used the Northwind Microsoft access 2000 database for These Example. Feel free, however, to use any data source that has an OLEDB provider available on your machine.
In the Data Link properties dialog box, choose the Microsoft Jet 4.0 OLD DB provider (see figure 4-35).

Figure 4-35. Choosing the OLE DB driver for access
And the database is C:\NorthWind.mdb, as you can see in figure 4-36.
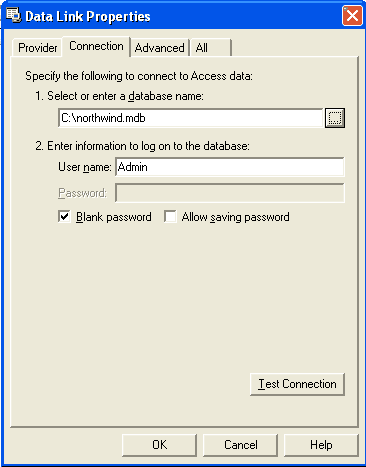
Figure 4-36. Choosing the database in server Explorer
Adding an OleDbData Adapter
Working with either OleDbDataAdapter or an ODBCDataAdapter is the same as working with the SqlDataAdapter. You can use either the Server Explorer or the Data Adapter Configuration Wizard to create an OleDb data adapter. In this example, I'll use the Data Adapter Configuration wizard. Drop an OleDbDataAdapter Control from Toolbox > Data to your application form. This action will bring up the Data Adapter Configuration wizard.
On the second page of the wizard, choose your Data Connection, you can either create a new connection or pick an existing connection (see figure 4-37).
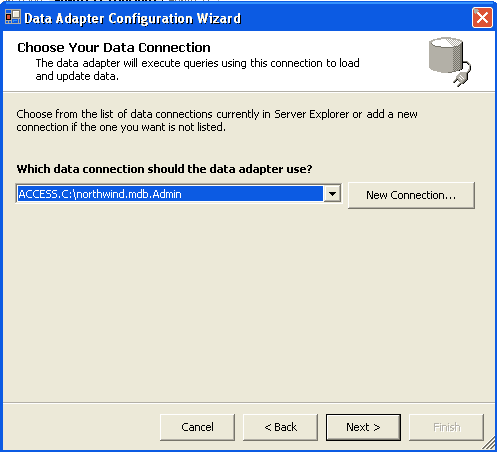
Figure 4-37. Configuring an Ole Db data adapter for access
On the next page select the use SQL statement option and click the Next button (see figure 4-38).
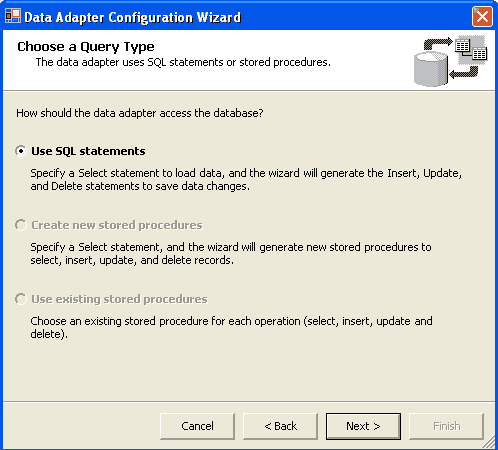
Figure 4-38. Choosing the query type in the Data Adapter configuration wizard
This will bring you to the Add table selection page. As you can see from figure 4-39, I'm picking the Orders table. Then click the add button.
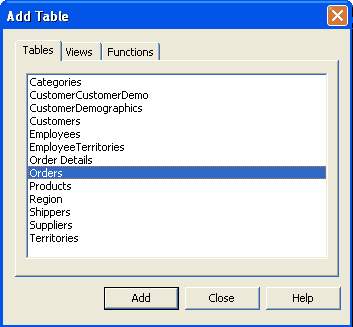
Figure 4-39. Adding a table to the query in the Data Adapter Configuration wizard
After clicking Add, the Query Builder brings up a table column selector, as shown in figure 4-40.
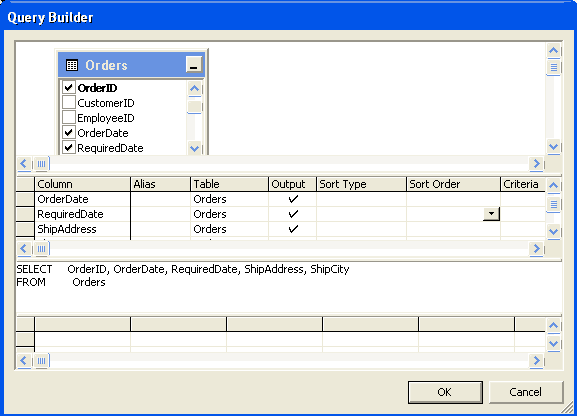
Figure 4-40. Choosing columns for the query in the Data Adapter Configuration wizard
I choose OrderID, OrderDate, ShipAddress, ShipCity, and RequiredDate for my query by checking the columns in the orders window. This builds the query shown in the third pane of the Query Builder. Clicking OK displays the final query, as shown in figure 4-41.

Figure 4-41. Generating the SQL statements in the Data Adapter Configuration wizard
Clicking on the advances option button bring up the advanced SQL Generation Option dialog box, as shown in figure 4-42.
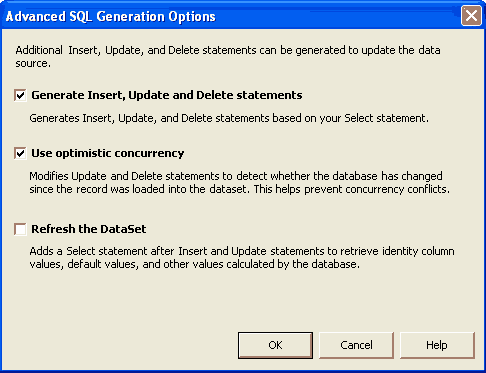
Figure 4-42. Advanced options in the Data Adapter Configuration wizard
In this dialog box can opt not to generate INSERT, UPDATE, or DELETE statements by turning off the first option. This is useful if you're planning on only reading the database and don't want all this extraneous code generated.
The second Option, use Optimistic Concurrency Cause the wizard to use Optimistic Concurrency. Optimistic Concurrency Checks to see if the row being updated in the database has already been changed by someone else during the update process. The data provider manages this by using a WHERE clause in the UPDATE statement that checks for the original data in the dataset. If it doesn't find the original data, it won't update the data source. A data provider maintains two sets of parameters: one with the original data and one with the current data. The current data parameters work in the UPDATE statement (this is the data you're trying to update the database with), and the original data parameters work in the WHERE Clause (these parameters are the check to make sure the database hasn't been updated). If you turn off the use optimistic concurrency option, the WHERE clause only contains the primary key and no original parameter data is generated. You can probably turn this off to speed things up if the application is only for single user. Below are the differences between the Select statements generated with optimistic concurrency on and off.
This is the code with optimistic concurrency turned off:
oleDbUpdateCommand1.CommandText = @"UPDATE Orders SET OrderDate =?, "+ "RequiredDate = ?, ShipAddress = ?, ShipCity = ? WHERE (OrderID = ? )"+ "AND (OrderDate = ? OR ? IS NULL AND OrderDate IS NULL) AND "+ "(RequiredDate = ? OR ? IS NULL AND RequiredDate IS NULL) AND "+ " (ShipAddress = ? OR ? IS NULL AND ShipAddress IS NULL) AND "+ "(ShipCity = ? OR ? IS NULL AND ShipCity IS NULL)";
This is the code with optimistic concurrency on:
this.oleDbUpdateCommand1.CommandText = @"UPDATE Orders SET OrderID =?, " + "OrderDate = ?, RequiredDate = ?, ShipAddress = ?, ShipCity = ?" + "WHERE (orderID = ?) AND (OrderDate = ?) AND (RequiredDate = ?) " + "AND (ShipAddress =?) AND (ShipCity = ?)";
"SELECT OrderID, OrderDate, RequiredDate, ShipAddress, " + "ShipCity FROM Orders WHERE (OrderID = ?)";
You may also notice the SQL Select statement tacked onto the end of the SQL UPDATE statement. The Refresh the Dataset option adds this statement. Turning this option off will remove the Select statement. You had to uncheck this for the OleDb adapter or else Insert and Update don't work. This isn't true, however for the SqlServer adapter.
Clicking next bring up the results screen. As you can see in figure 4-43, the Data Adapter Configuration wizard has done quite a bit of work! It's generated all of the commands for the adapter, all of the mapping and although not indicated all of the parameters.
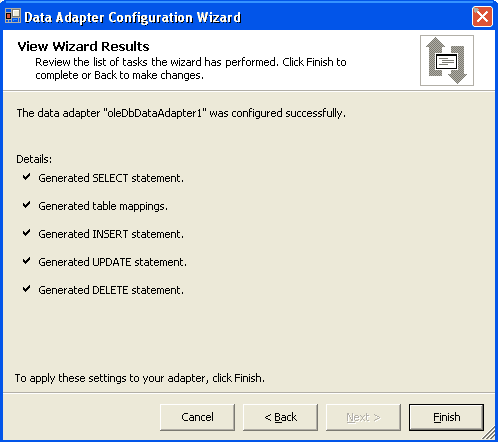
Figure 4-43. View wizard results page of the Data Adapter Configuration wizard
If you examine the form designer, you'll see the wizard added two components to your form: oleDbConnection1 and oleDbDataAdapter1. The source code generated by the wizard is similar to the source generated for the sqlDataAdapter. You'll notice differences, though, in the ConnectionString and the parameters if you were to go through the same process with a SqlDataAdapter. The OdbcDataAdapter will also generate similar code.
Populating DataSet and Filling the DataGrid
Now, to test whether everything went fine, create a Windows Forms application and add an OleDataAdapter using the previous steps. Then add a DataGrid control to the form, as well as all the code listed in listing 4-5 on the Form_Load event or button- click handler.
Listing 4-5. Adding the code on the Form _ Load event
private void Form1_Load(object sender, System.Event Args e)
{
DataSet ds = new DataSet();
// Populate Dataset by calling Fill method
oleDbDataAdapter1.Fill(ds);
// Set DataGrid's Data source property data Grid1. Data source = ds.DefaultViewManager;
dataGrid1.DataSource=ds.DefaultViewManager;
}
If you remember the SqlDataAdapter example, you know that it contained almost the same code. As you can see from listing 4-5, you create a DataSet object and call OleDbData Adapter's Fill method to fill data from the data adapter to the dataset. After that you use the Data Grid control's DataSource property and set it as DataSet'sDefaultViewManager.
Now build and run the project. Your output should look like Figure 4-44.
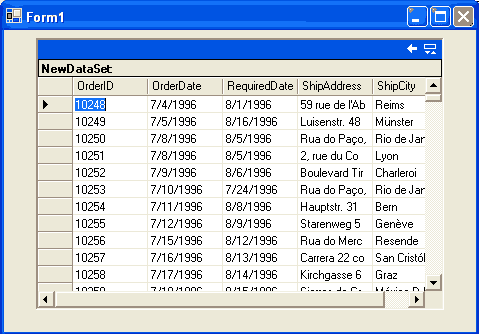
Figure 4-44. Filling a Data Grid with the Orders table
In this article I will explain your about working OleDb Data Adapters in ADO .NET.
Conclusion
Hope this article would have helped you in understanding working OleDb Data Adapters in ADO .NET. See my other articles on the website on ADO.NET.
 |
This essential guide to Microsoft's ADO.NET overviews C#, then leads you toward deeper understanding of ADO.NET. |