ViewBox Control in Silverlight
A ViewBox control resizes itself based on the size of the contents. This article demonstrates how to work with a Silverlight ViewBox control.
Note: The ViewBox control is not a part of Silverlight 2 rather it is a part of Silverlight Toolkit. This article is written by using the Silverlight Toolkit November 2008 that you can download from here: Silverlight Toolkit - Release: Silverlight Toolkit November 2008. This control may be a part of Silverlight in near future versions.
Adding Silverlight Toolkit Reference
Before you can use a ViewBox control, you must download the Silverlight Toolkit. After that you need to add a reference to the assembly.
To add a reference, right click the References folder of your project in Solution Explorer and select Add Reference. This action will open the Add Reference dialog as you can in the following Figure 1. On this dialog, select Browse option and browse the Microsoft.Windows.Controls.dll assembly from the folder where you installed the Silverlight Toolkit. This assembly resides in the Binaries folder.
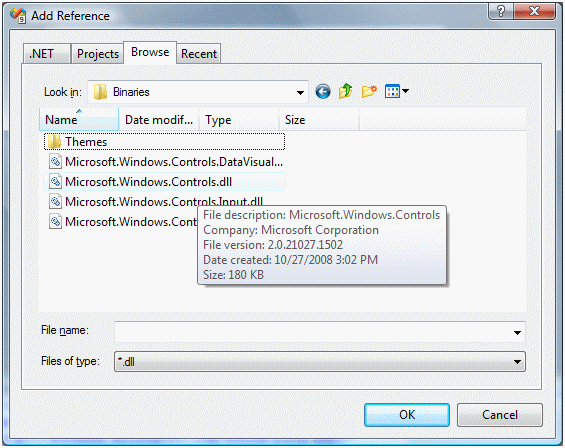
Figure 1
Once you add the reference, you will see the Microsoft.Windows.Controls added to your References dialog as you see in Figure 2.
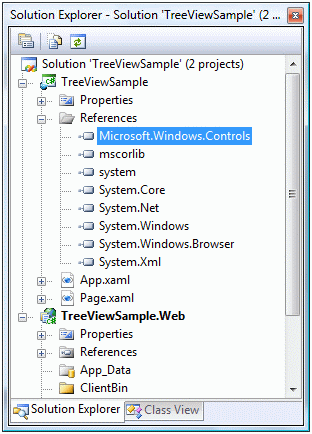
Figure 2
Now, the next step is to import the Microsoft.Windows.Controls namespace to the page. Once you type xmlns= in your page, you will see Microsoft.Windows.Controls listing in Intellisense. Select it as shown in Figure 3.
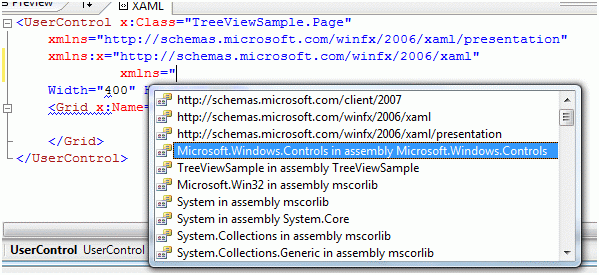
Figure 3
The final reference added to the page looks like following. As you can see here, I added name of this reference to ToolkitRef.
xmlns:ToolkitRef="clr-namespace:Microsoft.Windows.Controls;assembly=Microsoft.Windows.Controls"
Now you will see ToolkitRef in your page and once you select it, you will notice ViewBox added to the Intellisense. To add the ViewBox control to your page, just select it as you can see in Figure 4.
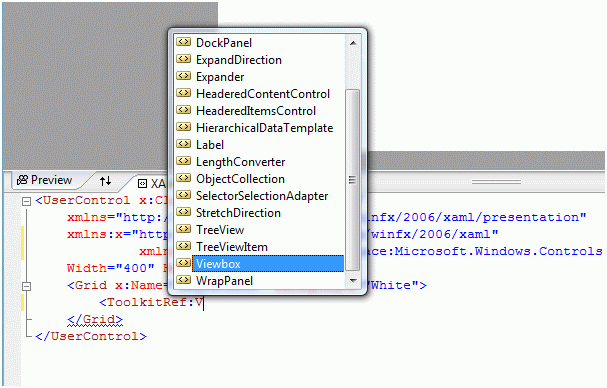
Figure 4
Creating a ViewBox
The ViewBox element represents a Silverlight ViewBox control in XAML.
< ToolkitRef:ViewBox />
The Orientation property is used to wrap child items horizontally or vertically.
The code snippet in Listing 1 creates a ViewBox control and sets its orientation to horizontal. The output looks like Figure 1 where all child controls are wrapped horizontally.
<Grid x:Name="LayoutRoot" Background="White" >
<ToolkitRef:ViewBox Orientation="Horizontal">
<Ellipse Width="100" Height="100" Fill="Red" />
<Ellipse Width="80" Height="80" Fill="Orange" />
<Ellipse Width="60" Height="60" Fill="Yellow" />
<Ellipse Width="40" Height="40" Fill="Green" />
<Ellipse Width="20" Height="20" Fill="Blue" />
</ToolkitRef:ViewBox>
</Grid>
Listing 1
The output looks like Figure 5.
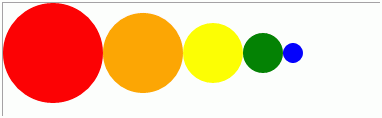
Figure 5
Now if you change orientation to vertical like Listing 2, the output looks like Figure 2.
<ToolkitRef:ViewBox Orientation="Vertical">
Listing 2
As you can see Figure 6, the new controls are aligned vertically.

Figure 6
Useful Resources related to ViewBox
· Viewbox in the Silverlight Toolkit
· WPF Viewbox Reference
· Silverlight Toolkit: ViewBox
Summary
In this article, I discussed how we can create a ViewBox control in Silverlight and C#.