In my previous article, we discussed how to create an InfoPath form for SharePoint Server 2007. In this article we will understand that how can we publish and activate an InfoPath form in SharePoint Server 2007.
Publishing an InfoPath Form to a Sharepoint Server:
Before publishing the InfoPath Form to a Sharepoint Server, make sure that the form security level is set either to Domain Level or Full trust. In order to check the security level, click on Tools->Form Options, in the dialog box that appears, select "Security and Trust" from Category. And set the security level.
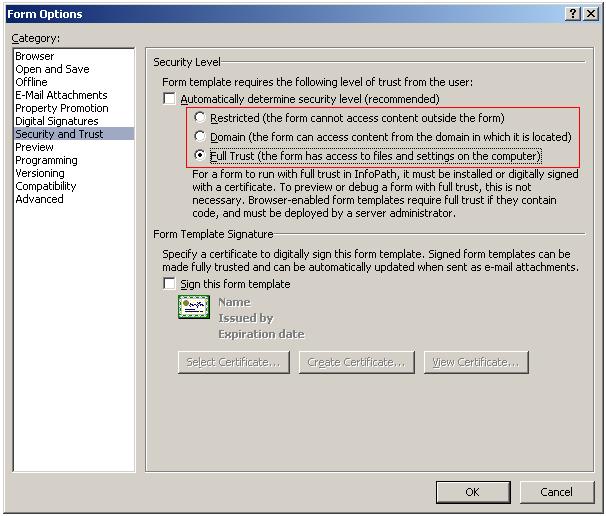
The security level should be set to "Domain" preferably. But if your code is using some external databases other than Sharepoint default databases, then you will have to choose "Full Trust".
To publish an InfoPath to Sharepoint Server proceed as follows:
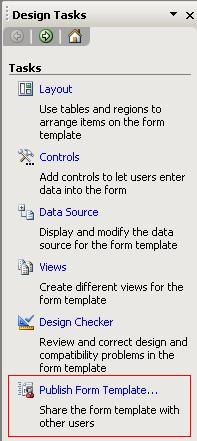
- In the Design Tasks Pane, Click on Publish Form Template.
- In the wizard that appears, Select "To a network location" and click on Next.
- Give the location and name of the form where you want to save it on the network and click on Next.
- In the next dialog box delete any path given and leave it blank, if all the form users can use the network location where the form is saved, else provide a network location where all the form users could access the form and click on Next.
- Now click on Publish button. The form will be successfully published to the network location.
- Click on Close button in the dialog box that appears. Now you will have to activate the form on the site collection.
Activating the form in the Sharepoint Server
The steps to activate the InfoPath form on Sharepoint Server are as follows:
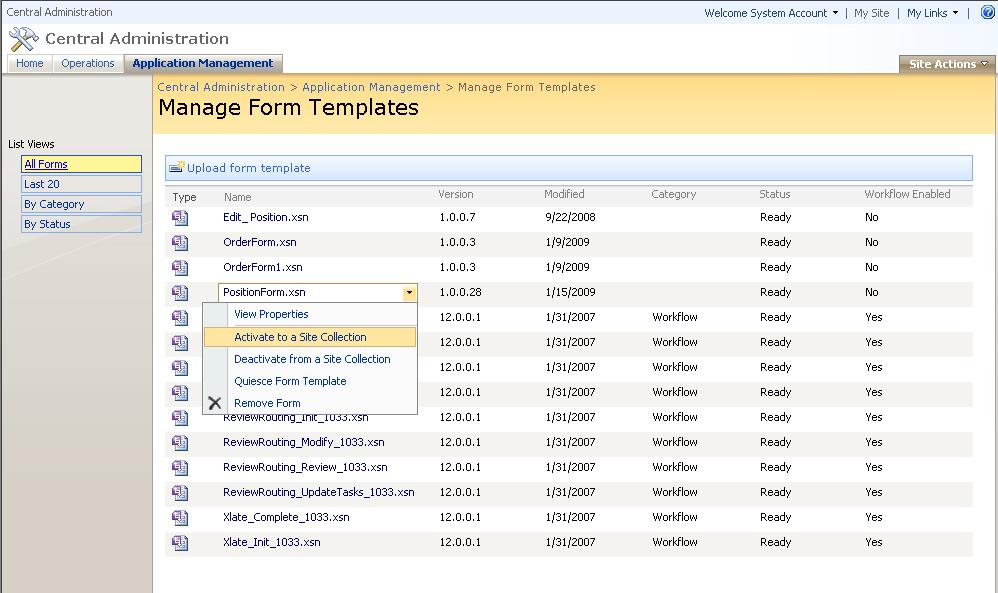
- Open Central Administration and go to Application Management
- In application management, Click on "Upload Form Template" under InfoPath Form Services.
- Browse to the form you saved on the network location in previous steps, verify and upload the form template.
- In the Manage Form Templates, select the form and activate it on the desired site collection.
- Now go to the site collection on which you have activated the InfoPath form.
- Create a Document Library by clicking Site Actions-> Create.
- Now go to Settings-> Document Library Settings.
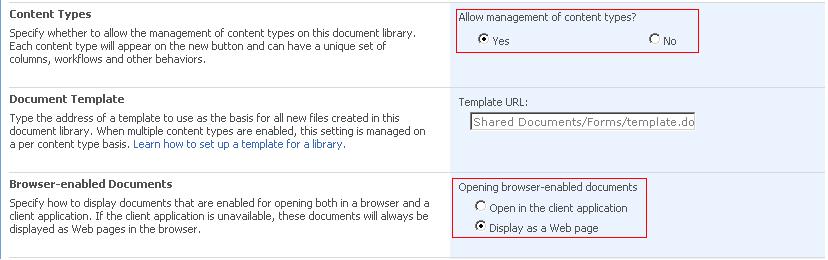
- Click on Advanced Settings. On the Advanced Settings Page, set "Allow Management of Content Type" as Yes.
- In the Browser Enabled Document, select "Display as a Web Page".
- Now in the Document Library Settings Page, click on "Add from existing site content types" under Content Types.

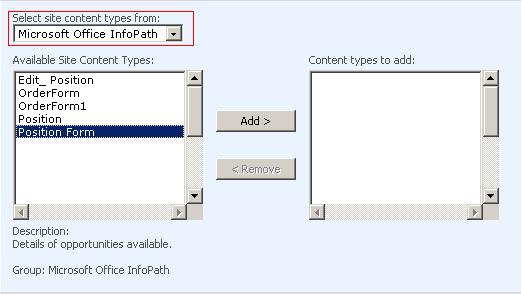
- On the Add Content Types page, select "Microsoft Office InfoPath" from the drop down and then select your form template and click on Add. When it is added, click on OK.
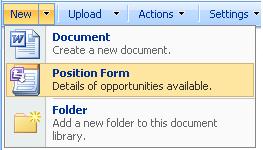
- Now go back to the document library, and click on New in the toolbar, you will see the new content type added there, click on the content type and you will be redirected to the Form.
- Fill the form and click on Submit, and then check the database, you will find a new entry in your database.