This article describes how to use the Twitter API and show all tweets on a page using Windows Phone 7.
Getting Started
Creating a Windows Phone Application:
- Open Visual Studio 2010.
- Go to File => New => Project
- Select Silverlight for Windows Phone from the Installed templates and choose Windows Phone Application
- Enter the Name and choose the location.
Click OK.
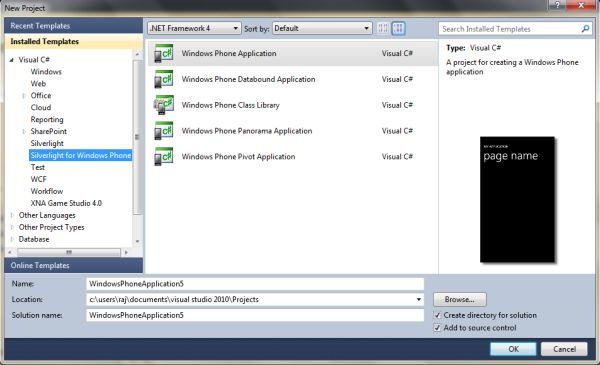
Image 1.
Add a new class:
public class ItemCollection
{
public string UserName { get; set; }
public string Message { get; set; }
public string ImageSource { get; set; }
}
Now add a TextBox, Button and ListBox control on the page.
<Grid x:Name="ContentPanel" Grid.Row="1" Margin="12,0,12,0">
<TextBox Height="72" HorizontalAlignment="Left" Margin="2,-13,0,0" Name="textBox1" VerticalAlignment="Top" Width="254" />
<Button Content="Find" Height="72" HorizontalAlignment="Left" Margin="247,-13,0,0" Name="findButton" VerticalAlignment="Top" Width="160" Click="findButton_Click" />
<ListBox Height="521" Margin="11,75,-31,0" Name="listBox1" VerticalAlignment="Top" Width="476">
<ListBox.ItemTemplate>
<DataTemplate>
<StackPanel Orientation="Horizontal" Height="132">
<Image Source="{Binding ImageSource}" Height="73" Width="73" VerticalAlignment="Top" Margin="0,10,8,0"/>
<StackPanel Width="370">
<TextBlock Text="{Binding UserName}" Foreground="#FFC8AB14" FontSize="28" />
<TextBlock Text="{Binding Message, Mode=OneWay}" TextWrapping="Wrap" FontSize="24" />
</StackPanel>
</StackPanel>
</DataTemplate>
</ListBox.ItemTemplate>
</ListBox>
</Grid>
Code Behind:
public MainPage()
{
InitializeComponent();
SupportedOrientations = SupportedPageOrientation.Portrait | SupportedPageOrientation.Landscape;
}
Button click event:
private void findButton_Click(object sender, RoutedEventArgs e)
{
WebClient wc = new WebClient();
wc.DownloadStringCompleted += new DownloadStringCompletedEventHandler(wc_DownloadStringCompleted);
wc.DownloadStringAsync(new Uri("http://api.twitter.com/1/statuses/user_timeline.xml?screen_name=" + textBox1.Text));
}
void wc_DownloadStringCompleted(object sender, DownloadStringCompletedEventArgs e)
{
if (e.Error != null)
return;
XDocument xdoc = XDocument.Parse(e.Result);
List<ItemCollection> contentList = new List<ItemCollection>();
foreach (XElement item in xdoc.Elements("statuses").Elements("status"))
{
ItemCollection content = new ItemCollection();
content.UserName = item.Element("user").Element("screen_name").Value;
content.Message = item.Element("text").Value;
content.ImageSource = item.Element("user").Element("profile_image_url").Value;
contentList.Add(content);
}
listBox1.Visibility = Visibility.Visible;
listBox1.ItemsSource = contentList.ToList();
}
Build and run to see the result.
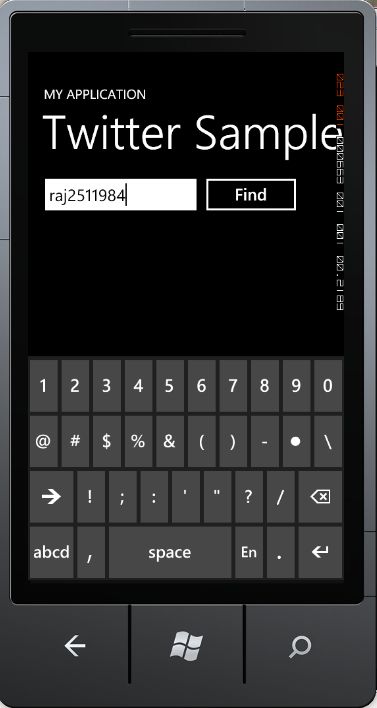
Image 2.

Image 3.
We are done here with this sample. If you have questions or comments drop me a line in the comments section.