Introduction
In this article we will understand the basics of SharePoint Workflow , the life cycle of sharepoint work flow and finally we implement a simple work flow using the three-state work flow which is available in share point.
Previous SharePoint QuickStart FAQ
- Quick Start FAQ Part 1:- 11 basic FAQ questions, must for every new comer. It's a the basic Quick Start FAQ tutorial which talks about What is SharePoint, WSS, MOSS, Site/Site collection , Virtual Path provider and then ends with explaining Site Pages and Application pages SharePoint FAQ's - Part1
- Quick Start FAQ Part 2:- This is the second part in the series which explains the ready made functionalities, custom pages, deploying/activating/deactivating features and lot. SharePoint FAQ's - Part2
- Quick Start FAQ Part 3:- This is the third part of the series in which we have explained page templates , page instances, WSS model, understand safe mode processing and deploy custom controls. SharePoint FAQ's - Part3
- Quick Start FAQ Part 4:- This is fourth part of SharePoint series. In this series we will talk about webparts, webparts and only webparts. SharePoint FAQ's - Part4
- Quick start FAQ Part 5 :- This is the 5th tutorial of SharePoint FAQ series. This series will mainly concentrate on custom columns, content types and document list library. I am sure once your read this article your thinking of how SharePoint organizes document centralization will change. SharePoint FAQ's - Part5
Is SharePoint workflow same as windows workflow?
The first basic important point to note is Sharepoint workflow and windows are not different entities. The base for sharepoint workflow is window workflow. In other words sharepoint workflow sits on the top of windows workflow and adds the human work flow flavor.
The below figure reflects the broader definition of sharepoint workflow. It takes the core windows workflow from .NET framework and then applies content centric workflow on it. Content centric workflows are nothing but simple windows work flow attached to list, documents and custom contents.
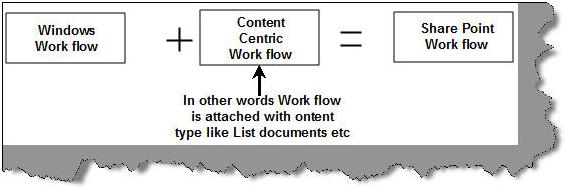
Figure :- Content type workflow
You can visualize sharepoint workflows as windows workflow with human workflow touch and feel. The human work flow touch and feel comes when the work flow is attached to a content type like list, document etc.
For instance let's say we have made approve and disapprove windows work flow. You can attach this work flow with a student content type and the human work flow for student then becomes student passed and student failed. If the content type is invoice then approve work flow can become a invoice paid work flow and disapprove can become invoice not paid.
In other words sharepoint workflow is content centric and they depict human work flow.
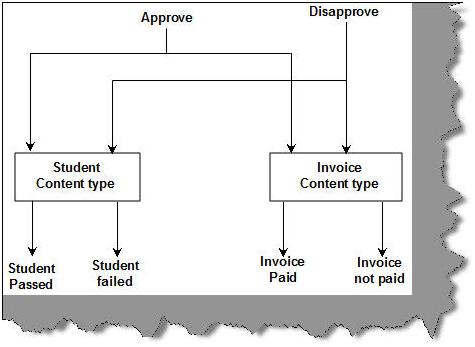
Figure :- Approve and Disapprove
What are the different stages of SharePoint workflow life cycle?
Sharepoint workflow cycle is very much unique to Sharepoint environment. As we said sharepoint workflow are always connected in context with a sharepoint content like list or a document.
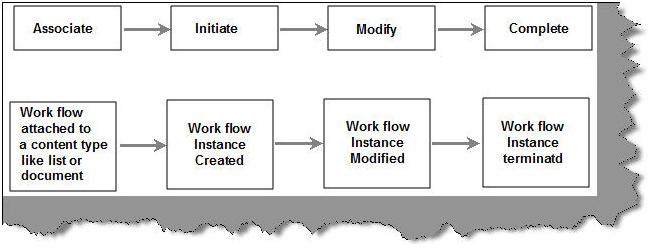
Figure:- Four different stages in Sharepoint workflow
There are four stage in the sharepoint workflow cycle associate, initiate, modify and complete.
- Associate: - As said workflows in sharepoint are always talked in context with a content type. So the first step is to associate a workflow with a content type like list or a document.
- Initiate: - The second step is to initiate the workflow instance. Work flows are nothing but classes finally so a workflow instance needs to be created to start the work flow in action.
- Modify: - Later the workflow instance is modified as per the workflow stages.
- Complete: - Finally the workflow object is terminated.

Figure :- Screen and sharepoint workflow
The web forms of share point interact with WSS who in turn then interacts with the windows work flow runtime. The windows workflow runtime passed details to the appropriate workflow instance depending on the data passed by WSS. The sharepoint workflow instance then runs the work flow logic and takes appropriate action accordingly.
What is a three-state workflow in SharePoint?
Three-state workflow helps organization to track workflows which has three states and two transitions. Its designed to track status of list item , task etc. With each transition between states the work flow assigns the task to some person and sends a email alert.
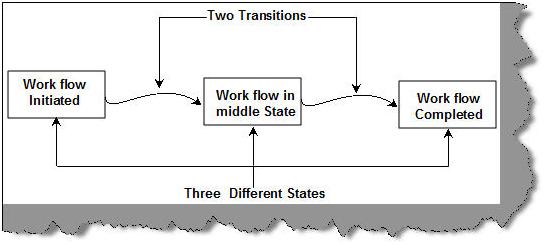
Figure: - Three state workflow
In order to better understand three-state we will create a simple task list. This task list will go through a review process. Following is how the workflow will be executed:-
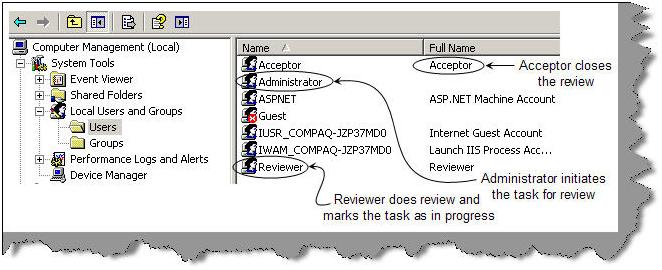
- Administrator creates the initiates the task. The task is assigned to the reviewer.
- The reviewer then reviews the task, makes his comments and makes the task in progress. Once he makes the task in progress it's automatically assigned to the acceptor.
- Acceptor finally does the complete review and closes the task.

Figure: - Three state example
The first thing is to add two users in our computer domain one is the reviewer who will review and the other is the acceptor who will close the task initative.
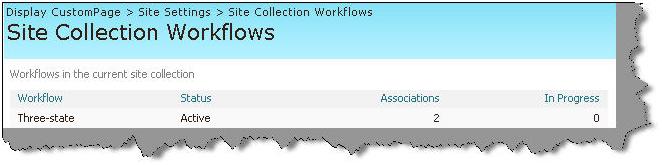
To see the workflow go to Site actions  Site settings Workflows. You will see the 'Three-state' workflow as shown in the below figure.
Let first create a team site so click on Site actions Site libraries and lists create a new content Sites and workspaces and give some nice name like 'My team site'
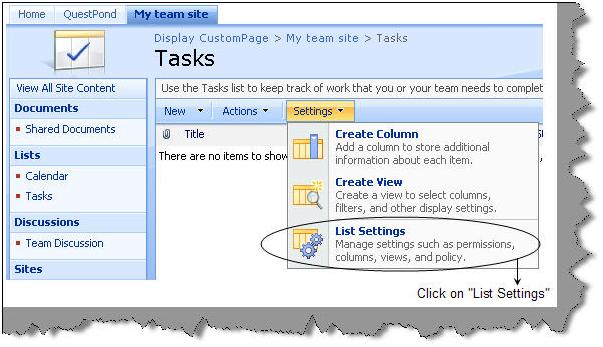
Now click on 'My team site' , click on tasks and then click on list settings as shown in the below figure.
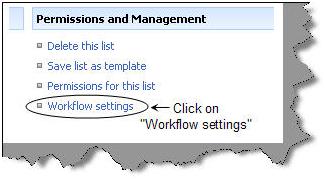
Once you click on 'List setting' you will see lot of options. Goto the permission and management section and click on 'Workflow Settings' as shown in the below figure.
You will prompted to create a new work flow. So create a new workflow and you will need to fill in details of the workflow as shown in the below figure. Give a nice name to the work flow, for the current sample we have given the name as 'My workflow'. We have specified saying that create workflow as soon as the item is created.
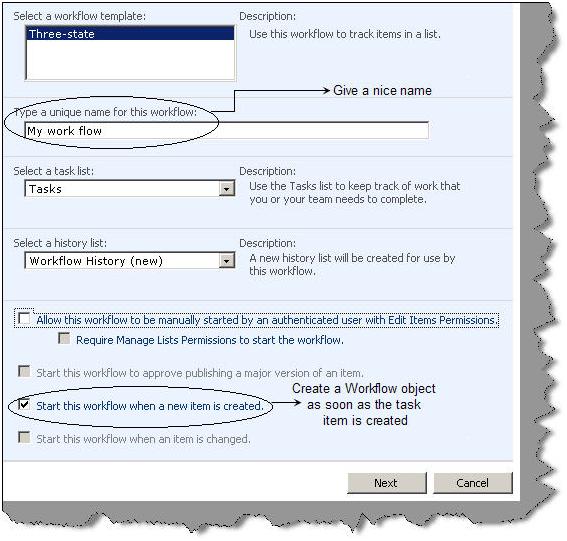
A workflow will have three states an initial state, middle state and final state. These states will be decided on the choice field of the task list. So when the status is having value 'Not Started' then the work flow is in the initial state. When the status is with value 'In progress' then the workflow is in middle state. When the status is completed that means the work flow object will be terminated and the workflow will be marked as closed.

Now the second step is to tell the three-state work flow what needs to be done on every work flow state. So let's fill what should happen when the work flow is initiated. When the work flow is initiated it will be allocated to the user 'reviewer'. You can see the values visually in the below figure.

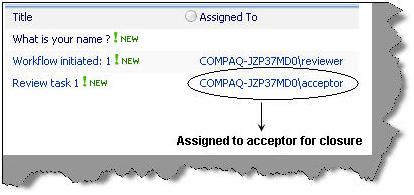
When the reviewer reviews the document it's assigned to an acceptor. So when the workflow is in the in progress state it's assigned to the acceptor for final closure.

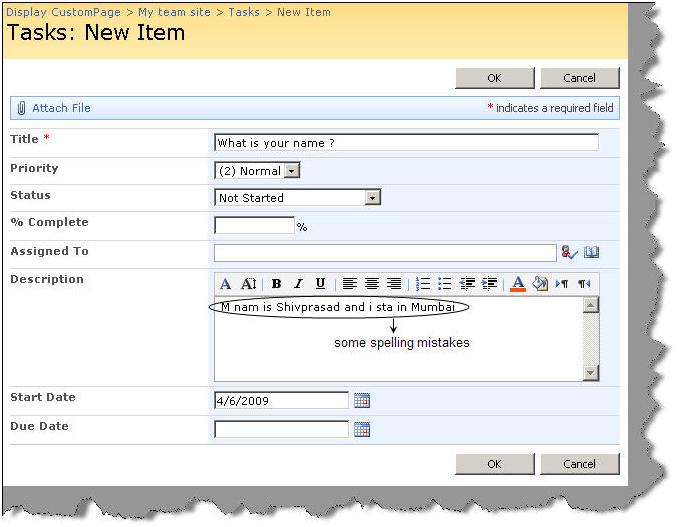
So now that you have attached the work flow with the list its time to invoke the workflow on the list. Click on new to add a task to the task list. Below are the details of task which we need to enter. What we have done is we have entered a wrong statement with spelling mistakes.
Now as soon as you click ok , you will see that the task is assigned to a reviewer.

Now login as reviewer and click on 'What is your name' ?

Now as reviewer you will correct the sentence and mark the task as 'In progress'.

As soon as you mark the task as in progress it's assigned to the acceptor. Now login as a acceptor and mark the task as complete.
Once done click on work flows and you should be able to see a complete tri-state flow.
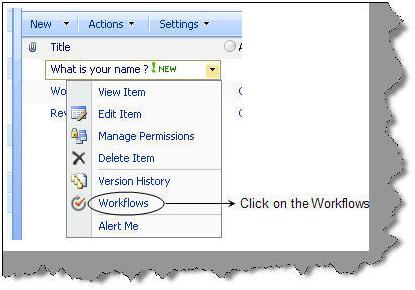
You can see how the work flow was initiated , how the reviewer reviewed it and finally the acceptor closed it.
