Introduction
In this section we will create our first program using Azure blobs. This article creates a simple web page where we upload image files which are stored in azure blobs. We have also created a simple search text box which will help us to search the image blobs with the image file name.
In case you are a complete newbie to azure you can download my two azure basic videos which explain what azure is all about Azure Faq Part 1 :- Video1 , Azuer Faq Part 2 :- Video2.
Please feel free to download my free 500 question and answer eBook which covers .NET , ASP.NET , SQL Server , WCF , WPF , WWF@ http://www.questpond.com .
Step 1:- Ensure you have things at place
In case you are a complete fresher to Azure, please ensure you have all the pre-requisite at place. You can read the below article to get the basic prerequisite http://www.c-sharpcorner.com/UploadFile/shivprasadk/136/Default.aspx?ArticleID=06ceb214-4077-4380-81b0-7d2c56021193.
Step 2:- What will we do?
Azure Blobs help to store large items like files, in other words its file storage system. In this article we will create a simple program to upload image files in Azure blob system.
Step 3:- Create a web role
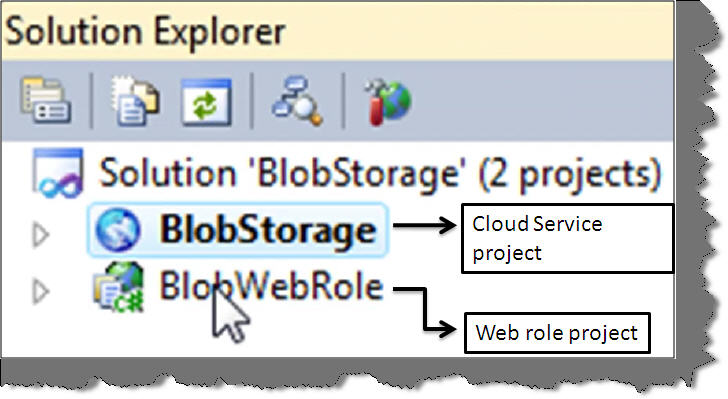
The first step is to a create a web role project. In case you are fresher in Azure, you can go through http://www.c-sharpcorner.com/UploadFile/shivprasadk/136/Default.aspx?ArticleID=06ceb214-4077-4380-81b0-7d2c56021193 to understand how to create a web role project. So let's create a simple project with name 'BlobStorage'. Once you have created the project it creates two projects one is the cloud service project and the other is the web role project. Cloud service project has all the necessary configuration needed for your cloud service project while the web role project is your asp.net project.
Step 4:- Set the blob connection string
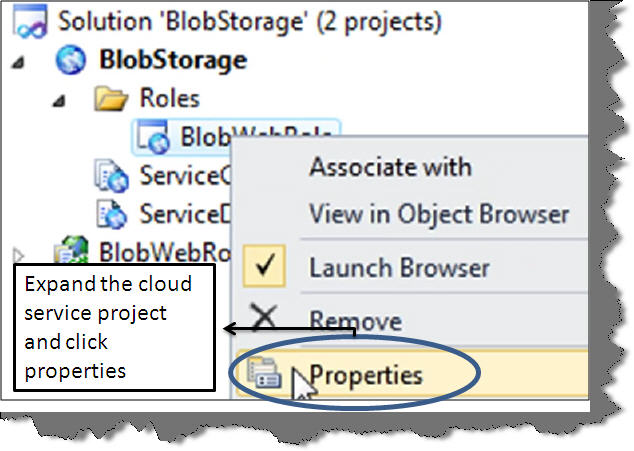
Now the next step is to define a blob connection string in the service configuration file. So expand the 'BlobStorage' project, right click on roles and select properties.
Once you select properties, go to settings tab and add the blob connection string as shown in the below figure. In the below figure we have added blob connection string name as 'BlobConnectionString'.

Click on the right hand eclipse and select 'Use development storage'. All the changes done using the setting UI will be reflected in the 'ServiceConfiguration' file as shown above.
Step 5:- Create the blob on webrole onstart
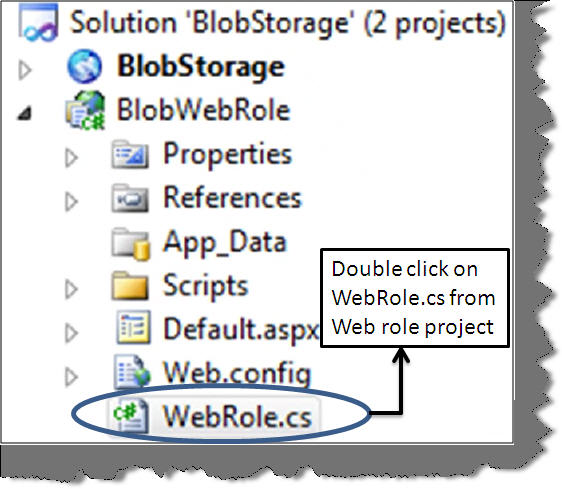
Now it's time to start coding. Open the web role project and open 'WebRole.cs' file.
Now let's write a code on the 'onstart' event to create the blob container.
public override bool OnStart() { }
Use the 'CloudStorageAccount' static class to set the configuration environment.
public override bool OnStart()
{
// Set the configuration file
DiagnosticMonitor.Start("DiagnosticsConnectionString");
CloudStorageAccount.SetConfigurationSettingPublisher((configName, configSetter) => { configSetter(RoleEnvironment.GetConfigurationSettingValue(configName));
} ); .... .... .... .... }
The next step is to get a reference of the cloudstorageaccount object using the blob connection string which was provided when you setup your web role project.
// get the blob connection string
CloudStorageAccount objStorage = CloudStorageAccount.FromConfigurationSetting("BlobConnectionString");
Once we have access to the storage account object, use the blob end point to create the blob client.
// get the client reference
CloudBlobClient objClient = new CloudBlobClient(objStorage.BlobEndpoint, objStorage.Credentials);
Give a nice name to the container and create the container object using the client object which you have just created using the blob end point. Call the 'CreateIfnotExist' method of the container to ensure that you create the blob container only if it does not exist to avoid any errors.
// Get the reference to container
CloudBlobContainer objContainer = objClient.GetContainerReference("mycontainer");
// Create the container if it does not exist objContainer.CreateIfNotExist();
Step 6:- Code your ASP.NET UI
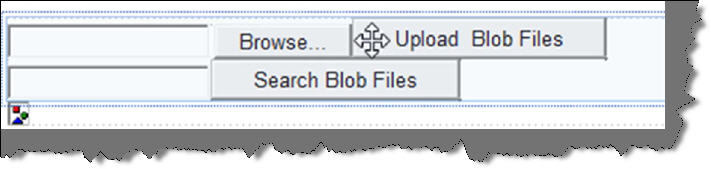
The final step is to create the ASPX page which will help us upload image files in the blob container which we just created in the 'WebRole.cs' file. You can see in t he below figure we have create a browse button which help us upload image files and a search text box which will help us search blob files.
So create the below defined ASPX UI.
In the above ASPX CS UI first get the reference to the below specified name spaces.
using Microsoft.WindowsAzure; using Microsoft.WindowsAzure.StorageClient;
In the file upload button we need to insert the below code snippet to upload the file. So get access to the container object 'MyContainer' and call the 'GetBlobReference' function to get access to the cloud blob object.
// Get the storage account reference
CloudStorageAccount objStorage = CloudStorageAccount.FromConfigurationSetting("BlobConnectionString");
// get the Client reference using storage blobend point
CloudBlobClient objClient = new CloudBlobClient(objStorage.BlobEndpoint, objStorage.Credentials);
// Get Container reference
CloudBlobContainer objContainer = objClient.GetContainerReference("mycontainer");
// Get blob reference
CloudBlob obj =objContainer.GetBlobReference(FileUpload1.FileName.ToString());
Set the meta data of the cloud object and open a blob stream object to write the file. Do not forget to close the blob steam object once you are done.
// Set meta values
obj.Metadata["MetaName"] = "meta";
// Open a stream using the cloud object
BlobStream blobstream = obj.OpenWrite();
// Write the stream to the blob database
blobstream.Write(FileUpload1.FileBytes, 0, FileUpload1.FileBytes.Count());
blobstream.Close();
Once we upload the file, we will browse through the blob list to get the list of blobs present in the container.
// Browse through blob list from the container
IEnumerable<IListBlobItem> objBlobList = objContainer.ListBlobs();
foreach (IListBlobItem objItem in objBlobList)
{
Response.Write(objItem.Uri + "<br>");
}
In the same UI we have provided a search object to search a blob. To search a blob first get access to the container object and call the 'GetBlobReference' function with the blob name to get reference to the cloud object.
// Get the blob reference using the blob name provided in the search
CloudBlob obj = objContainer.GetBlobReference(txtSearch.Text);
BlobStream blobstream = obj.OpenRead();
Read the blob stream using the blob steam object and finally attach this stream with the Image object to display the same in the HTTP response.
// Create the image object and display the same on the browser response
System.Drawing.Image objimg=null; ]
objimg = System.Drawing.Image.FromStream(blobstream,true);
Response.Clear();
Response.ContentType = "image/gif";
objimg.Save(Response.OutputStream,System.Drawing.Imaging.ImageFormat.Jpeg);
Step 7:- Run the project and enjoy
Finally enjoy your first blob program. You can see in the below figure we have uploaded some image files in the blob.
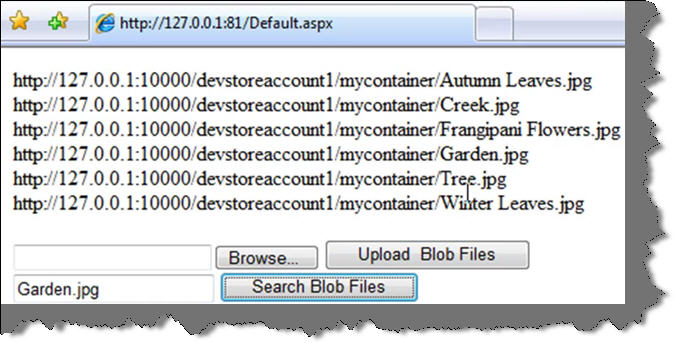
We can also search the blob using the search blob text box and you should be able to get the below image display from the blob database.
