

Introduction
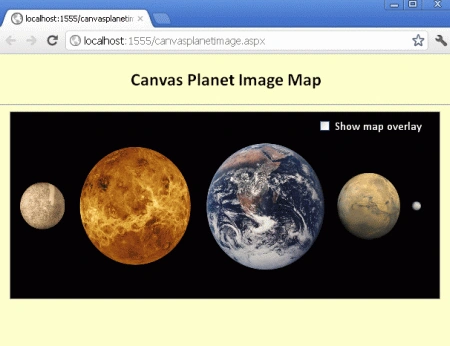
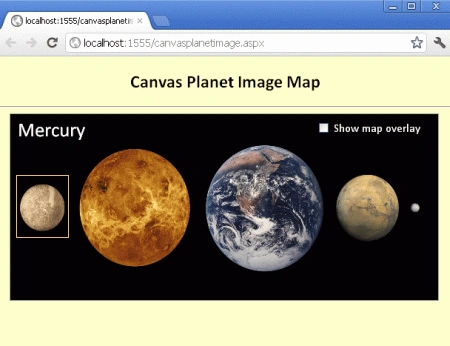
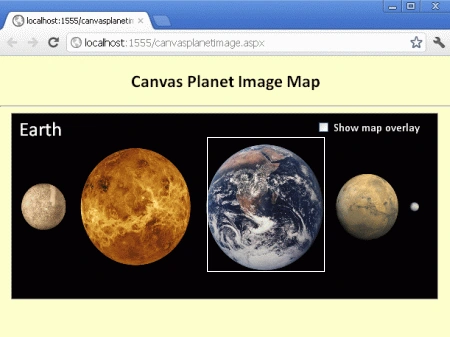
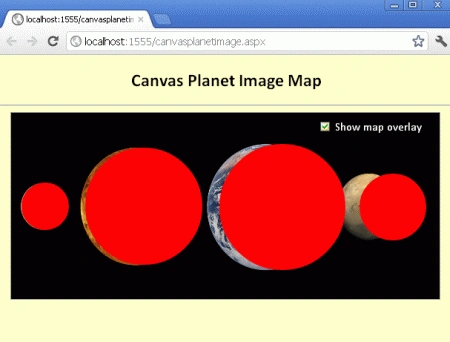
In this article, we are going to understand the concept of a canvas planet image map using HTML 5. In this section, you will see, with the mouse over the planets, the names of the planets and use of a checkbox to show and hide the map overlay while running the application in the browser.
Here we will use some JavaScript and some styles along with HTML code. Just go through the steps to see how to create this application.
Let's see how the PlanetImageMap application can be created. To do so use the following steps.
Step 1 : Open a HTML editor or Visual Studio.
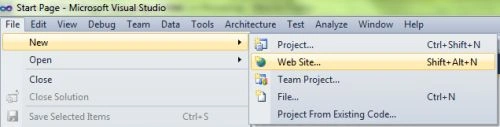
- Go to Solution Explorer
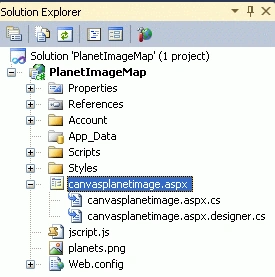
- Right-click on the Application name
- Select Add-->add new item
- Now in the window that opens, select an HTML page or a new Webform
- Rename it to canvasplanetimage.aspx
CSS Script
- <style>
- body
- {
- margin: 0px;
- padding: 0px;
- font-family: Calibri;
- }
- canvas
- {
- border: 1px solid #9C9898;
- margin-left: 15px;
- }
- #page
- {
- position: relative;
- width: 580px;
- height: 253px;
- }
- #controls
- {
- position: absolute;
- right: 10px;
- top: 10px;
- z-index: 99999;
- }
- label
- {
- color: white;
- vertical-align: top;
- }
- </style>
Step 3 : In this part we need to work on some JavaScript. To fully understand how JavaScript works, download the attached .rar file and run the PlanetImageMap application.
The whole JavaScript looks as in the following
- window.onload = function ()
- {
- var stage = new Kinetic.Stage("container", 578, 251);
- var planetsLayer = new Kinetic.Layer();
- var circlesLayer = new Kinetic.Layer();
- var messageLayer = new Kinetic.Layer();
- var planets = {
- Mercury: {
- x: 46,
- y: 126,
- radius: 32
- },
- Venus: {
- x: 179,
- y: 126,
- radius: 79
- },
- Earth: {
- x: 366,
- y: 127,
- radius: 85
- },
- Mars: {
- x: 515,
- y: 127,
- radius: 45
- }
- };
- var imageObj = new Image();
- imageObj.onload = function ()
- {
- // draw shape overlays
- for (var pubKey in planets)
- {
- (function () {
- var key = pubKey;
- var planet = planets[key];
- var planetOverlay = new Kinetic.Shape({
- drawFunc: function () {
- var context = this.getContext();
- context.beginPath();
- context.arc(planet.x, planet.y, planet.radius, 0, Math.PI * 2, false);
- context.closePath();
- if (this.show) {
- context.fillStyle = "red";
- context.fill();
- }
- },
- // custom property
- show: false
- });
- planetOverlay.on("mouseover", function ()
- {
- writeMessage(messageLayer, key);
- });
- planetOverlay.on("mouseout", function ()
- {
- writeMessage(messageLayer, "");
- });
- circlesLayer.add(planetOverlay);
- } ());
- }
Step 4 : In this section we are going to become familiar with the body part of HTML scripting. Replace this script from the body section of the canvasplanetimage.aspx page. Here we pass a Canvas in the canvas tag.
- <body style="background-color: #FFFFCC">
- <center>
- <h2>
- Canvas Planet Image Map
- </h2>
- </center>
- <hr />
- <div id="page">
- <div id="container">
- </div>
- <div id="controls">
- <input type="checkbox" id="checkbox">
- <label>
- Show map overlay
- </label>
- </div>
- </div>
- </body>
Step 5 : The complete code for the PlanetImageMap application:
- <%@ Page Language="C#" AutoEventWireup="true" CodeBehind="canvasplanetimage.aspx.cs" Inherits="PlanetImageMap.canvasplanetimage" %>
- <!DOCTYPE html PUBLIC "-//W3C//DTD XHTML 1.0 Transitional//EN" "http://www.w3.org/TR/xhtml1/DTD/xhtml1-transitional.dtd">
- <html xmlns="http://www.w3.org/1999/xhtml">
- <head runat="server">
- <script src="jscript.js">
- </script>
- <script>
- </script>
- </head>
- <body style="background-color: #FFFFCC">
- <center>
- <h2>
- Canvas Planet Image Map
- </h2>
- </center>
- <hr />
- <div id="page">
- <div id="container">
- </div>
- <div id="controls">
- <input type="checkbox" id="checkbox">
- <label>
- Show map overlay
- </label>
- </div>
- </div>
- </body>
- </html>
Step 6 : Output Press F5
Note: For the accurate output of HTML5 applications, you must have the Google Chrome browser on your PC. You will see mouse over the planets to see their names and use the checkbox to show and hide the map overlay while running the application on the browser.
Arun ChoudharyPosted Mar 24, 2012, 7:47 AM
Thanks for sharing.