Introduction
This article is intended to illustrate how to develop Web application using data binding technologies in Microsoft Visual Studio.NET and Oracle JDeveloper. The solution will be based on the Model-View-Controller design pattern, thus we will first build the business model portion of the application where we place the middle-tier business logic and validation rules components, and finally we will build the presentation layer as a master-detail form to represent the parent-child relationship between entities. Following this approach, then you will create more complex pages.
Solution using Microsoft technologies
First step is to create a database connection in Visual Studio.NET. Go to the Server Explorer window, and right-click on the Data Connections node and the select Add Connection option. When the Add Connection window appears, then enter the connection data (see Figure 1).
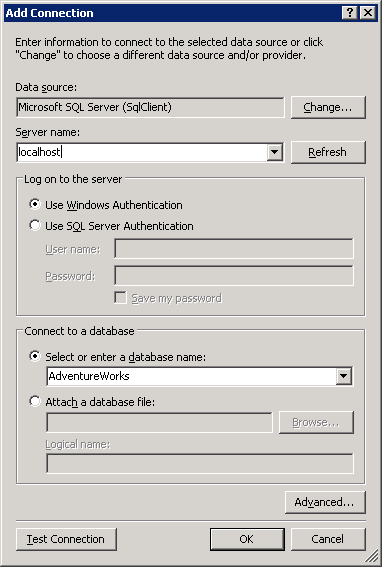
Figure 1
After the database connection is created, we have to create a solution to hold two projects: one class library project for the business logic components (see Figure 2) and a Web site application for the presentation layer components (see Figure 3).
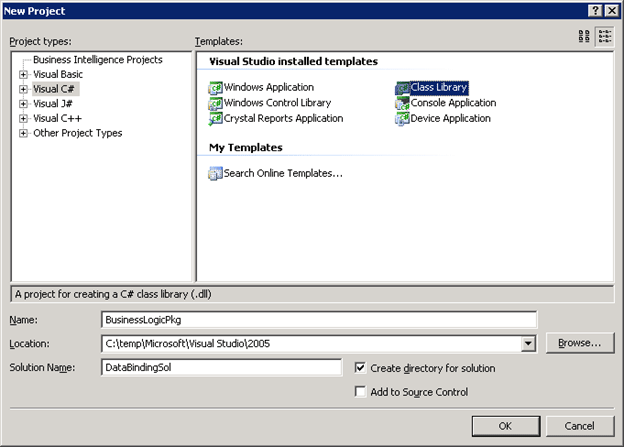
Figure 2

Figure 3
Now let's build the business logic components. We're going to access to the Purchasing.PurchaseOrderDetail and Purchasing.PurchaseOrderHeader tables to show the underlying data. In order to achieve this goal, we're going to represent the underlying business entities PurchaseOrderDetail and PurchaseOrderHeader using a DataSet object. In the Solution Explorer window, right-click on the BusinessLogicPkg project and select Add | New Item option and finally select the DataSet item (see Figure 4).
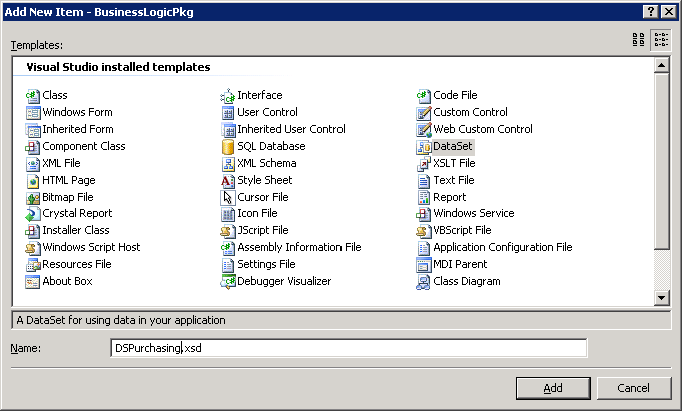
Figure 4
When the DataSet design appears, then right-click on the DSPurchasing dataset and select Add | Table Adapter option. After the TableAdapter Configuration Wizard appears, then select the created connection (see Figure 5).
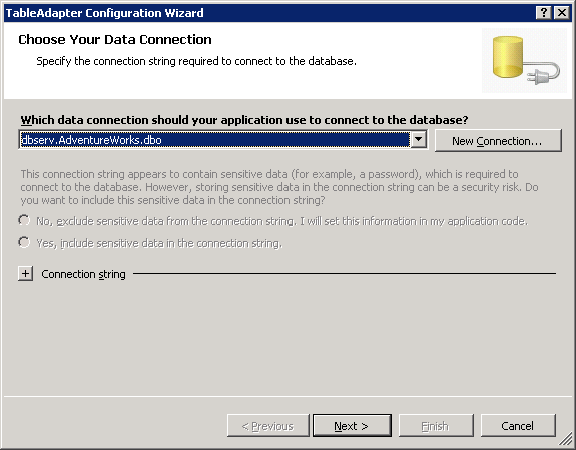
Figure 5
The select the Use SQL Statement options in the Choose a CommandType page (see Figure 6).
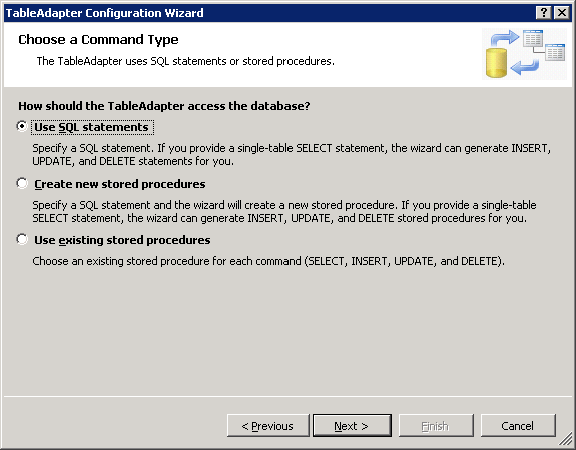
Figure 6
In the Enter a SQL Statement page, you must enter the SQL query to access to the Purchasing.PurchaseOrderDetail table. Then click on the Next button until the end of the wizard.
Now repeat the same steps to define the PurchaseOrderHeader business entity by enter the appropriate SQL query (see Figure 7).
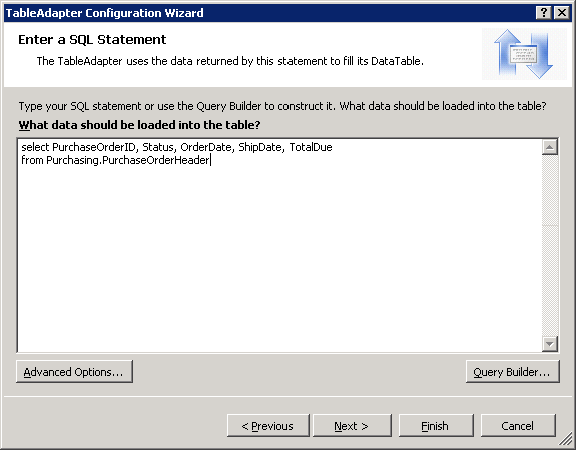
Figure 7
Let's add a method to PurchaseOrderDetail business entity to select some entities by the PurchaseOrderID attribute. Right-click on the PurchaseOrderDetail and select the Add | Query option in order to start the TableAdapter Configuration Wizard. In the Choose a Command Type page, select the Use SQL Statements option and click on the Next button (see Figure 8).
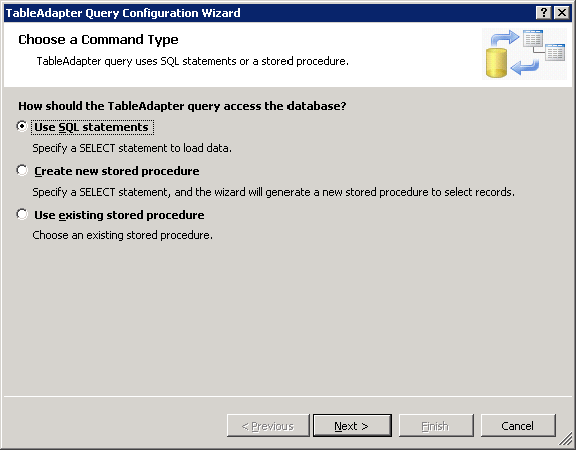
Figure 8
In the Choose a Query Type page, select the SELECT which returns rows option and click on the Next button (see Figure 9).
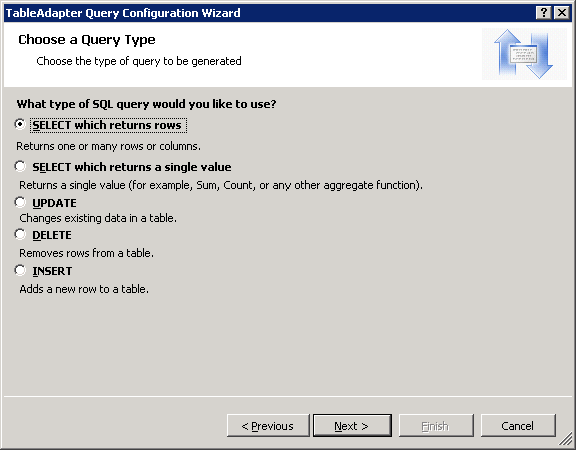
Figure 9
In the Specify a SQL Select statement, enter the following query (see Figure 10).
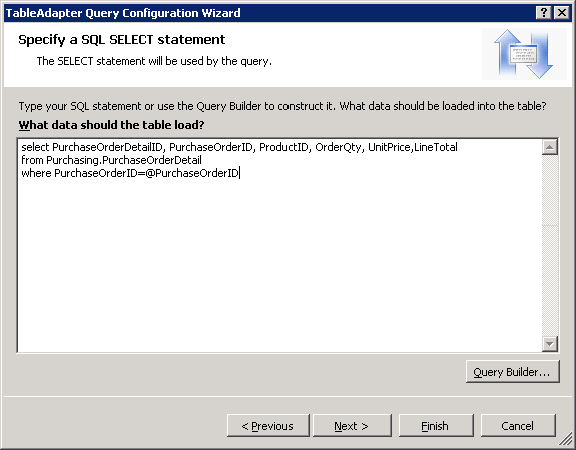
Figure 10
And finally, choose a name for the method (see Figure 11).
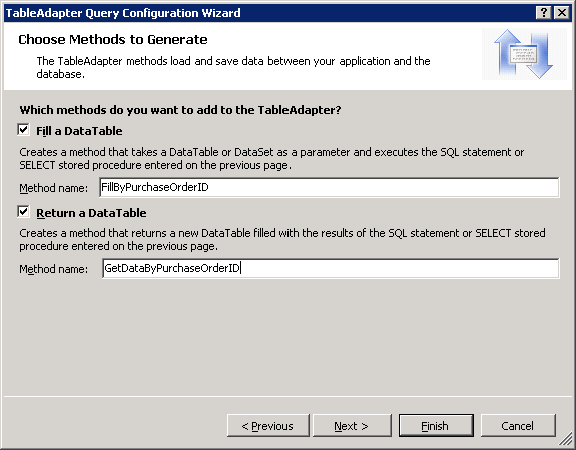
Figure 11
Now let's go to the WebPresentation Web site project and right-click to select Add | New Item. Then create two Web forms: one for the PurchaseOrderDetail (see Figure 12) and the other for the PurchaseOrderHeader (see Figure 13).

Figure 12
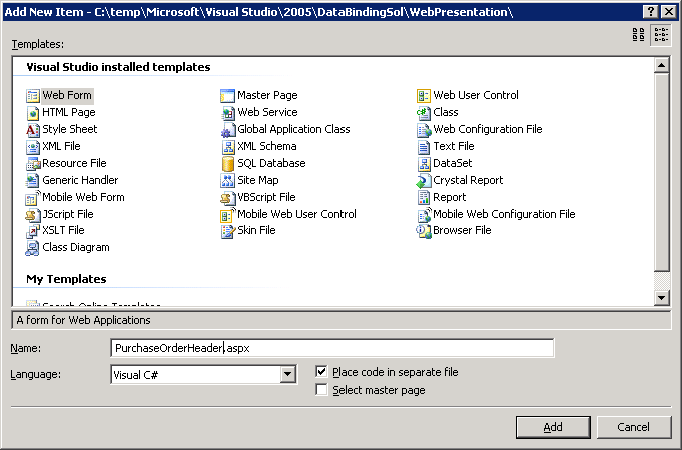
Figure 13
Then add a reference to the BusinessLogicPkg library (see Figure 14).
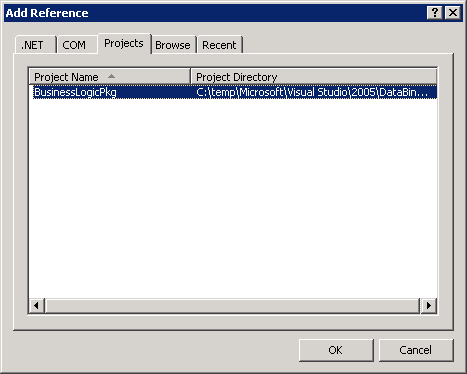
Figure 14
Then drag and drop an ObjectDataSource item from the Toolbox onto the PuchaseOrderHeader page. Click on the Configure Data Source link to launch the Configure Data Source window. In the Choose a Business Object page, select the PurchaseOrderHeaderTableAdapter and click on the Next button (see Figure 15).
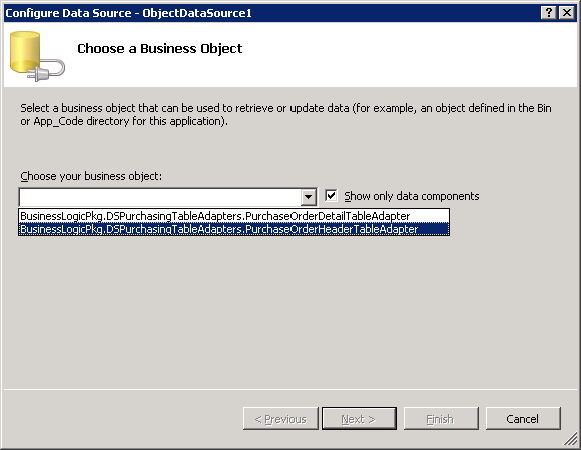
Figure 15
In the Define Data Methods, choose as shown in Figure 16 and click on the Finish button.
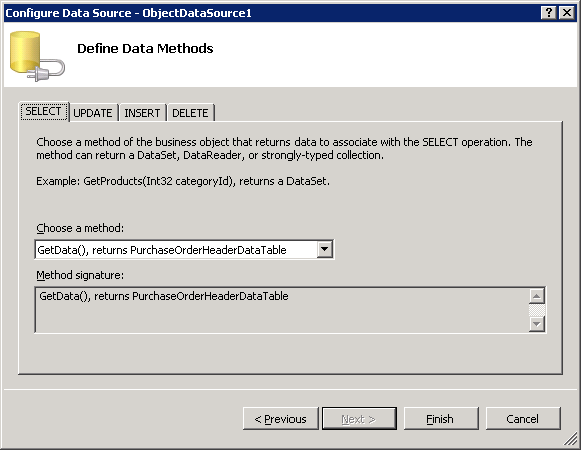
Figure 16
Then drag and drop a GridView control from the Toolbox onto the PurchaseOrderHeader Web form and bind this control to the ObjectDataSource item (see Figure 17).
Figure 17
Now let's add a reference to the PurchaseOrderDetail page in order to represent the master-detail Web form. Click on the HyperLinkField to add a new column to the GridView control, then we must set some properties such as Text to Click for further details, DataNavigateUrlFields to PurchaseOrderID, DataNavigateUrlFormatString to PurchaseOrderDetail.aspx?id={0} (see Figure 18).
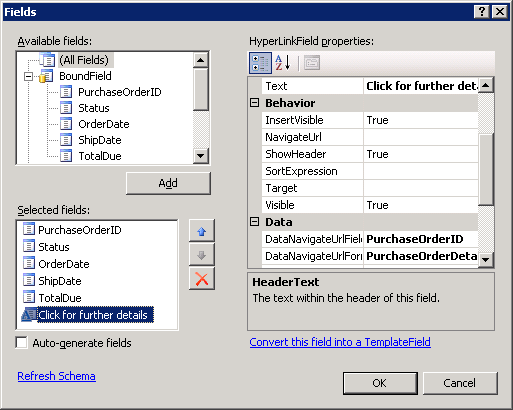
Figure 18
Drag and drop an ObjectDataSource item from the Toolbox onto the PurchaseOrderDetail page. Click on the Configure Data Source link to launch the Configure Data Source window. In the Choose a Business Object page, select PurchaseOrderDetailTableAdapter and click on the Next button(see Figure 19).
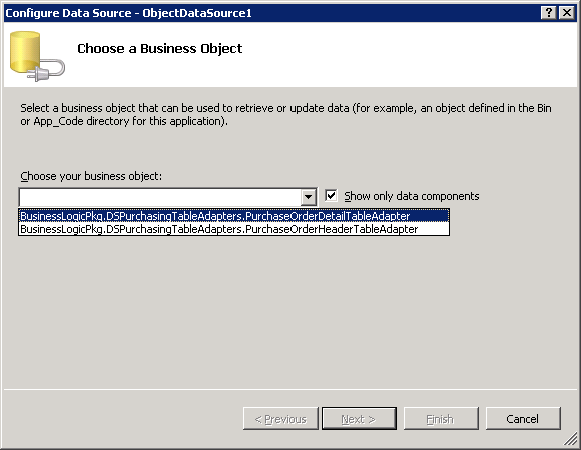
Figure 19
In the Define Data Methods page, select the GetDataByPurchaseOrderID and click on the Next button(see Figure 20).
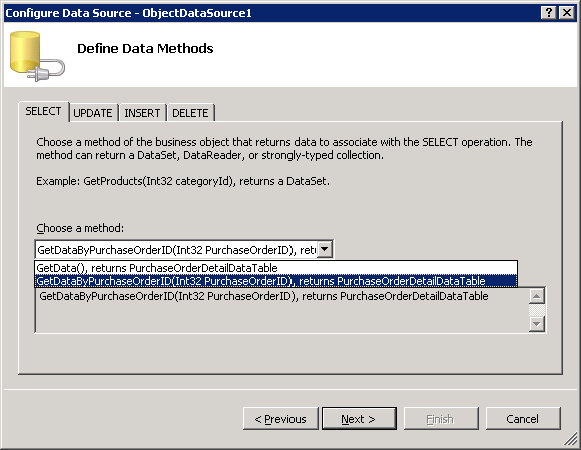
Figure 20
In the Define Parameters page, we need to set the source for the PurchaseOrderID parameter. Set the Parameter source field to QueryString, and the QueryStringField field to id, and finally click on the Finish button (see Figure 21).
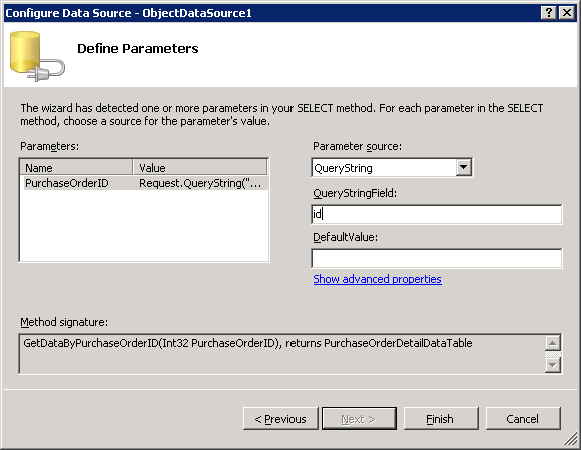
Figure 21
The last step is to drag and drop a GridView control from the Toolbox onto the PurchaseOrderDetail page. Finally, let's bind the GridView control to the ObjectDataSource created before (see Figure 22).
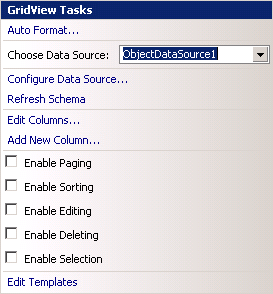
Figure 22
Now let's run the solution and test the results.
Solution using Oracle technologies
First step is to create a database connection using JDBC. In the JDeveloper, click on the Connections tab, right-click on the Database node and choose New Database Connection option. The Create Database Connection Wizard then appears. In the step 1, set a descriptive name for the connection (see Figure 23).
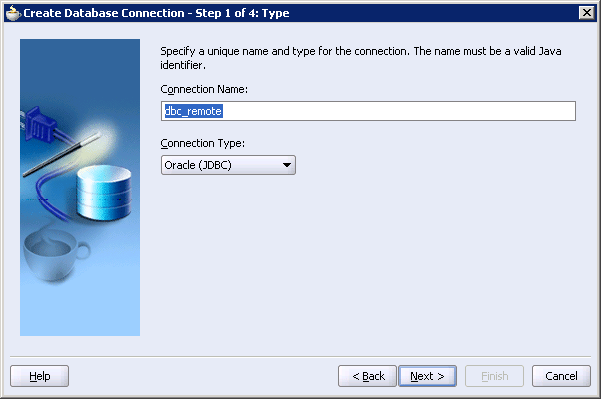
Figure 23
In the Step 2, you have to set authentication information. In the Step 3, you have to set information concerning the Oracle database system (see Figure 24).
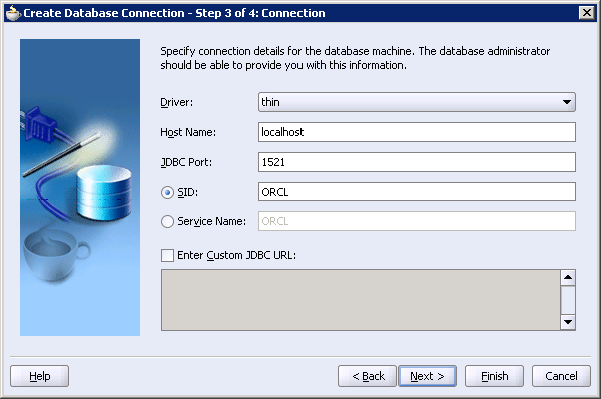
Figure 24
After the database connection is created, we have to develop the business layer's components. First of all, let's create an application as a container of our projects. A project in JDeveloper is a group of related files. This application will have two projects: one project for hosting the business objects and the other for hosting the presentation objects. In order to create an application, right-click on the Applications tab, and select New Application option (see Figure 25).
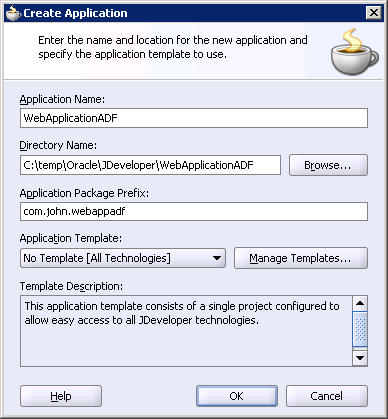
Figure 25
After that, you have to create a project inside the application (see Figure 26).
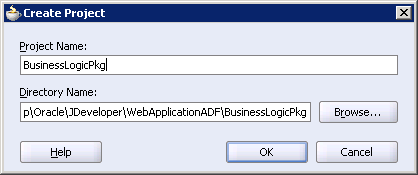
Figure 26
Then right-click on the application and create a new project for the presentation.
Now let's develop the business components. Right-click on the BusinessLogicPkg project and choose New option. In the New Gallery window, expand the Business Tier node and select ADF Business Components and Business Components from Tables (see Figure 27).
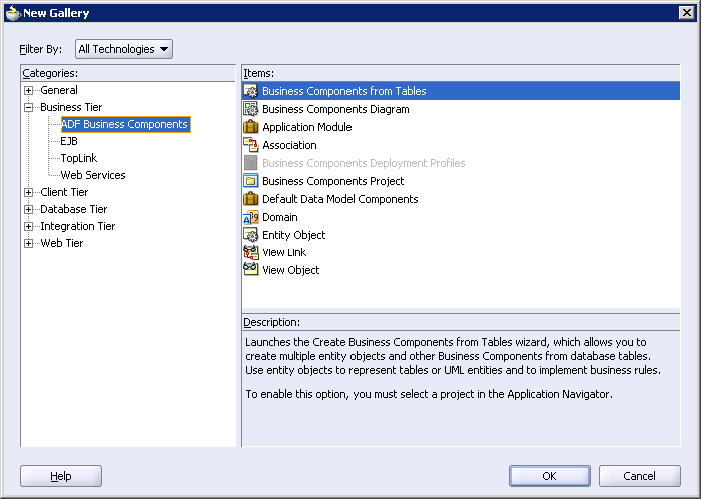
Figure 27
Then the Initialize Business Components Project window appears. In the first page, select the database connection created before. Then the Create Business Components from Tables window will appear. In the Step 1, let's configure the Entities Objects from available tables on the database schema. Entities objects encapsulate business logic and rules as well as default for a table and automatically handle saving any change made by the user back to the database. Let's select the Dept and Emp tables on the scott schema (see Figure 28).
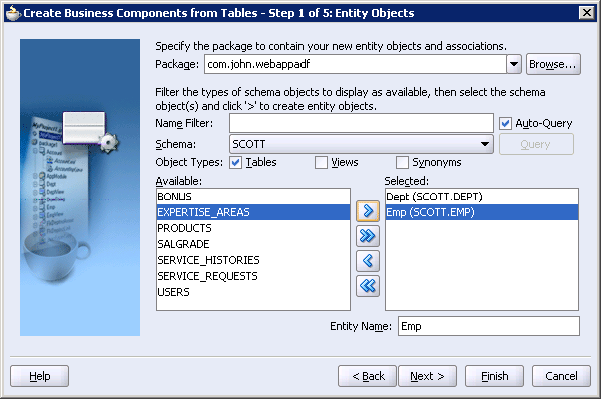
Figure 28
In the Step 2, we can specify the updatable view objects. View objects encapsulate SQL queries, joins, filters and enables the external interaction with the underlying tables. When related to underlying Entity Objects, they enable the users to perform CRUD (create, read, update, and delete) operations with automatic enforcement of business rules. Let's select DeptView and EmpView as updatable views which are related to Dept and Emp Entity Objects (see Figure 29).

Figure 29
In the Step 3, you can specify read-only view objects. In the Step 4, you can set a name for the application module. The application model defines the data model of related view objects usages for an application (see Figure 30).
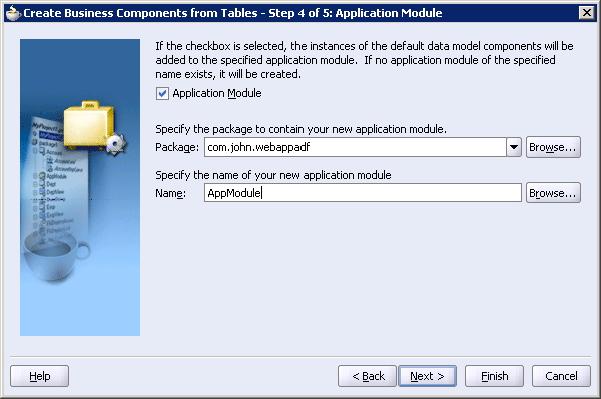
Figure 30
In the Step 5, you can specify the business components diagrams, but we are not going to use this feature. Click on the Finish button and the business components are finally created.
Now let's go to the presentation project and develop the presentation components using the ADF Faces which are an extension to the JSF standards. Go to the PresentationPkg preject, right-click and select New option. Then navigate to the JSF and JSF JSP item (see Figure 31).
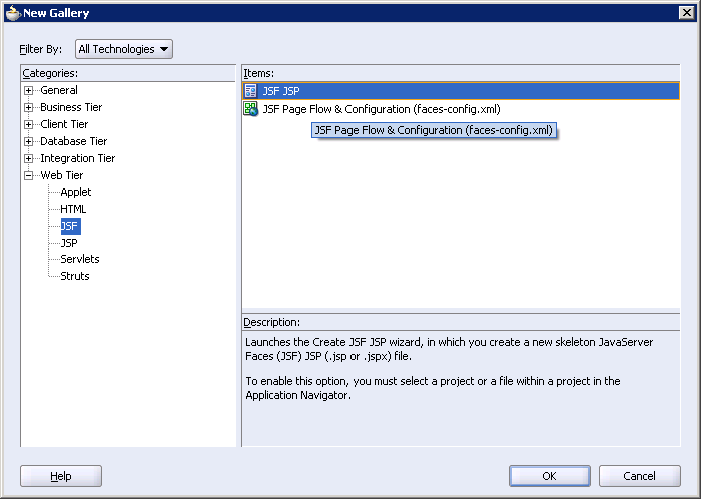
Figure 31
Click OK button and the Create JSF JSP window will appear. In the Step 1, name the page as departments.jsp (see Figure 32).
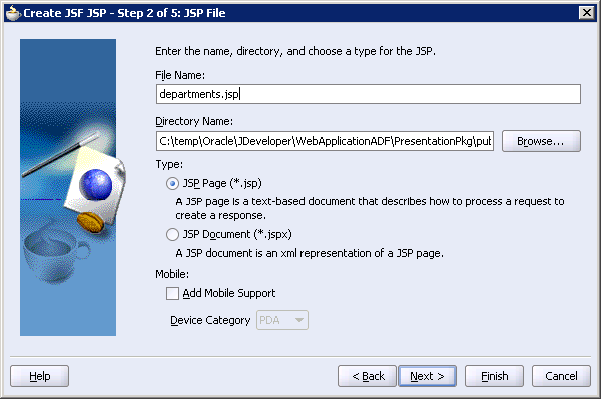
Figure 32
In the Step 2, leave the default values and click on the Next button. In the Step 3, you specify the Tag Libraries to use in your presentation project. Make sure you have selected the JSF Core 1.0, JSF HTML 1.0, ADF Faces Components and ADF Faces HTML (see Figure 33).
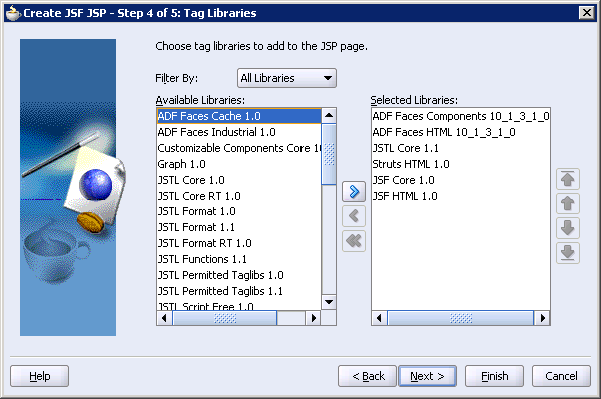
Figure 33
Then click on the Finish button. In order to consume the business components from the presentation project, right-click on the presentation project and select Project Properties option, then check on the BusinessLogicPkg.jpr project in the Dependencies node (see Figure 34).
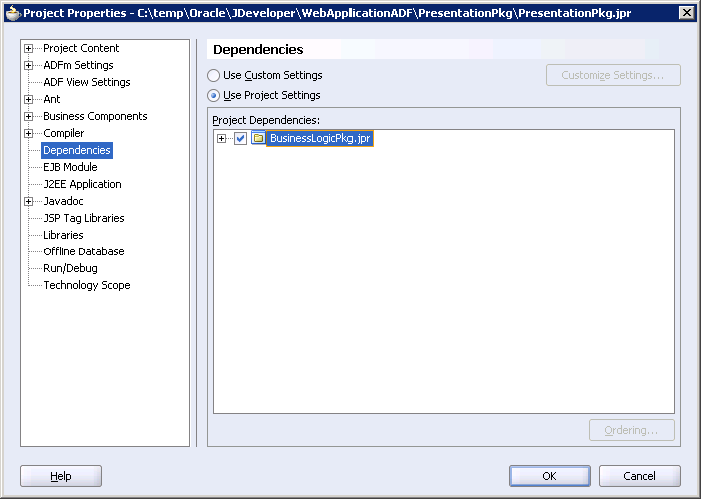
Figure 34
If you go to the Data Controls Palette, you can see that the wizards have noticed a foreign key relationship between emp and dept tables, and then you can see all the departments from the DeptView1 as well as the employees related to a particular department from the EmpView2 which is linked to the DeptView1. In order to activate the data binding mechanism associated to Web controls, you only have to drag and drop items from the Data Controls Palette inside the JSF JSP page (see Figure 35).
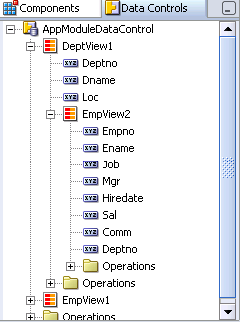
Figure 35
Let's drag and drop the EmpView2 item from the Data Controls Palette onto the JSF JSP departments page. Then JDeveloper opens a context menu with the available options for this data control. Select Master-Details | ADF Master Form, Detail Table option (see Figure 36).

Figure 36
You can see the result (see Figure 37).
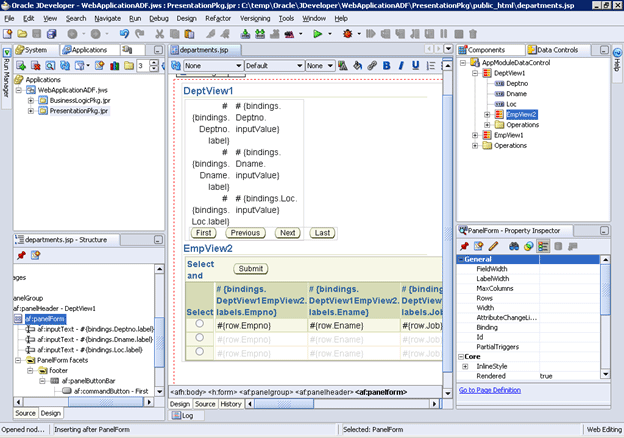
Figure 37
Now that you have developed your first ADF Faces Web application, you need to test it. You can achieve this objective using the OC4J server embedded in JDeveloper. In order to test this page, go to the Applications tab, and navigate to the departments.jsp JSF JSP page, right-click on it and select Run option from the context menu (see Figure 38).
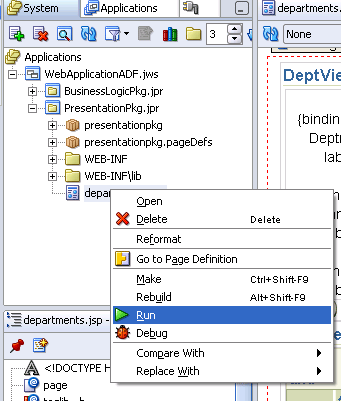
Figure 38
Conclusion
In this article, I've illustrated how to develop Web application using data binding technologies in Microsoft Visual Studio and Oracle JDeveloper. Now you are ready to follow this approach, and create more complex pages to solve your own business problems.