Introduction
As you would know by now, one of the basic controls provided by Silverlight is the CheckBox control. This article will demonstrate how to design the look of the CheckBox in Blend and add event handler code for it using Blend and Silverlight.
Launch Expression Blend and create a Silverlight 2 application in it. Let us assume the application is named CheckDemo.
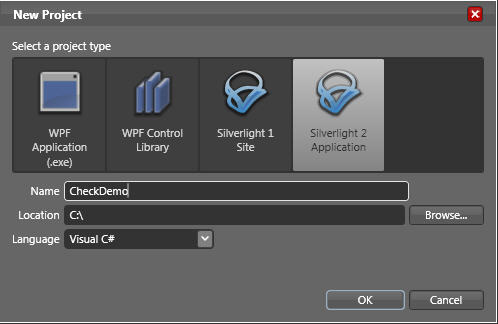
Figure 1
Edit the default Page.xaml such that the default Grid is replaced with Canvas.
Drag and drop two CheckBox controls in the artboard area. Arrange them one below the other. Specify their content as Music and Reading respectively.
Name the two controls as chkHobbies1 and chkHobbies2 respectively.
Open the Properties window for the first CheckBox and edit its brushes as shown.
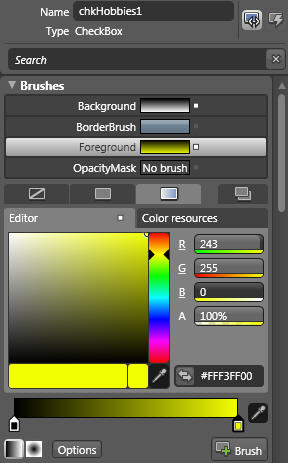
Figure 2
Likewise, edit the properties of the second CheckBox and choose the same brush colors. This will render the check boxes as shown.

Figure 3
Next, click on thelightning symbol on the Properties window.
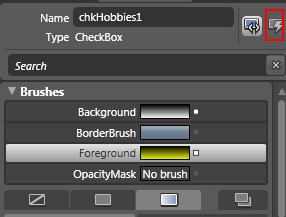
Figure 4
This will open the events window for the CheckBox in Blend IDE. A list of events that are available for CheckBox will be displayed. Double click on Checked to generate a empty default event handler for the first CheckBox. If you have Visual Studio 2008 Standard or Professional edition, then the event handler method will open in that IDE.
If however you have Express edition installed, the event handler method will be copied to Clipboard and you have to manually copy it to Page.xaml.cs in VS IDE.
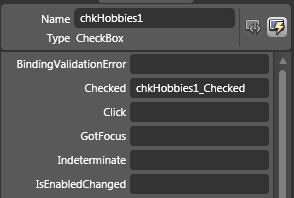
Figure 5
The empty event handler method will look as shown below:
private void chkHobbies1_Checked(object sender, System.Windows.RoutedEventArgs e)
{
}
Using the above procedure, egenerate empty methods for Checked event of the second CheckBox and UnChecked events of both the check boxes.
Add a Button control below the CheckBoxes and generate a Click event for it. Also add a TextBlock control (but no event for it).
Open VS IDE and edit the Page.xaml.cs so that it looks as follows:
public partial class Page : UserControl
{
string hobbies = "";
public Page()
{
// Required to initialize variables
InitializeComponent();
txtblkMessage.Visibility = Visibility.Collapsed;
txtblkMessage.Text = "Hobbies:";
}
private void chkHobbies1_Checked(object sender, RoutedEventArgs e)
{
hobbies += " " + chkHobbies1.Content.ToString();
}
private void chkHobbies2_Checked(object sender, RoutedEventArgs e)
{
hobbies += " " + chkHobbies2.Content.ToString();
}
private void chkHobbies1_Unchecked(object sender, System.Windows.RoutedEventArgs e)
{
if (hobbies.Contains(chkHobbies1.Content.ToString()))
{
int index = hobbies.IndexOf(chkHobbies1.Content.ToString());
int length = chkHobbies1.Content.ToString().Length;
hobbies = hobbies.Remove(index, length);
}
}
private void chkHobbies2_Unchecked(object sender, System.Windows.RoutedEventArgs e)
{
if (hobbies.Contains(chkHobbies2.Content.ToString()))
{
int index = hobbies.IndexOf(chkHobbies2.Content.ToString());
int length = chkHobbies2.Content.ToString().Length;
hobbies = hobbies.Remove(index, length);
}
}
private void Button_Click(object sender, RoutedEventArgs e)
{
txtblkMessage.Text = "Hobbies :" + hobbies;
txtblkMessage.Visibility = Visibility.Visible;
}
When you build and execute the application, you will see that the TextBlock appropriately reflects the choices made in the CheckBox controls.
Conclusion: In this article, you learnt how to work with the CheckBox control using Blend and Silverlight.