Overview
There are many benefits of test driven development including better end product with well defined supporting unit tests and having a programming paradigm that is a bit more flexible in regards to scope changes. Having unit tests available will make our code more maintainable over the long run is invaluable because we can modify our code without fear such as when we are adding/modifying functionality or refactoring. It could even be considered crucial when we have projects where the scope is likely to change throughout the development lifecycle like in the case where the functional specifications are not clearly defined before we begin producing code.
Test driven development can be a huge shift in the development approach for many of us. The test driven approach basically chips away at the solution like a sculptor would at a marble block instead of trying to define and create a monolithic application in one shot.
As a first step, we'll define the interfaces out software will adhere to. The interface should clearly define how our class is to interact with other classes and what information it will expose. This is a crucial step in any software design process because we really have to know where we are going and the interface serves as a map that will help us get there.
After we have an interface, we'll begin with the test-driven development cycle.
-
Add a test
-
Run all tests and watch the new one fail (and the rest succeed)
-
Modify our code to make the test succeed
-
Run all tests and watch them succeed
-
Refactor, if necessary
-
Run tests to ensure everything still works
-
Repeat
Like I said, this will be a totally new approach to coding for some of us, but well worth it. Like they say: "Don't knock it till you try it."
Part I. Getting Started
For this demonstration, we'll be building a simple calculator that will add and subtract a double and display the information. We will also need to be able to clear the calculator's memory.
Personally, I like to separate the interfaces into a separate solution because once our interfaces are "baked" (they are not going to be changing), we can make a reference to the interfaces in new projects and code against them without having to pull in any concrete implementation. As a matter of fact, we could completely re-write the implementation on the back end if we needed to without breaking other solutions if all projects agree on a core set of interfaces to code against.
So we'll start with one solution and two projects. One project will be for the interfaces (I like using "Core" in the namespace) and the other for our implementation.
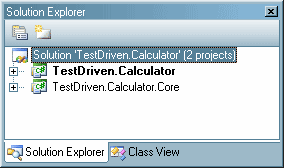
Next, we need to define our interface for the adding calculator and put it in our core project.
public interface ICalculator
{
double Total { get; }
double Add(double value);
double Subtract(double value);
double Clear();
}
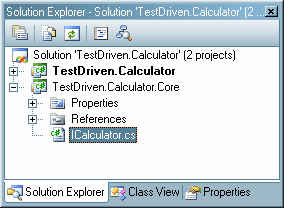
Then we'll set up the implementation project by first adding a reference to the TestDriven.Calculator.Core project and creating an empty Calculator class which will implement our interface.
using System;
using System.Collections.Generic;
using System.Text;
using TestDriven.Calculator.Core;
namespace TestDriven.Calculator
{
public class Calculator:ICalculator
{
}
}
VisualStudio 2005 has a great feature which you probably already know about, but I thought I'd mention it anyways. It allows us to stub out the properties and methods required for implementing interfaces. If we right-click on the interface name (ICalculator) and select "Implement Interface > Implement Interface" we get the following code.
using System;
using System.Collections.Generic;
using System.Text;
using TestDriven.Calculator.Core;
namespace TestDriven.Calculator
{
public class Calculator:ICalculator
{
#region ICalculator Members
public double Total
{
get { throw new Exception("The method or operation is not implemented."); }
}
public double Add(double value)
{
throw new Exception("The method or operation is not implemented.");
}
public double Subtract(double value)
{
throw new Exception("The method or operation is not implemented.");
}
public double Clear()
{
throw new Exception("The method or operation is not implemented.");
}
#endregion
}
}
So we have our interface and test project set up our solution should look like this:
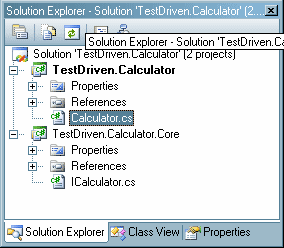
Now for the unit tests. For certain versions of Visual Studio unit testing will be built in, but just in case you didn't want to spend the cash to get one these versions, we'll be implementing unit tests in this sample project using NUnit. The process will be pretty much the same either tool you use. If you don't have a unit testing framework installed on your machine, go to http://nunit.com and download and install the most recent release.
We'll create a new project called TestDriven.Calculator.UnitTests
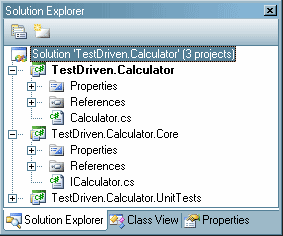
In our new project, we'll make an empty class called "CalculatorTest.cs" and we'll need references to our other two projects and the nunit.framework.
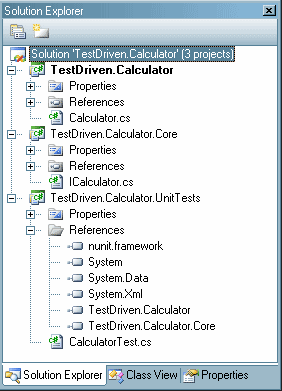
Now we are ready to get started developing our solution.
Part II. Test Driven Development
First we need to decorate our test class so NUnit knows that it is for testing.
using System;
using System.Collections.Generic;
using System.Text;
using NUnit.Framework;
using TestDriven.Calculator.Core;
using TestDriven.Calculator;
namespace TestDriven.Calculator.UnitTests
{
[TestFixture]
public class CalculatorTest
{
}
}
On a side note, if we needed to do some preliminary test setup, we could define a method and decorate it with "[Setup]" as follows.
[TestFixture]
public class CalculatorTest
{
/// <summary>
/// Used for pre-test preperations
/// </summary>
[SetUp]
public void Init()
{
}
}
First Iteration in Development Cycle
First things first, let's create a method to test the calculator constructor.
/// <summary>
/// Testing construction of calculator
/// </summary>
[Test]
public void CalculatorConstructorTest()
{
ICalculator calc = new Calculator();
Assert.IsTrue(null != calc, "Construction failed");
Assert.IsTrue(0.0D == calc.Total, "Value should initially be 0.0");
}
There are a couple of things I'd like to point out. First, our test method is decorated with "[Test]" so our testing framework knows it is a test case. You'll notice we are using the ICalculator interface to hold a reference to our calculator.
ICalculator calc = new Calculator();
It is important that we code to the interface wherever possible. This enables us to change core functionality without breaking how our unit tests interact with the underlying classes. The only place we'll be referencing the concrete Calculator class is when we have to use the constructor.
Next, we'll write our assertions. These are the things that the unit test will be asserting for us: We need to make sure the constructor worked and returns an object implementing the correct interface. We will also make sure the initial value of the calculator is 0.0.
Assert.IsTrue(null != calc, "Construction failed");
Assert.IsTrue(0.0D == calc.Total, "Value should initially be 0.0");
Next, we'll have to complete a couple of steps to test.
-
Compile our solution.
-
Create a new NUnit project (from the NUnit program)
-
Add our TestDriven.Calculator.CalculatorTests assembly to the Nunit project (from the NUnit program)
Now we can run our tests from the NUnit program and see what we get:
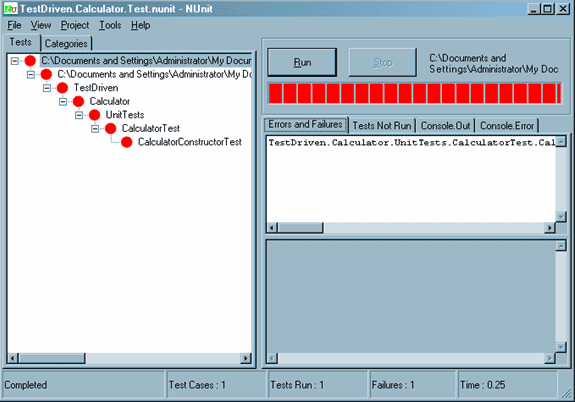
I know what you are thinking now: "Red lights mean failure -- Dude, this is Awesome!" (Actually, all joking aside, this is exactly what we want.)
This is the first step in the process. We made a test that failed. Next step is to change our code so that the test passes. In order to do this, we'll build a constructor for the Calculator class and implement the Total property.
public class Calculator:ICalculator
{
public Calculator()
{
m_total = 0.0;
}
private double m_total;
#region ICalculator Members
public double Total
{
get { return m_total; }
}
public double Add(double value)
{
throw new Exception("The method or operation is not implemented.");
}
public double Subtract(double value)
{
throw new Exception("The method or operation is not implemented.");
}
public double Clear()
{
throw new Exception("The method or operation is not implemented.");
}
#endregion
}
Then recompile and run our test again.
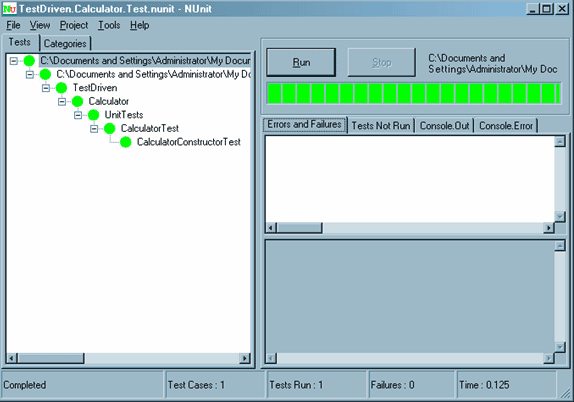
So now that we have passed the first test we look for places to improve the code. There are none so we are done with the first iteration of the test driven development cycle.
Second Iteration in Development Cycle
To start, we'll build tests for the ICalculator.Add() and ICalculator.Subtract () methods:
/// <summary>
/// Testing addition
/// </summary>
[Test]
public void CalculatorAdditionTest()
{
ICalculator calc;
double expected, actual;
calc = new Calculator();
expected = 1.0;
actual = calc.Add(1.0);
Assert.AreEqual(expected, actual, "0 + 1 should be 1");
Assert.AreEqual(expected, calc.Total, "total is incorrect");
expected = 2.5;
actual = calc.Add(1.5);
Assert.AreEqual(expected, actual, "1 + 1.5 should be 2.5");
Assert.AreEqual(expected, calc.Total, "total is incorrect");
}
/// <summary>
/// Testing subtraction
/// </summary>
[Test]
public void CalculatorSubtractionTest()
{
ICalculator calc;
double expected, actual;
calc = new Calculator();
expected = -1.0;
actual = calc.Subtract(1.0);
Assert.AreEqual(expected, actual, "0 - 1 should be -1");
Assert.AreEqual(expected, calc.Total, "total is incorrect");
expected = -2.5;
actual = calc.Subtract(1.5);
Assert.AreEqual(expected, actual, "-1 -1.5 should be -2.5");
Assert.AreEqual(expected, calc.Total, "total is incorrect");
}
Next, we compile and run the tests from NUnit and they will fail.
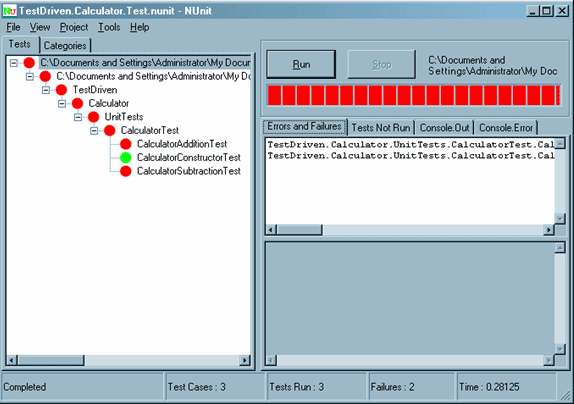
Next, we'll update the Calculator class.
public class Calculator:ICalculator
{
public Calculator()
{
m_total = 0.0;
}
private double m_total;
#region ICalculator Members
public double Total
{
get { return m_total; }
}
public double Add(double value)
{
m_total += value;
return m_total;
}
public double Subtract(double value)
{
m_total -= value;
return m_total;
}
public double Clear()
{
throw new Exception("The method or operation is not implemented.");
}
#endregion
}
Recompile and run the tests and make sure they pass
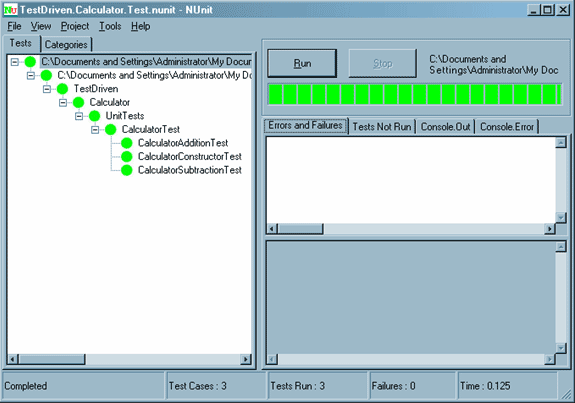
This is the point where we would check to see if there are any places where we could refactor our code to make it more efficient. For example, even though our current implementation is more than adequate, let's say we wanted to change the way we implemented the Subtract() method. We will update the code, compile and run our tests to be sure we didn't break anything.
public double Subtract(double value)
{
return Add(-1.0 * value);
}
So now we are done with our second iteration of the test driven development cycle.
Third Iteration in Development Cycle
To wrap up, we'll be working on the Clear() functionality. Here is the test:
/// <summary>
/// Testing clearing calculator
/// </summary>
[Test]
public void ClearTest()
{
ICalculator calc;
calc = new Calculator();
calc.Add(123.456);
calc.Clear();
Assert.AreEqual(0.0, calc.Total, "calculator has not been cleared");
}
We compile, run the tests, and see the failure
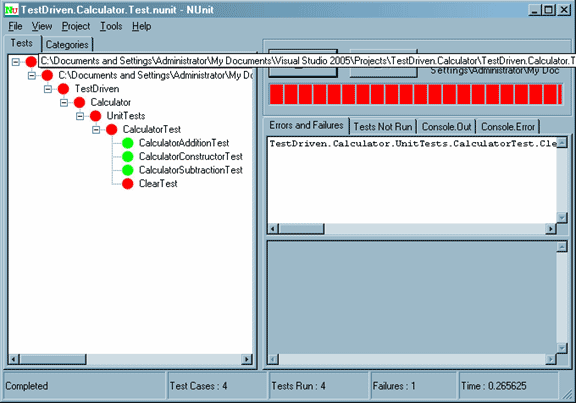
We'll implement the method, compile and test.
public double Clear()
{
m_total = 0.0;
return m_total;
}
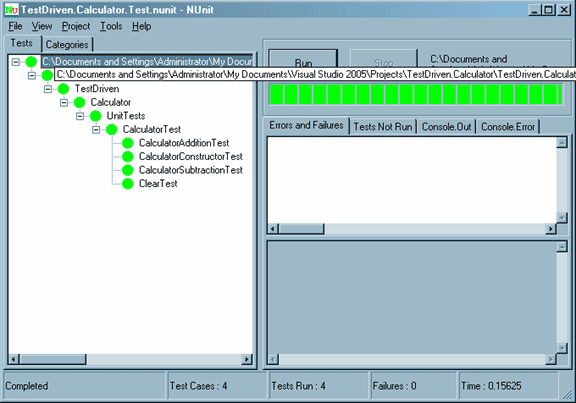
Next, we'll look for places to refactor. Let's change the constructor:
public Calculator()
{
Clear();
}
We compile, test and make sure nothing is broken.
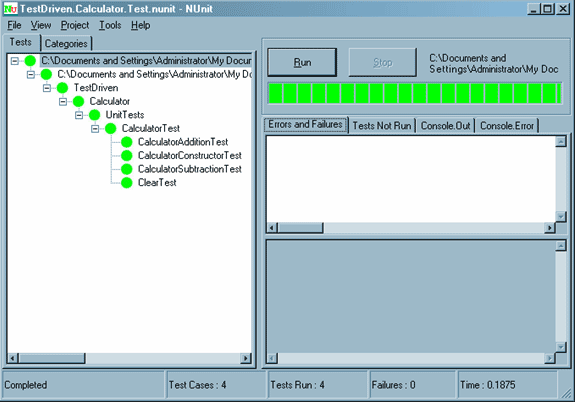
All is well, so we are done.
Wrap up.
Hopefully this article gave you a basic understanding of how test driven development works. It is a different approach than traditional development cycles and takes a bit of an adjustment to get started. Once you try building a project using this approach, chances are you won't go back because having unit tests for your code is invaluable, especailly in large projects with complex functionality for maintenance, refactoring, and managing any types of changes that may come up.
Until next time,
Happy programming.