In this article, we will discuss the RabbitMQ Message Queue and its implementation using .NET Core 6 API as a Message Producer and Console Application as a Message Consumer.
Agenda
- Introduction of RabbitMQ
- Benefits of using RabbitMQ
- Implementation of RabbitMQ in .NET Core 6
Prerequisites
- Visual Studio 2022
- Docker Desktop
- .NET Core 6 SDK
Introduction of RabbitMQ
- Rabbit MQ is the message broker that acts as a middleware while using multiple microservices.
- RabbitMQ is an open-source message broker software. It is sometimes also called message-oriented middleware.
- RabbitMQ is written in the Erlang programming language.
- RabbitMQ is used to reduce the load and delivery time of a web application when some of the resources have taken a lot of time to process the data.
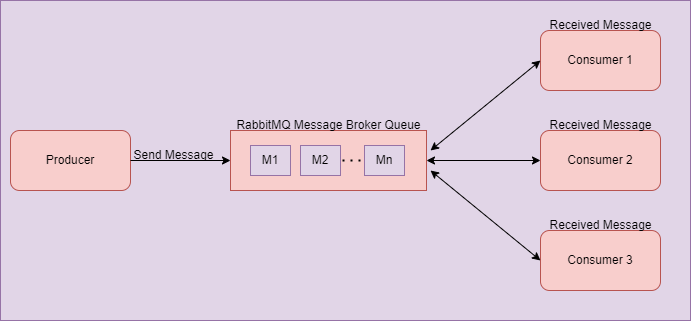
- As you can see in the diagram above, there is one producer who sends a message to the RabbitMQ server. The server will store that message inside the queue in a FIFO manner.
- Once the producer has sent the message to the queue, there may be multiple consumers who want the message produced by the producer. In that case, consumers subscribe to the message and get that message from the Message Queue, as you see in the above diagram.
- In this section, we will use one eCommerce Site as an example to understand more fully.
- There are multiple microservices running in the background while we are using the eCommerce website. There is one service that takes care of order details and another service that takes care of payment details and receipts.
- Suppose we placed one order. At that time, the order service will start and process our order. After taking the order details, it will send data to the payment service, which takes the payment and sends the payment receipt to the end-users.
- In this case, there may be a chance of some technical issue occurring in the payment service. If the user did not receive the payment receipt due to this, the user would be impacted and connected with the support team ti try to learn the status of the order.
- There may be another scenario on the user(consumer) side. Perhaps due to some technical issue, the user is exited from the application when the payment is in process. However, he will not get any receipt details after payment is successfully processed from backend services.
- In these scenarios, RabbitMQ plays an essential role in processing messages in the message queue. So, when the consumer gets online, he will receive that order receipt message from the message queue, produced by the producer, without impacting the web application.
- All these examples are just for understanding purposes. There are a lot of scenarios in which RabbitMQ may play an important role while using multiple microservices. Sometimes RabbitMQ is used fully to load balancing between multiple services or for many other purposes.
Benefits of using RabbitMQ
There are many benefits to using a Message Broker to send data to the consumer. Below, we will discuss a few of these benefits.
High Availability
When multiple microservices are used by the application, if one of the microservices is stopped due to technical reasons at that time, the message will never be lost. Instead, it persists in the RabbitMQ server. After some time, when our service starts working, it will connect with RabbitMQ and take the pending message easily.
Scalability
When we use RabbitMQ, at that time, our application does not depend on only one server and virtual machine to process a request. If our server is stopped at that time, RabbitMQ will transfer our application load to another server that has the same services running in the background.
RabbitMQ Implementation with .NET Core 6
Let’s start with the practical implementation of RabbitMQ using .NET Core 6 Web API as a producer and Console Application as a consumer.
Step 1. Create a .NET Core API project.

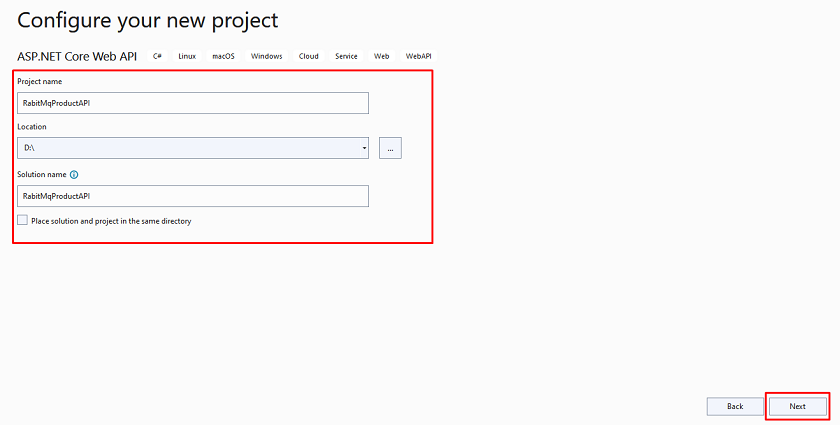
Step 2. Configure your project.
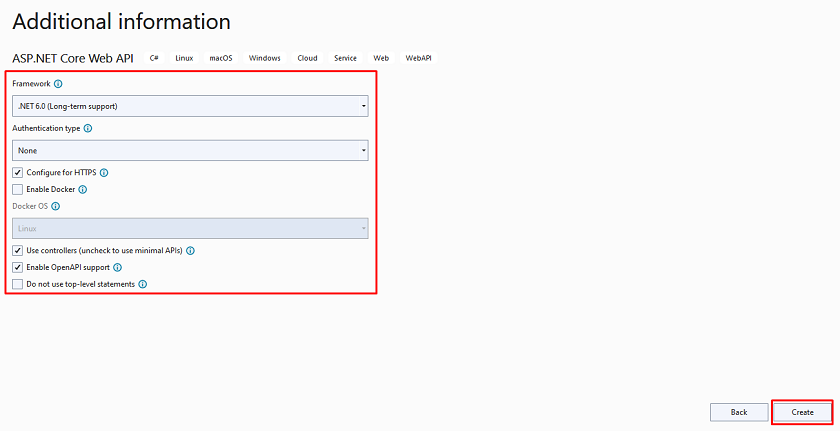
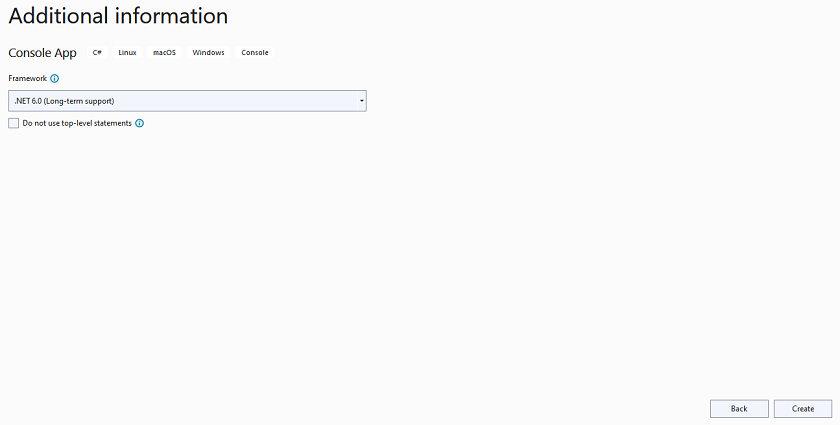
Step 3. Provide additional information about your project.
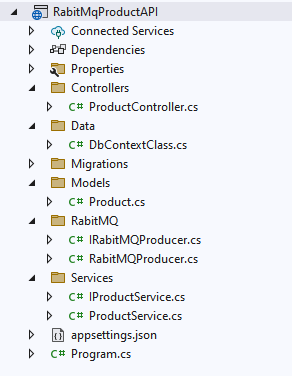
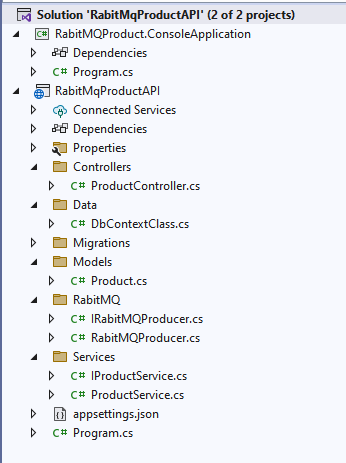
Step 4. Project Structure of Producer Application.
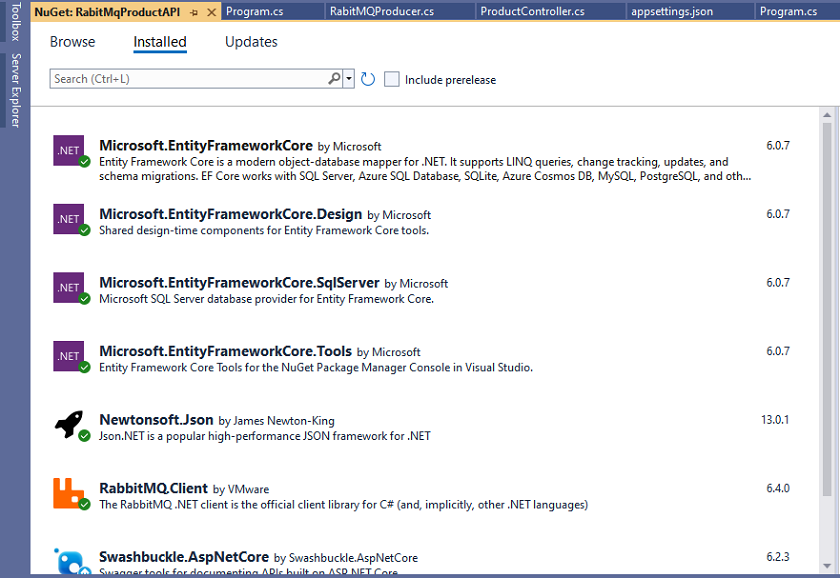
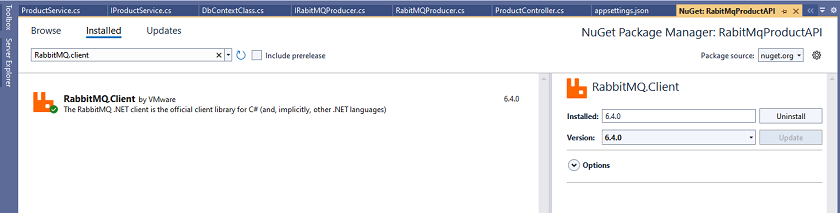
Step 5. Install a few NuGet packages.
Step 6. Create a Product Class inside the Models folder.
namespace RabitMqProductAPI.Models {
    public class Product {
        public int ProductId {
            get;
            set;
        }
        public string ProductName {
            get;
            set;
        }
        public string ProductDescription {
            get;
            set;
        }
        public int ProductPrice {
            get;
            set;
        }
        public int ProductStock {
            get;
            set;
        }
    }
}
Step 7. Next, create a DbContextClass.cs class inside the Data folder.
using Microsoft.EntityFrameworkCore;
using RabitMqProductAPI.Models;
namespace RabitMqProductAPI.Data {
    public class DbContextClass: DbContext {
        protected readonly IConfiguration Configuration;
        public DbContextClass(IConfiguration configuration) {
            Configuration = configuration;
        }
        protected override void OnConfiguring(DbContextOptionsBuilder options) {
            options.UseSqlServer(Configuration.GetConnectionString("DefaultConnection"));
        }
        public DbSet < Product > Products {
            get;
            set;
        }
    }
}
Step 8. Later on, create an IProductService.cs and ProductService.cs class inside the Services folder.
using RabitMqProductAPI.Models;
namespace RabitMqProductAPI.Services {
    public interface IProductService {
        public IEnumerable < Product > GetProductList();
        public Product GetProductById(int id);
        public Product AddProduct(Product product);
        public Product UpdateProduct(Product product);
        public bool DeleteProduct(int Id);
    }
}
Create a ProductService.cs.
using RabitMqProductAPI.Data;
using RabitMqProductAPI.Models;
namespace RabitMqProductAPI.Services {
    public class ProductService: IProductService {
        private readonly DbContextClass _dbContext;
        public ProductService(DbContextClass dbContext) {
            _dbContext = dbContext;
        }
        public IEnumerable < Product > GetProductList() {
            return _dbContext.Products.ToList();
        }
        public Product GetProductById(int id) {
            return _dbContext.Products.Where(x => x.ProductId == id).FirstOrDefault();
        }
        public Product AddProduct(Product product) {
            var result = _dbContext.Products.Add(product);
            _dbContext.SaveChanges();
            return result.Entity;
        }
        public Product UpdateProduct(Product product) {
            var result = _dbContext.Products.Update(product);
            _dbContext.SaveChanges();
            return result.Entity;
        }
        public bool DeleteProduct(int Id) {
            var filteredData = _dbContext.Products.Where(x => x.ProductId == Id).FirstOrDefault();
            var result = _dbContext.Remove(filteredData);
            _dbContext.SaveChanges();
            return result != null ? true : false;
        }
    }
}
Step 9. Create IRabitMQProducer.cs and RabitMQProducer.cs classes for the message queue inside the RabbitMQ folder.
namespace RabitMqProductAPI.RabitMQ {
    public interface IRabitMQProducer {
        public void SendProductMessage < T > (T message);
    }
}
Next, create a RabitMQProducer.cs class.
using Newtonsoft.Json;
using RabbitMQ.Client;
using System.Text;
namespace RabitMqProductAPI.RabitMQ {
    public class RabitMQProducer: IRabitMQProducer {
        public void SendProductMessage < T > (T message) {
            //Here we specify the Rabbit MQ Server. we use rabbitmq docker image and use it
            var factory = new ConnectionFactory {
                HostName = "localhost"
            };
            //Create the RabbitMQ connection using connection factory details as i mentioned above
            var connection = factory.CreateConnection();
            //Here we create channel with session and model
            using
            var channel = connection.CreateModel();
            //declare the queue after mentioning name and a few property related to that
            channel.QueueDeclare("product", exclusive: false);
            //Serialize the message
            var json = JsonConvert.SerializeObject(message);
            var body = Encoding.UTF8.GetBytes(json);
            //put the data on to the product queue
            channel.BasicPublish(exchange: "", routingKey: "product", body: body);
        }
    }
}
Step 10. After that, create a new ProductController.cs.
using Microsoft.AspNetCore.Mvc;
using RabitMqProductAPI.Models;
using RabitMqProductAPI.RabitMQ;
using RabitMqProductAPI.Services;
namespace RabitMqProductAPI.Controllers {
    [Route("api/[controller]")]
    [ApiController]
    public class ProductController: ControllerBase {
        private readonly IProductService productService;
        private readonly IRabitMQProducer _rabitMQProducer;
        public ProductController(IProductService _productService, IRabitMQProducer rabitMQProducer) {
                productService = _productService;
                _rabitMQProducer = rabitMQProducer;
            }
            [HttpGet("productlist")]
        public IEnumerable < Product > ProductList() {
                var productList = productService.GetProductList();
                return productList;
            }
            [HttpGet("getproductbyid")]
        public Product GetProductById(int Id) {
                return productService.GetProductById(Id);
            }
            [HttpPost("addproduct")]
        public Product AddProduct(Product product) {
                var productData = productService.AddProduct(product);
                //send the inserted product data to the queue and consumer will listening this data from queue
                _rabitMQProducer.SendProductMessage(productData);
                return productData;
            }
            [HttpPut("updateproduct")]
        public Product UpdateProduct(Product product) {
                return productService.UpdateProduct(product);
            }
            [HttpDelete("deleteproduct")]
        public bool DeleteProduct(int Id) {
            return productService.DeleteProduct(Id);
        }
    }
}
Here, you can see that we inject the IRabitMQProducer service inside the constructor and use it in the add product API endpoint to send data into the message queue. This inserts product details inside the RabbitMQ queue, and later the consumer will get that data. This is the continuous listening queue.
Step 11. Add the connection string inside the appsetting.json file.
{
    "Logging": {
        "LogLevel": {
            "Default": "Information",
            "Microsoft.AspNetCore": "Warning"
        }
    },
    "AllowedHosts": "*",
    "ConnectionStrings": {
        "DefaultConnection": "Data Source=DESKTOP-***;Initial Catalog=RabitMQDemo;User Id=**;Password=***@1;"
    }
}
Step 12. Next, register a few services inside the Program.cs class.
using RabitMqProductAPI.Data;
using RabitMqProductAPI.RabitMQ;
using RabitMqProductAPI.Services;
var builder = WebApplication.CreateBuilder(args);
// Add services to the container.
builder.Services.AddScoped < IProductService, ProductService > ();
builder.Services.AddDbContext < DbContextClass > ();
builder.Services.AddScoped < IRabitMQProducer, RabitMQProducer > ();
builder.Services.AddControllers();
// Learn more about configuring Swagger/OpenAPI at https://aka.ms/aspnetcore/swashbuckle
builder.Services.AddEndpointsApiExplorer();
builder.Services.AddSwaggerGen();
var app = builder.Build();
// Configure the HTTP request pipeline.
if (app.Environment.IsDevelopment()) {
    app.UseSwagger();
    app.UseSwaggerUI();
}
app.UseHttpsRedirection();
app.UseAuthorization();
app.MapControllers();
app.Run();
Step 13. Add migration and update using the following entity framework command after executing that into the package manager console under the main project.
add-migration "first"
qupdate-database
Step 14. Install rabbitmq docker file using the following command (Note- docker desktop is in running mode)
docker pull rabbitmq:3-management
Next, create a container and start using the Rabbitmq Dockerfile that we downloaded:
docker run --rm -it -p 15672:15672 -p 5672:5672 rabbitmq:3-management
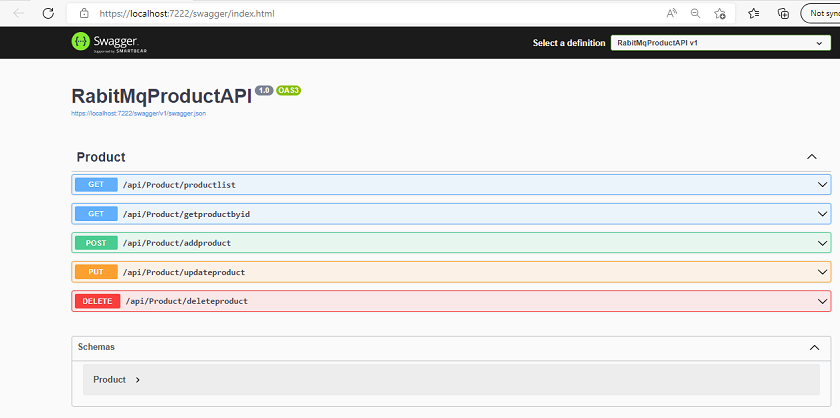
Step 15. Finally, run your application, and you will see the swagger UI and API endpoints.
Creating a New Console Application
This is all about Product Web API as a producer. Now, let's create a new console application as the consumer consumes the message sent by the producer.
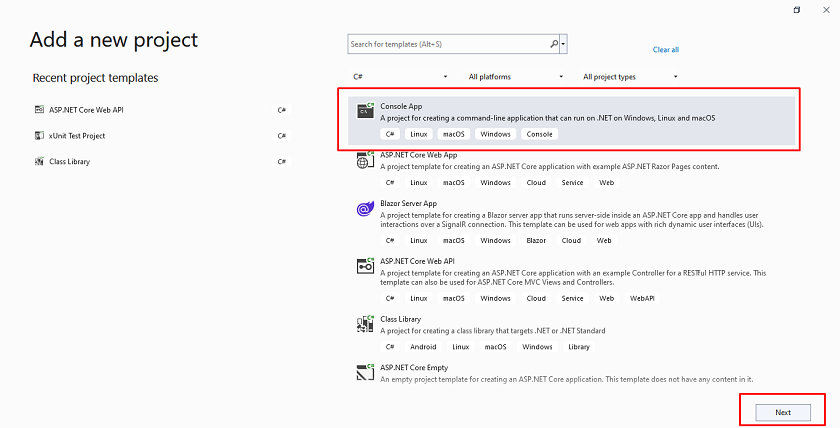
Step 1. Add a new console application inside the same solution.
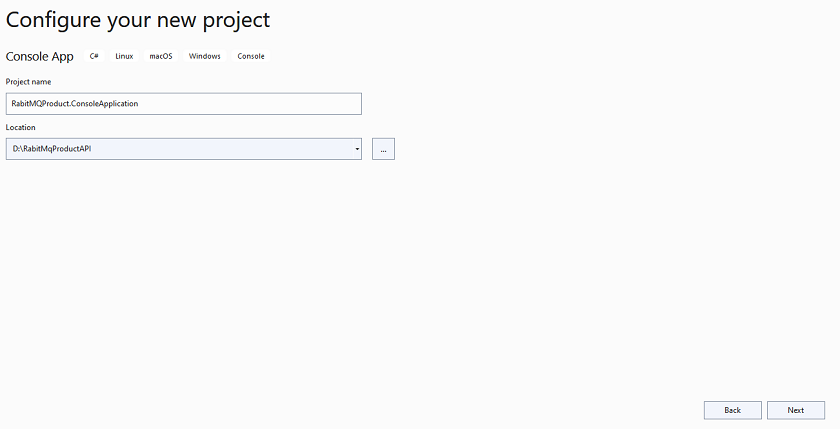
Step 2. Configure your new project.
Step 3. Provide additional information.
Step 4. Install a few NuGet packages.
Step 5. Add the following code inside the Program.cs class.
using RabbitMQ.Client;
using RabbitMQ.Client.Events;
using System.Text;
//Here we specify the Rabbit MQ Server. we use rabbitmq docker image and use it
var factory = new ConnectionFactory {
    HostName = "localhost"
};
//Create the RabbitMQ connection using connection factory details as i mentioned above
var connection = factory.CreateConnection();
//Here we create channel with session and model
using
var channel = connection.CreateModel();
//declare the queue after mentioning name and a few property related to that
channel.QueueDeclare("product", exclusive: false);
//Set Event object which listen message from chanel which is sent by producer
var consumer = new EventingBasicConsumer(channel);
consumer.Received += (model, eventArgs) => {
    var body = eventArgs.Body.ToArray();
    var message = Encoding.UTF8.GetString(body);
    Console.WriteLine($ "Product message received: {message}");
};
//read the message
channel.BasicConsume(queue: "product", autoAck: true, consumer: consumer);
Console.ReadKey();
Step 6. Final Project Structure.
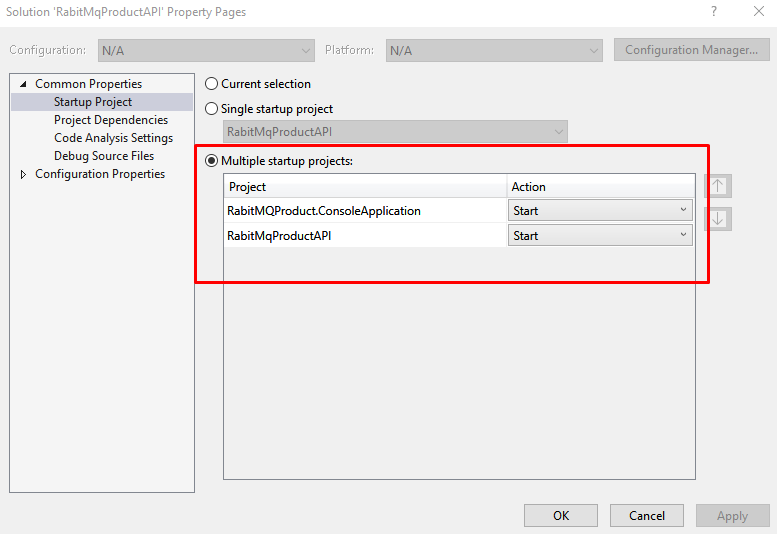
Step 7. Go to the solution property and configure both the producer and the consumer project as a starting project, as shown below.
Step 8. Open the following URL to open the RabbitMQ dashboard on the port we set while running docker.
http://localhost:15672/
When you click the URL, the login page will open.
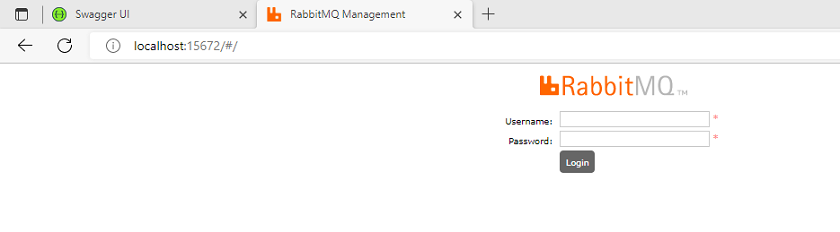
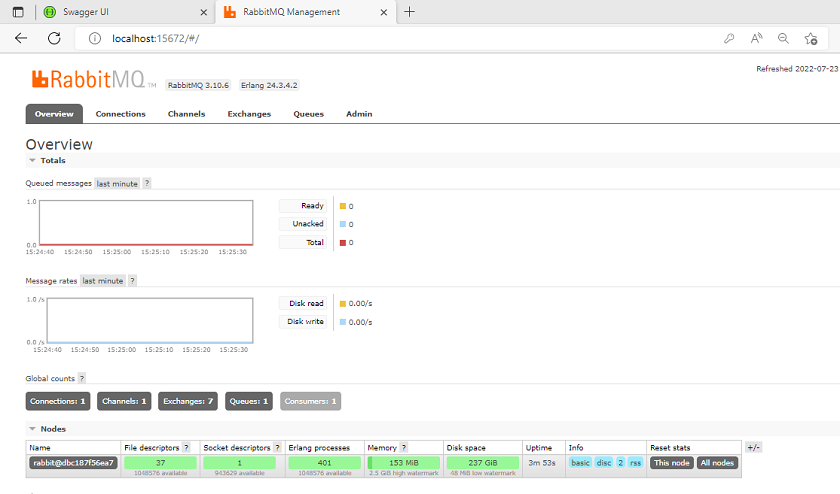
Enter default username ("guest") and password (also "guest"), and next you will see the dashboard.
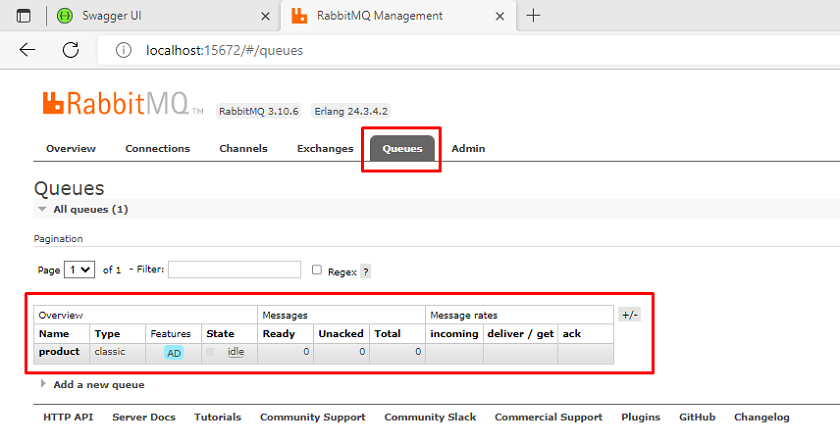
Open the queue tab, in which you will see our product queue.
Step 9. Enter the one product details and execute the API.
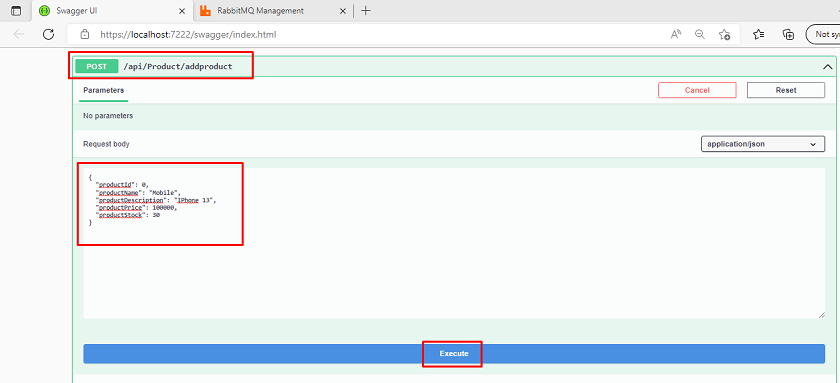
Step 10. When you execute the above API using Swagger, then the message is sent to the queue. You can see inside the console window of the consumer the product details that he listened to from the queue immediately.

This is all about RabbitMQ. You may use this as per your requirement and purpose.
Conclusion
We discussed all the things related to RabbitMQ, beginning from the introduction, working, and then set up a docker image and a few functionalities related to the producer and the consumer using the product application.
Happy learning!