

Before reading this article, I highly recommend reading the previous part of the series:

Why to Use MVVM (A Model View ViewModel)
- This is used to define the business models.
- Here we can create different types of object classes for use of separate UI (User Interface) logic from business functionality for easier testing.
- A model is representing the real world object in our business logic.
- It includes functions & properties.
- ViewModel is used for communication (connection) between View & Model.
- Binding is used for connection between properties & events of UI to functions.
What is Binding in KnockOut.js
- To establish relationship between View & ViewModel.
- Pass user action to ViewModel.
- Manipulate elements on View based on ViewModel observable properties.
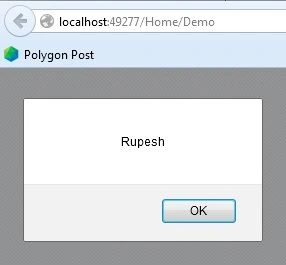
Demo for observable:
Step 1: Create one project in VS 2013. Create any empty application.
Add action method & view for same action method.
Add the following code to our view:
- @{
- Layout = null;
- }
- <!DOCTYPE html>
- <html>
- <head>
- <meta name="viewport" content="width=device-width" />
- <title>Demo</title>
- <script src="~/Scripts/jquery-2.2.0.js"></script>
- <script src="~/Scripts/knockout-3.4.0.js"></script>
- <script>
- $(document).ready(function () {
- var employeeName = ko.observable("Rupesh");
- alert(employeeName());
- })
- </script>
- </head>
- <body>
- <div></div>
- </body>
- </html>
Demo for Binding using MVVM
Step 1: By right click on project add Knockout.js & JavaScript files from Manage Nuget packages.
Now add one JavaScript file for Knockout.js code. Here in this demo we can see on button click event we will show & hide the image.
Also add the following references & code to above created file as follows:
- /// <reference path="jquery-2.2.0.js" />
- /// <reference path="knockout-3.4.0.js" />
- $(document).ready(function ()
- {
- var imageViewModel = {
- myImage: ko.observable(false),
- showMyImage: function ()
- {
- this.myImage(true);
- },
- hideMyImage: function ()
- {
- this.myImage(false);
- }
- };
- ko.applyBindings(imageViewModel);
- });
Step 3: I am using ASP.NET MVC 5. So I am going to create one controller with some action methods as well as views for that particular action method.
Step 4: Now create view for our action and add the following code.
- @{
- Layout = null;
- }
- <!DOCTYPE html>
- <html>
- <head>
- <meta name="viewport" content="width=device-width" />
- <title>Index</title>
- <script src="~/Scripts/jquery-2.2.0.js"></script>
- <script src="~/Scripts/knockout-3.4.0.js"></script>
- <script src="~/Scripts/Intro-KO.js"></script>
- </head>
- <body>
- <div>
- <div data-bind="visible:myImage">
- <img src="~/images/thanks.jpg" alt="thanks" style="width:200px;height:300px;" />
- </div>
- <div>
- <button data-bind="click:showMyImage"> Show Image </button>
- <button data-bind="click:hideMyImage"> Hide Image </button>
- </div>
- </div>
- </body>
- </html>
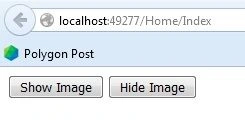
After clicking the button Show Image.
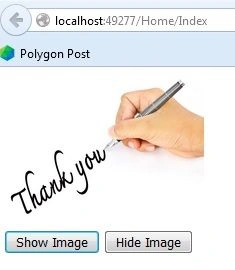
In the following code there is little bit difference than above code. In above case we have used data-bind.
Step 1: Create one new action method in our controller.
Create view against this action & add the following code:
- @{
- Layout = null;
- }
- <!DOCTYPE html>
- <html>
- <head>
- <meta name="viewport" content="width=device-width" />
- <title>Test</title>
- <script src="~/Scripts/jquery-2.2.0.js"></script>
- <script src="~/Scripts/knockout-3.4.0.js"></script>
- <script>
- $(document).ready(function () {
- var myViewModel =
- {
- showImage: ko.observable(false)
- };
- $('#showLogo').click(function () {
- myViewModel.showImage(true);
- });
- $('#hideLogo').click(function () {
- myViewModel.showImage(false);
- });
- ko.applyBindings(myViewModel);
- })
- ko.applyBindings(imageViewModel);
- </script>
- </head>
- <body>
- <div>
- <div data-bind="visible:showImage">
- <img src="~/images/CSCLogo.png" alt="C#Corner" style="width:200px;height:150px;" />
- </div>
- <div>
- <button id="showLogo"> Show Logo </button>
- <button id="hideLogo"> Hide Logo </button>
- </div>
- </div>
- </body>
- </html>
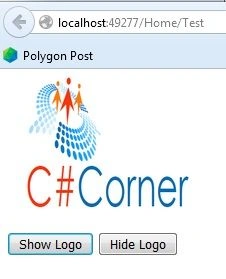
Step 2: Now run the application.
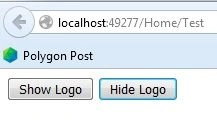
After button click on show logo.
Summary
This article will help fresher candidates to understand Knockout.js.
Read more articles on Knockout.js:
Bhuvanesh MohankumarPosted May 3, 2016, 12:40 PM
Good to read
Rupesh KahanePosted Feb 15, 2016, 12:53 PM
thanks to Nanddeep Nachan
Nanddeep NachanPosted Feb 15, 2016, 4:28 AM
Nice share
Vignesh ManiPosted Feb 8, 2016, 4:39 AM
Good
Sibeesh VenuPosted Feb 8, 2016, 12:09 AM
Nice Share
Santhakumar MunuswamyPosted Feb 7, 2016, 1:14 PM
Thanks for nice article
Prasham SabadraPosted Feb 7, 2016, 12:38 PM
Thanks Rupesh :)
Rupesh KahanePosted Feb 6, 2016, 12:56 PM
thanks to Shubham Kumar, Amit Singh & Pankaj Kumar Choudhary also
Pankaj Kumar ChoudharyPosted Feb 6, 2016, 7:52 AM
Nice Explain...........
Amit Kumar SinghPosted Feb 6, 2016, 6:36 AM
Nice One
Shubham KumarPosted Feb 6, 2016, 4:33 AM
very nice