

Using Visual Studio Code Editor for Open Source
As all of us know that ASP.NET 5 is now open source but to write the code for ASP.NET 5 we need editors. There are a lot of editors available in the market which can be used but as we are much familiar with Visual Studio we will prefer to use Visual Studio. So Microsoft has created a free editor for it which is known as Visual Studio Code.
Visual Studio Code is an Editor created by Microsoft which is open source and can be used with Windows, Linux and OS X. Debugging, IntelliSense (intelligent code completion), embedded Git control are supported by Visual Studio Code. Visual Studio Code provides us a lot of customizations like changing the Editor’s theme, editor's preferences, editor’s keyboard shortcut and many more customization.
To download Visual Studio Code please visit the URL.

From this website you can download it for Windows, Linux x64, 32 bit Version and Mac OS X.
I am downloading it for windows.
It will redirect you to a new URL where it will provide a downloadable file as well as having a video for complete details how to use Visual Studio Code.
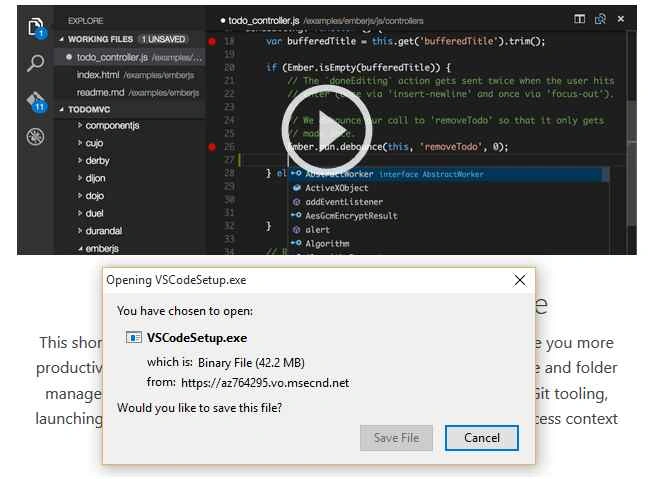
Save the setup file and you can also watch the video being displayed on the page while downloading the setup. This video provides very helpful information.
After downloading the setup file install it,


The setup is very small in size (42.2 MB approx.) and it gets installed within few minutes.
After installation first time it will open the Visual Studio Code like the following screenshot,
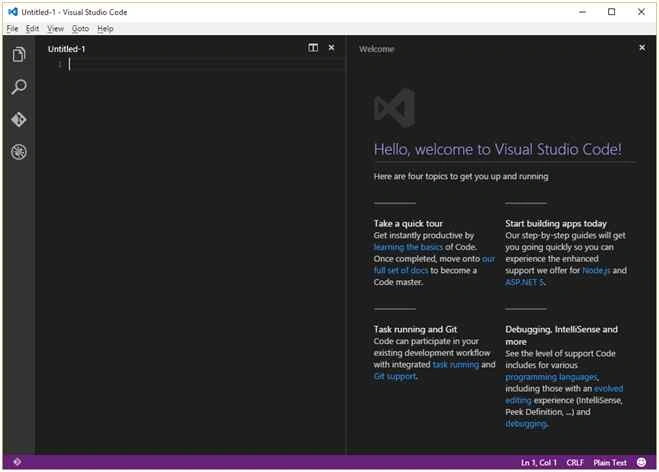
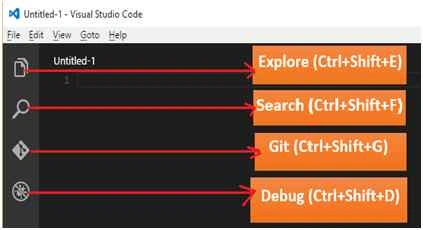
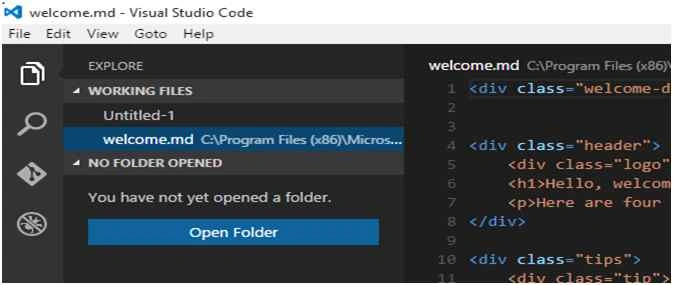
Some more screenshots of Visual Studio Code.
Explore
Search

Git
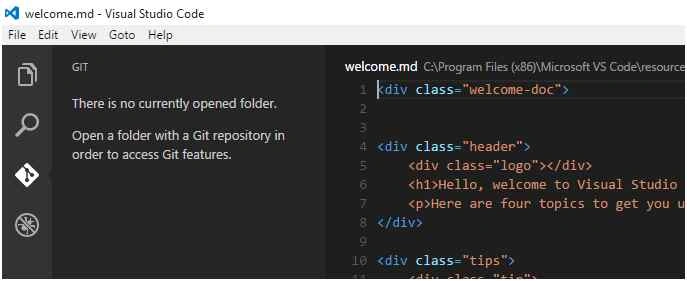
Debug
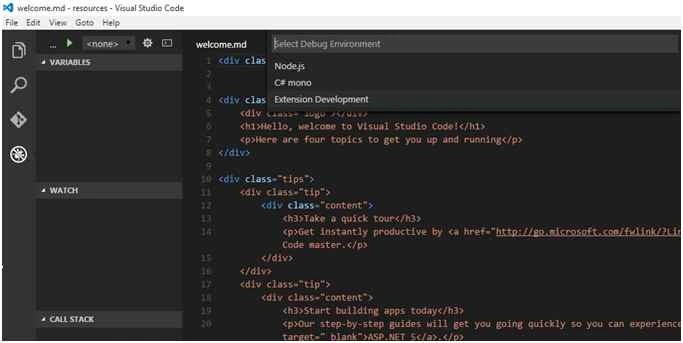
If any update is available it will be displayed like the following screenshot. To update it you need to click on Update Now or you can choose the option “Later”. You can also read the Release Notes.

File Menu

Edit Menu
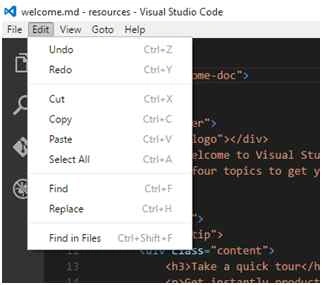
View Menu

Goto Menu
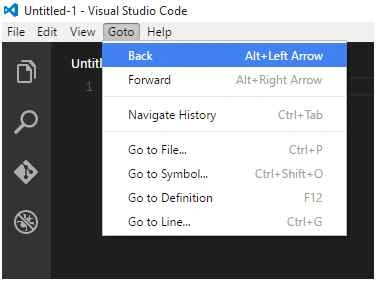
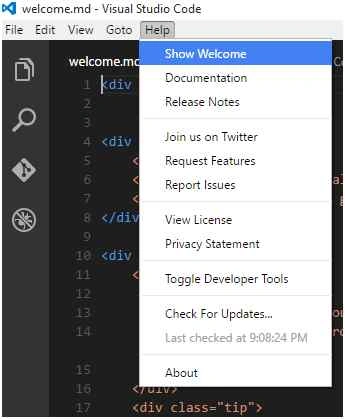
Help Menu
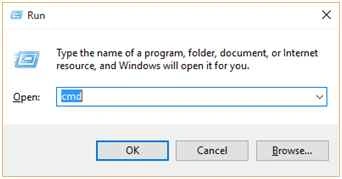
Opening Visual Studio Code from Command Prompt.
Run (Window Key +R) - cmd, then write code and press enter

Windows 10
In Windows 10 just write code in search box and press enter,

Splitting the Editor

The Visual Studio Code Editor provides the feature to split the Editor window. You can find the Split Editor button at the top right corner of the editor.

Installing Yeoman for scaffolding, package manager & build tool
npm install yo -g
I am using -g to indicate that yeomen will be installed globally i.e. it will be installed for all the users.
The Yeoman workflow is comprised of three core tools for improving your productivity and satisfaction when building a web app. These tools are:
- Yo - the scaffolding tool from Yeoman.
- A package manager, such as bower or npm.
- A build tool, such as Grunt or Gulp.
Each of these projects are independently maintained by their respective communities, but work well together as a part of a prescriptive workflow for keeping you effective. Let’s walk through what these binaries can do.
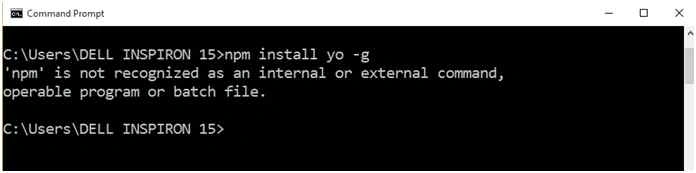
You can see that it is displaying a message:
'npm' is not recognized as an internal or external command, operable program or batch file.
The command prompt is displaying this message, node package manager is not installed on this PC. So first I need to install node package manager.
Installing Node Package Manager
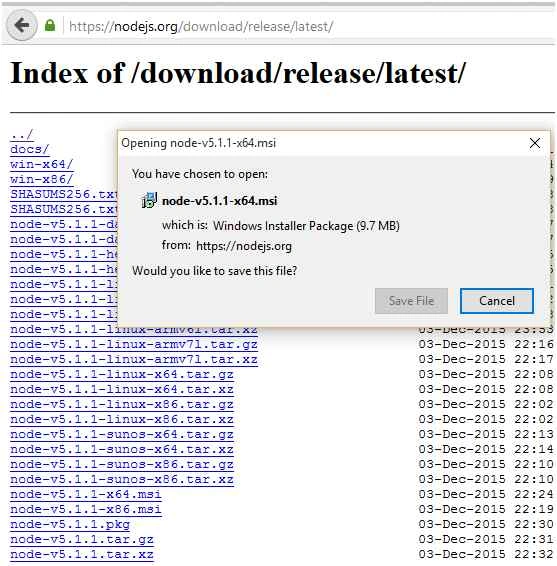
The Node Package Manager can be downloaded from the following link.
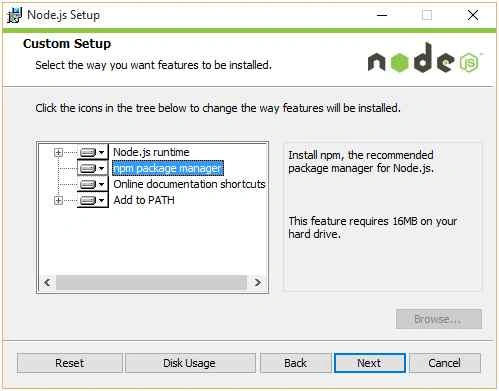
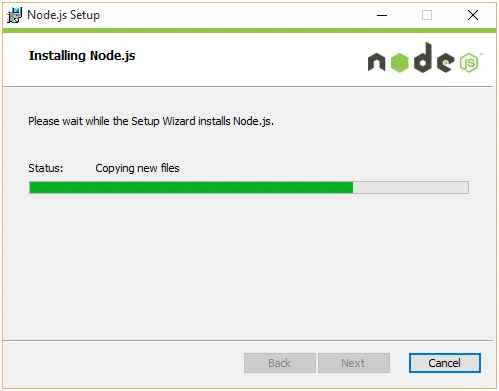
Now reopen the command prompt and run the following command,
npm install yo –g
It will start installing and will be installed in few minutes.
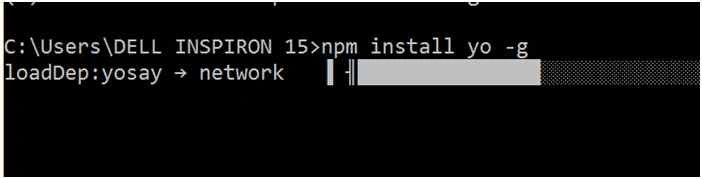
Finally Yeoman is installed after few minutes
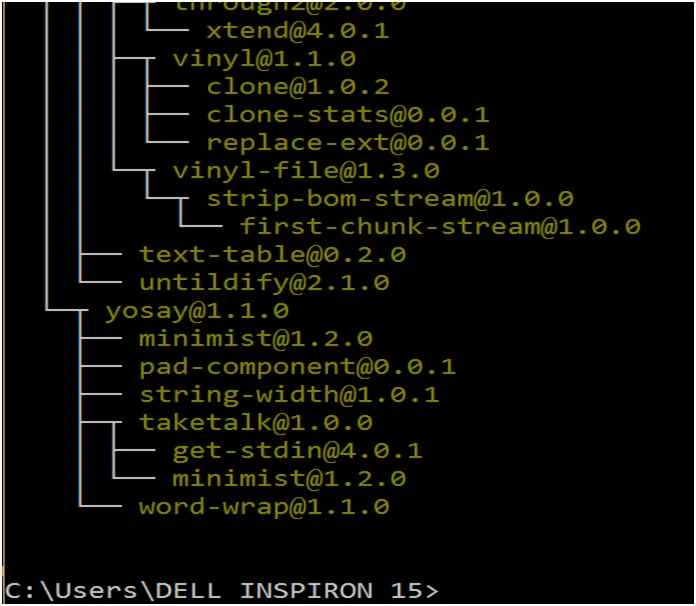
Now write “yo” on command prompt and press enter.

If anything is deleted or you have cleaned the “~/APPData/Roaming/~” folder then you may get error something like the following,
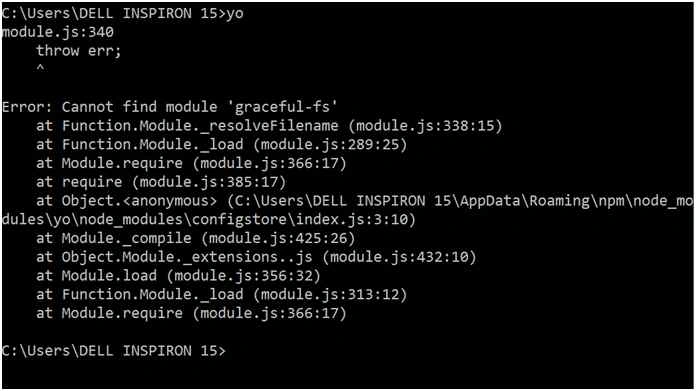
Installing ASP.NET 5 using npm
To install ASP.NET 5 using npm you need to run the following command,
npm install generator-aspnet -g
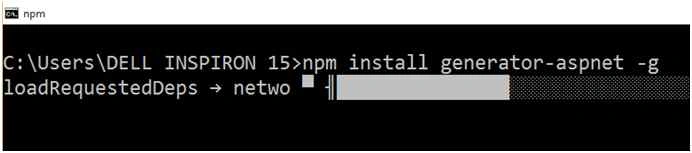
When ASP.NET is installed successfully then write “yo” on command prompt.
It will show you that a generator Aspnet is installed.
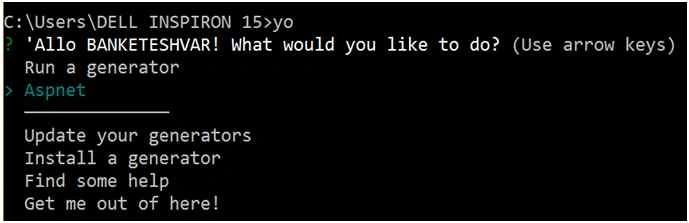
Press enter again on the command prompt then console window will look something like the following screenshot,
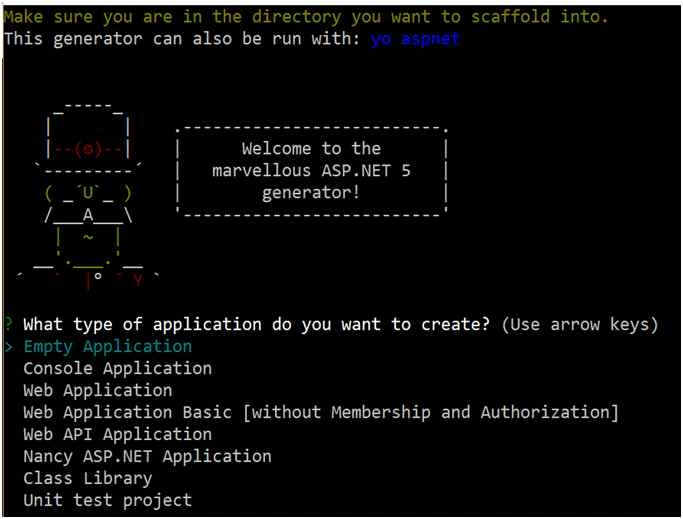
You can see in the above screenshot that it is saying that this generator can also be run with “yo aspnet”.
Let’s run “yo aspnet” on command prompt.
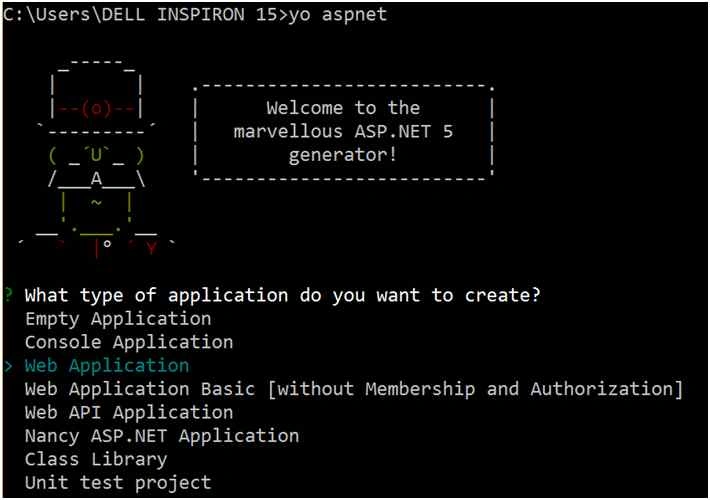
To select different type of projects you need to use up and down arrow of your keyboard.
You can also use numbers starting from 1 to select a type of application.
Suppose I have to create a console application then I will press 2. It automatically moves cursor to Console Application and now press enter.
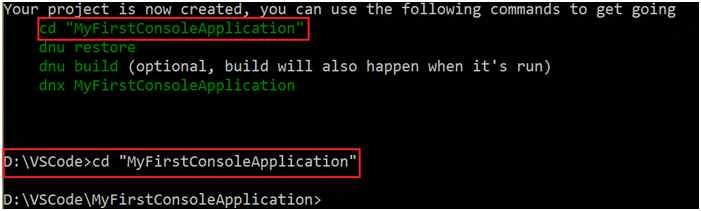
It will ask the application name. Let me give it “MyFirstConsoleApplication”.

As it is saying to change the directory by typing cd "MyFirstConsoleApplication”.
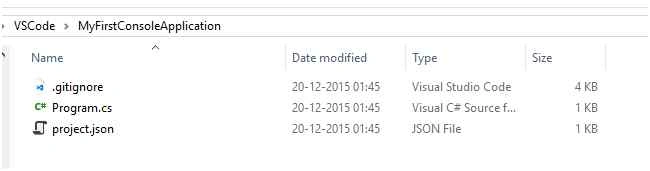
You can also see the file generated by it.
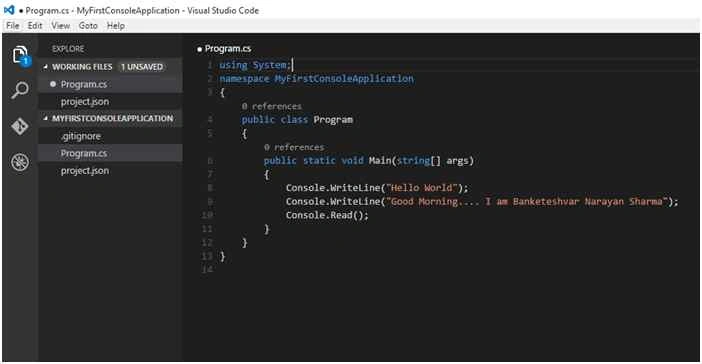
To open the code in Visual Studio Code Editor write “code”.

It will open the project in new Visual Studio Code Editor.
Output
To see the output of this application you can use dnx command,
- Run—cmd—it will open console window.
- Go to the current directory (in my case current directory is, “D:\VSCode\MyFirstConsoleApplication”).
- Write dnx MyFirstConsoleApplication (name of your console application).
It will show you the output in the console window,

I know that some parts of this article should be explained in more depth but the article is already long so I will explain those things in next tutorial.
ParthaPosted May 13, 2022, 11:23 AM
When i type yo it says invalid command
Pradeep SahooPosted May 18, 2016, 4:55 PM
Nice share .........
Rajeev PunhaniPosted Apr 27, 2016, 5:22 AM
Nice Informative article.
Banketeshvar NarayanPosted Jan 6, 2016, 2:18 PM
In this article I have mentioned that to install yeoman use the command “npm install yo –g” but if you are using an account that does not have administrative rights in that case it cannot install for all the users so in that case it will throw exception in that case use the command “npm install yo” . I have removed –g because it is use to indicate that yeoman has to be installed globally (for all the users).
Amandeep singhPosted Dec 28, 2015, 4:32 AM
nice one
Banketeshvar NarayanPosted Dec 26, 2015, 6:14 AM
Thanks @saransh kataria . I just visited the link you provided. your article is very nice. 2nd article of this series has been published and you can check it out at http://www.c-sharpcorner.com/UploadFile/efa3cf/Asp-Net-5-with-visual-studio-code-part-2/
Banketeshvar NarayanPosted Dec 26, 2015, 5:46 AM
Thanks Joe Wilson
Joe WilsonPosted Dec 26, 2015, 3:41 AM
Well, it's so good.
Banketeshvar NarayanPosted Dec 24, 2015, 6:13 AM
Thanks once again to all the readers
Banketeshvar NarayanPosted Dec 23, 2015, 11:05 PM
Thanks Santhakumar Munuswamy
Santhakumar MunuswamyPosted Dec 23, 2015, 3:51 PM
Thanks for nice article
Banketeshvar NarayanPosted Dec 21, 2015, 12:51 PM
Thanks Yaduveer Saini
Yaduveer SainiPosted Dec 21, 2015, 9:28 AM
Very Nice article.
Banketeshvar NarayanPosted Dec 21, 2015, 5:36 AM
Thanks Suman Verma
Suman VermaPosted Dec 21, 2015, 5:33 AM
Nice one
Banketeshvar NarayanPosted Dec 21, 2015, 4:49 AM
Thanks Gowtham K
Gowtham KPosted Dec 21, 2015, 4:00 AM
Great, Thanks for sharing it
Banketeshvar NarayanPosted Dec 21, 2015, 3:33 AM
Thanks Amandeep singh
Amandeep singhPosted Dec 21, 2015, 3:28 AM
nice
Banketeshvar NarayanPosted Dec 21, 2015, 2:10 AM
Thanks Mukesh Kumar for giving your precious time to read the article. Part 2 will come very shortly.
Mukesh KumarPosted Dec 21, 2015, 1:58 AM
Good Job Banke.. You have explained very smothly step by step.. waiting for part 2. Thanks for sharing
Banketeshvar NarayanPosted Dec 21, 2015, 1:30 AM
Thanks Ankur Mistry
Ankur MistryPosted Dec 21, 2015, 1:12 AM
helpful stuff
Banketeshvar NarayanPosted Dec 21, 2015, 12:40 AM
Thanks Syed Shanu
Syed ShanuPosted Dec 21, 2015, 12:31 AM
Great Post
Banketeshvar NarayanPosted Dec 21, 2015, 12:13 AM
Thanks Dhrumit Patel
Former memberPosted Dec 20, 2015, 11:48 PM
Good one Sir
Banketeshvar NarayanPosted Dec 20, 2015, 11:28 PM
Thanks Raja T
Raja TPosted Dec 20, 2015, 11:22 PM
Nice, Thanks for sharing