Blue Theme Orange Theme Green Theme Red Theme
 
Home | Forums | Videos | Photos | Blogs | E-Books | Interviews | Jobs | Beginners | Training
 | Consulting  
Submit an Article 
 Login Close
User Id:
Password:
 
Forgot Password
Forgot Username
Why Register
 Jump to
Skip Navigation Links
TechnologyExpand Technology
WebsiteExpand Website
New MS SQL 2008 Available - DiscountASP.NET
 Resources  
Close
 Our Network  
Close
Search :       Advanced Search »
Home » Windows Forms » Windows Forms Events Lifecycle

Windows Forms Events Lifecycle

This article describes the standard events that take place when a form is created and launched and shows the sequence in which they are raised.

Author Rank:
Technologies: .NET 3.0 and 3.5, Windows Forms,Visual C# .NET
Total downloads :
Total page views :  7131
Rating :
 5/5
This article has been rated :  1 times
   Print Read/Post comments Post a comment  Rate  
   Email to a friend  Bookmark  Similar Articles  Author's other articles  
 
ArticleAd
Become a Sponsor


Today there are a large number of books covering .NET and Windows Forms. While most of these books discuss the essentials of working with Windows Forms and guide you well on your way to becoming proficient in developing Windows Forms applications, very few books cover a vital and much needed topic. And this topic is: the sequence of events that are triggered for a Form. Knowing the lifecycle of a Form can help you place important bits of code in relevant events. 

If you look at ASP.NET tutorials and books, you will find many references to the Web Page lifecyle but what about Windows Forms lifecycle? Sadly, there's not much concrete information about this.  The aim of this article is, therefore, to delve into this topic and provide insightful knowledge about Form events. 

The events in the lifecycle of a Form from the time it is launched to the time it is closed are listed below:

  • Move: This event occurs when the form is moved. Although by default, when a form is instantiated and launched, the user does not move it, yet this event is triggered before the Load event occurs.
  • Load: This event occurs before a form is displayed for the first time.
  • VisibleChanged: This event occurs when the Visible property value changes.
  • Activated: This event occurs when the form is activated in code or by the user.
  • Shown: This event occurs whenever the form is first displayed. 
  • Paint: This event occurs when the control is redrawn.
  • Deactivate: This event occurs when the form loses focus and is not the active form.
  • Closing: This event occurs when the form is closing.
  • Closed: This event occurs when the form is being closed.

Let us view this through an example.

1. First, launch Visual Studio IDE (2005 or 2008) and create a Windows Forms application.

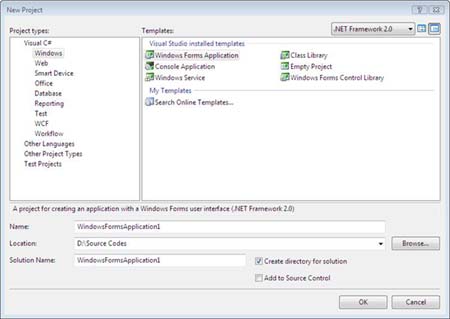
Figure 1: New Project Dialog Box

2. Give a suitable name and click OK. This will create the aplication and open it in Design view. 

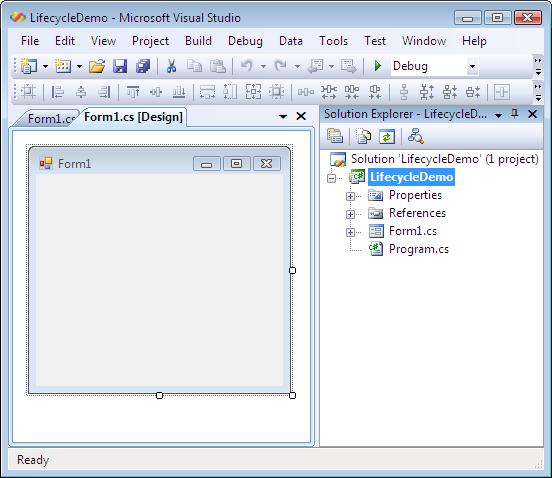
Figure 2: Application in the Design view

3. Open the Form properties window. The easiest way to do this is: select the Form in the design view and press the F4 key.

4. Click the Events tab and select the Move event. 

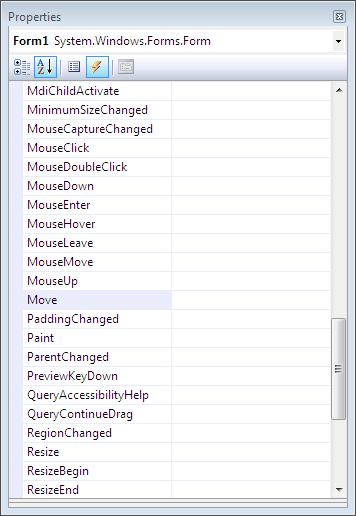
Figure 3: Form events

5. Double click on it. This will cause the event handler to be auto-generated in the Code View. 

6. Switch back to the Design View and in the Form properties window, double click the Load event. 

7. Likewise, repeat this procedure for all the events that were listed earlier.  

8. Open the Code View of Form1.Designer.cs and add the code marked in bold. 

using System.IO;


namespace LifecycleDemo

{

    partial class Form1

    {

   StreamWriter sr = new treamWriter("D:\\formevents.txt");

        /// <summary>

        /// Required designer variable.

        /// </summary>

        private System.ComponentModel.IContainer components = null;


        /// <summary>

        /// Clean up any resources being used.

        /// </summary>

        /// <param name="disposing">true if managed resources should be disposed; otherwise, false.</param>

        protected override void Dispose(bool disposing)

        {

            if (disposing && (components != null))

            {

                components.Dispose();


            }

            base.Dispose(disposing);

            sr.Close();

        }


        #region Windows Form Designer generated code

        #endregion

    }

}


9. Open the Code View of Form 1 and add the code marked in bold.


public partial class Form1 : Form

    {


        public Form1()

        {

            InitializeComponent();

        }


        private void Form1_Move(object sender, EventArgs e)

        {

            sr.WriteLine("1 - Move event");

        }


        private void Form1_Load(object sender, EventArgs e)

        {

            sr.WriteLine("2 - Load event");

        }


        private void Form1_Activated(object sender, EventArgs e)

        {

            sr.WriteLine("3 - Activated event");

        }


        private void Form1_VisibleChanged(object sender, EventArgs e)

        {

            sr.WriteLine("4 - VisibleChanged event");

        }


        private void Form1_Shown(object sender, EventArgs e)

        {

            sr.WriteLine("5 -Shown event");

        }


        private void Form1_Paint(object sender, PaintEventArgs e)

        {

            sr.WriteLine("6 - Paint event");

        }


        private void Form1_FormClosed(object sender, FormClosedEventArgs e)

        {

            sr.WriteLine("7 -  FormClosed event");


        }


        private void Form1_FormClosing(object sender, FormClosingEventArgs e)

        {

            sr.WriteLine("8 - FormClosing");


        }


        private void Form1_Deactivate(object sender, EventArgs e)

        {

            sr.WriteLine("9 - Deactivate");

       }

    }

10. Next, you save, build and execute the application.  (File->Save is used for the save operation and Build->Build Solution is used to build the application. To execute, click Debug->Start  Debugging.

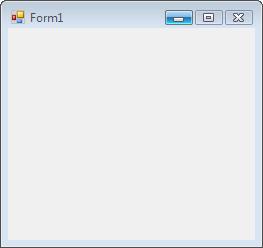
Figure 4: Form shown during execution of the application

11. Switch to some other application, such that the form is no longer in focus. 

12. Switch back to the Windows Form so that it regains focus. 

13. Exit the Windows Form application. 

14. Open the text file, formevents.txt. You will observe the output similar to the one shown in Figure 5.  (Output may vary if you perform some other actions in between causing additional events to be raised). 

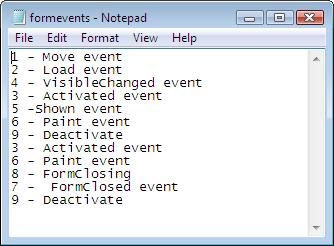
Figure 5: Text file contents showing event lifecycle

The Move, Load, VisibleChanged and Activated events are raised even before the Form is shown. Then the Shown event takes place. This is followed by the Paint event. These events are common for any application and are always standard. 

When you switch the focus to some other application, the Deactivate event occurs. When the form regains focus, the Activated event is raised. Then the form is painted again because it has regained focus. 

When you attempt to close the form, the FormClosing and FormClosed events are raised. Finally, after the form is closed,  Deactivate is raised once more. If you had inserted a WriteLine for Dispose as well (which has not been written as of now) you would see that statement appearing after the Deactivate. 

Conclusion: Thus, you learned about the lifecycle of events in a Windows Form.


Login to add your contents and source code to this article
 [Top] Rate this article
 About the author
 
Mamta M
Mamta M has over 8 years of experience in the IT industry and loves to learn and experiment with new technology trends. She is proficient in C#, ASP.NET and related technologies. In the past few months she has been actively working with Silverlight and is also co-writing a book on Silverlight.
Looking for C# Consulting?
C# Consulting is founded in 2002 by the founders of C# Corner. Unlike a traditional consulting company, our consultants are well-known experts in .NET and many of them are MVPs, authors, and trainers. We specialize in Microsoft .NET development and utilize Agile Development and Extreme Programming practices to provide fast pace quick turnaround results. Our software development model is a mix of Agile Development, traditional SDLC, and Waterfall models.
Click here to learn more about C# Consulting.
 
Introducing MaxV - one click. infinite control. Hyper-V Hosting from MaximumASP.
Finally – a virtual platform that delivers next-generation Windows Server 2008 Hyper-V virtualization technology from a managed hosting partner you can truly depend on. Visit www.maximumasp.com/max for a FREE 30 day trial. Hurry offer ends soon. Climb aboard the MaxV platform and take advantage of High Availability, Intelligent Monitoring, Recurrent Backups, and Scalability – with no hassle or hidden fees. As a managed hosting partner focused solely on Microsoft technologies since 2000, MaximumASP is uniquely qualified to provide the superior support that our business is built on. Unparalleled expertise with Microsoft technologies lead to working directly with Microsoft as first to offer IIS 7 and SQL 2008 betas in a hosted environment; partnering in the Go Live Program for Hyper-V; and product co-launches built on WS 2008 with Hyper-V technology.
Dynamic PDF
ceTE software specializes in components for dynamic PDF generation and manipulation. The DynamicPDF™ product line allows you to dynamically generate PDF documents, merge PDF documents and new content to existing PDF documents from within your applications.
Boost the performance of your .NET applications
“ANTS Profiler took us straight to the specific areas of our code which were the cause of our performance issues." Terry Phillips, Sr. Developer, Harley-Davidson Dealer Systems. Download your free trial of ANTS Profiler.
Go.NET
Build custom interactive diagrams, network, workflow editors, flowcharts, or software design tools. Includes many predefined kinds of nodes, links, and basic shapes. Supports layers, scrolling, zooming, selection, drag-and-drop, clipboard, in-place editing, tooltips, grids, printing, overview window, palette. 100% implemented in C# as a managed .NET Control. Document/View/Tool architecture with many properties&events. Optional automatic layout.
Dundas Software
Dundas Chart for .NET is the most advanced .NET charting package available today.  With an extremely complete feature set, elegant architecture and easy implementation, Dundas Chart can quickly add advanced Charting functionality to enhance and transform ASP.NET and Windows Forms applications.  Whether you are implementing charting into internal projects, or building applications for clients, Dundas Chart offers advanced technology and advanced results to get the most out of data.
 
   Print Read/Post comments Post a comment  Rate  
   Email to a friend  Bookmark  Similar Articles  Author's other articles  
 
 Post a Feedback, Comment, or Question about this article
Subject:  
Comment:  
ArticleAd
Become a Sponsor
Latest Comments:
Subject Posted By Posted On
helpDeepa11/19/2008
i have problem while running crystal report ,it asks for the connection information each time,which i cannot give to end users.Do you have any idea for form initialize event in c#.net window application.
Reply | Email | Delete | Modify | 
Possible article errorPatrick3/30/2009
Hi there...In step 8, your instructions are to add the the code highlighted bold, however, none of your samle in this step is highlight. Thanks for your time. :)
Reply | Email | Delete | Modify | 
 
 
Re: Possible article errorMamta3/30/2009
Hi Patrick,

Thanks for pointing that out. The article had actually been sent via mail and somehow in the mail message, the bold format in the section got omitted out. I will get that corrected immediately. Thanks again, I appreciate this.

-Mamta
Reply | Email | Delete | Modify | 

 Hosted by MaximumASP  |  Found a broken link?  |  Contact Us  |  Terms & conditions  |  Privacy Policy  |  Site Map  |  Suggest an Idea  |  Media Kit
Current Version: 5.2009.6.2
 © 1999 - 2009  Mindcracker LLC. All Rights Reserved