Introduction
This is beginners tutorial of how to deploy a WebPart in SharePoint. It is a 6 step procedure and this tutorial will walk through the same. In case you are fresher to SharePoint you can read my FAQ articles listed below. I am sure within an hour you can get acquainted to SharePoint and get started.
Quick Start FAQ Part I :- 11 basic FAQ questions , must for every new comer.It's a the basic Quick Start FAQ tutorial which talks about What is SharePoint, WSS, MOSS, Site/Site collection, Virtual Path provider and then ends with explaining SitePages and Application pages SharePoint FAQ: Part I
Quick Start FAQ part II:- This is the second part in the series which explains the ready made functionalities,custom pages,deploying/activating/deactivating features and lot. SharePoint FAQ: Part II
Quick Start FAQ Part III:- This covers page templates , page instances , WSS model , understand safe mode processing , deploy custom controls and understand WebParts. So let's drink the SharePoint wine series by series, slowly, maintain the hangover and enjoy this great product. SharePoint FAQ: Part III
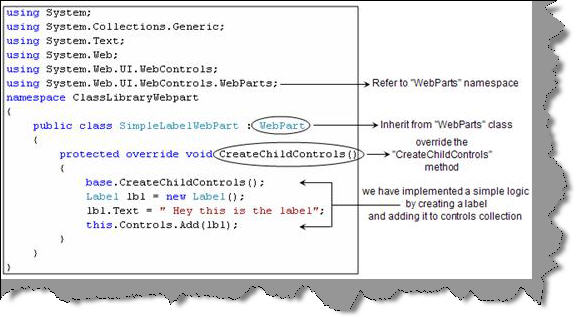
The first step is to create the WebPart. Below is the code snippet of a webPart. So we need to reference the 'WebParts', the custom webpart class should inherit from 'WebPart' class and finally we need to override the 'CreateChildControls' method with our custom implementation.
The second step is to copy the compiled DLL in the virtual directory of the sharepoint site.
You can get the virtual directory from the IIS from home directory tab in IIS. For instance the current website is hosted on the sharepoint 80 virtual site which is actually located at 'C: \Inetpub\wwwroot\wss\VirtualDirectories\80'.
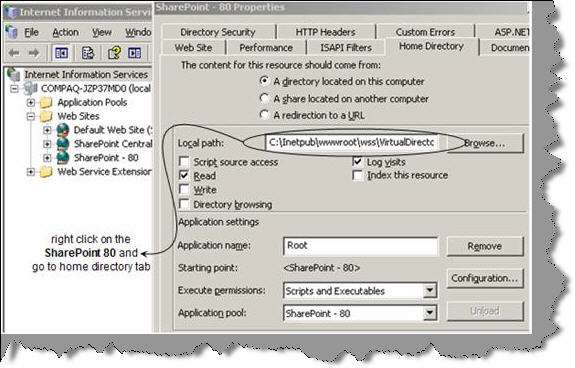
So now let's browse to 'C: \Inetpub\wwwroot\wss\VirtualDirectories\80\bin' directory and copy the DLL in the bin folder.
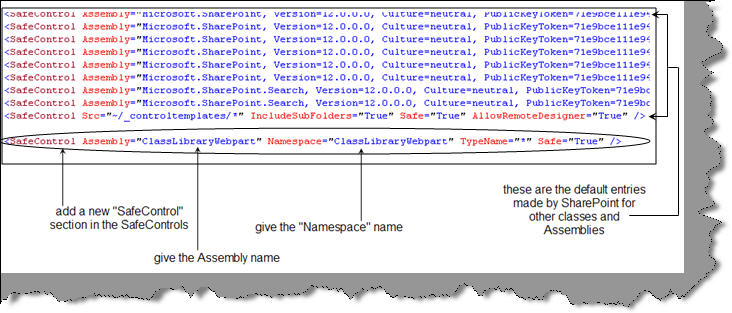
Now that we have copied the DLL to 'bin' folder, we need to make a 'SafeControl' entry in the 'Web.Config' file of the virtual directory.
So now let's browse to 'C:\Inetpub\wwwroot\wss\VirtualDirectories\80', open the web.config file and add the class library name in the 'SafeControls' section of the web.config file. Below code snippet shows the same in a visual manner.
Now that we have added the WebPart in the 'web.config' file its time to make it available in the web part gallery. So click on Site settings --> then click webparts --> Click new button, you should see the figure shown below.
You can also see the webpart which you recently added is seen the gallery. To make it available click the check box and click populate gallery.
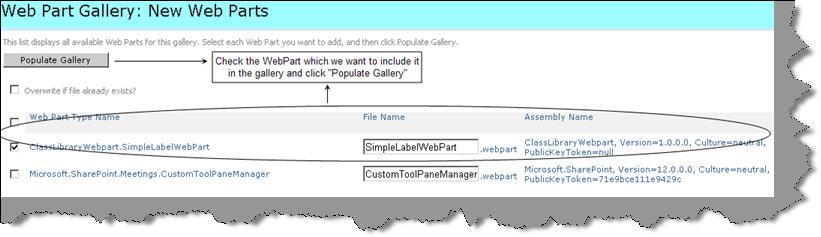
You should now see your webpart ( for this context it is SimpleLabelWebPart) in the WebPart gallery.
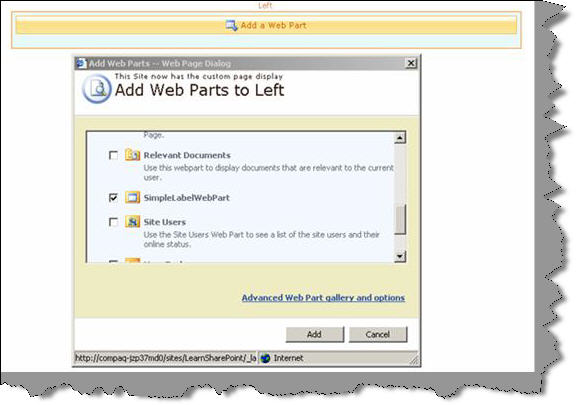
Ok so now that our WebPart is available in the gallery it's time to add this WebPart to a SharePoint page. So goto the page where you want to add this WebPart, click on the site action menu and click edit page as shown in the below figure.

On the page you should see a 'Add a webpart' button, click on it and it will populate with the existing web parts. Browse to your web part and click add.
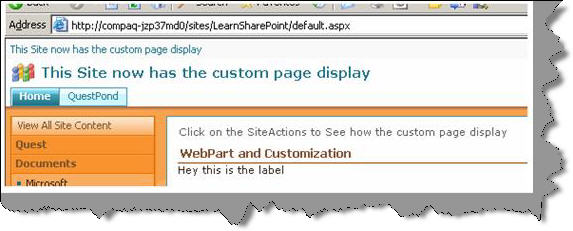
Once done your webpart is now added to the site page. You can edit the default webpart properties by clicking on 'Modify Shared WebPart'. For simplicity sake we have changed the title.
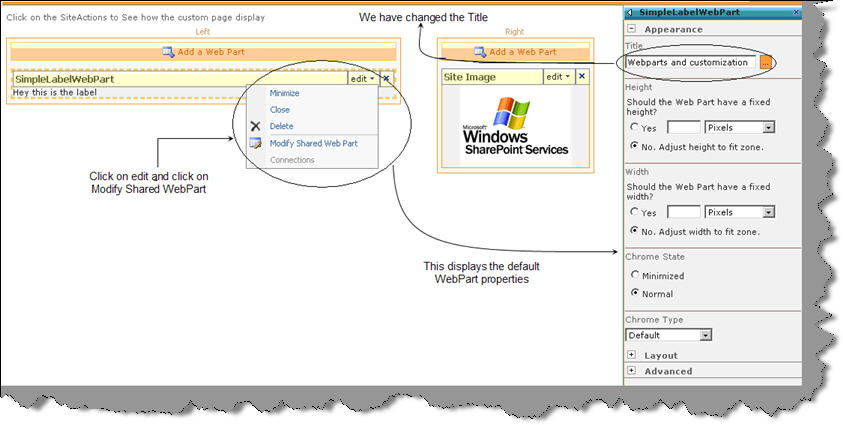
You can see the changed title display when view the page normally. So with a few lines of coding you can see how we have achieved huge customization.