

I am here to continue the discussion around AngularJS 2.0. So far, we discussed about data binding, input properties, output properties, pipes, viewchild, and also about directives in Angular 2.0. Now in this article, I will discuss how to use ngContent or transclusion in Angular 2.0. Also, in case you did not have a look at the previous articles of this series, go through the links mentioned below.
- AngularJS 2.0 From Beginning Introduction of AngularJS 2.0 (Day 1)
- AngularJS 2.0 From Beginning Component (Day 2)
- AngularJS 2.0 From Beginning Data Binding (Day 3)
- AngularJS 2.0 From Beginning Input Data Binding (Day 4)
- AngularJs 2.0 From Beginning - Output Property Binding (Day 5)
- AngularJs 2.0 From Beginning - Attribute Directive (Day 6)
- AngularJs 2.0 From Beginning - Structural Directives (Day 7)
- AngularJs 2.0 From Beginning - Pipes (Day 8)
- AngularJs 2.0 From Beginning - Viewchild (Day 9)
- AngularJs 2.0 From Beginning - Dynamic Grid (Day 10)
- AngularJs 2.0 From Beginning - Service (Day 11)
In my previous article, I already discussed about the injectable Service in Angular 2.0. In this article, we will discuss about the content template or ng-content in Angular 2.0.
In Angular 1.0, there is a concept of Transclusion. Actually, transclusion in an Angular 1.x is represent the content replacement such as a text node or html, and injecting it into a template at a specific entry time. Same thing in Angular 2.0 is totally forbidden. This is now done in Angular 2.0 through modern web APIs, such as shadow DOM which is known as content projection.
Content Projection
So now, we know what we are looking from an Angular 1.x perspective so that we can easily migrate the same in Angular 2.0. Actually, projection is a very important concept in Angular. It enables developer to develop or build reusable components and make the application more scalable and flexible.
In Web Components, we had the <content> element, which was recently deprecated, which acted as a Shadow DOM insertion point. Angular 2 allows Shadow DOM through the use of ViewEncapsulation. Early alpha versions of Angular 2 adopted the <content> element, however due to the nature of a bunch of Web Component helper elements being deprecated, it was changed to <ng-content>. Actually ViewEncapsulation defines whether the template and styles defined within the component can affect the whole application or vice versa. Angular provides three encapsulation strategies,
- Emulated (default)styles from main HTML propagate to the component. Styles defined in this component's @Component decorator are scoped to this component only.
- styles from main HTML do not propagate to the component. Styles defined in this component's @Component decorator are scoped to this component only.Native
- None
styles from the component propagate back to the main HTML and therefore are visible to all components on the page. Be careful with apps that have None and Nativecomponents in the application. All components with None encapsulation will have their styles duplicated in all components with Native encapsulation.
To illustrate ng-content that, suppose we have a children component.
- import { Component } from '@angular/core';
- @Component({
- selector: 'child',
- template: `
- <div style="border: 1px solid blue; padding: 1rem;">
- <h4>Child Component</h4>
- <ng-content></ng-content>
- </div>
- `
- })
- export class ChildComponent {
- }
- <child>
- <p>My <i>dynamic</i> content.</p>
- </child>
This is telling Angular that for any markup that appears between the opening and closing tag of <child>, to place inside of <ng-content></ng-content>. When doing this, we can have other components, markup, etc. projected here and the ChildComponent does not need to know about or care what is being provided.
But what if we have multiple <ng-content></ng-content> and want to specify the position of the projected content to certain ng-content? For example, for the previous ChildComponent, if we want to format the projected content into an extra area1 and area2 section. Then in the template, we can use directives, say, <area1> to specify the position of projected content to the ng-content with select="area1".
File Name - app.component.modal.html
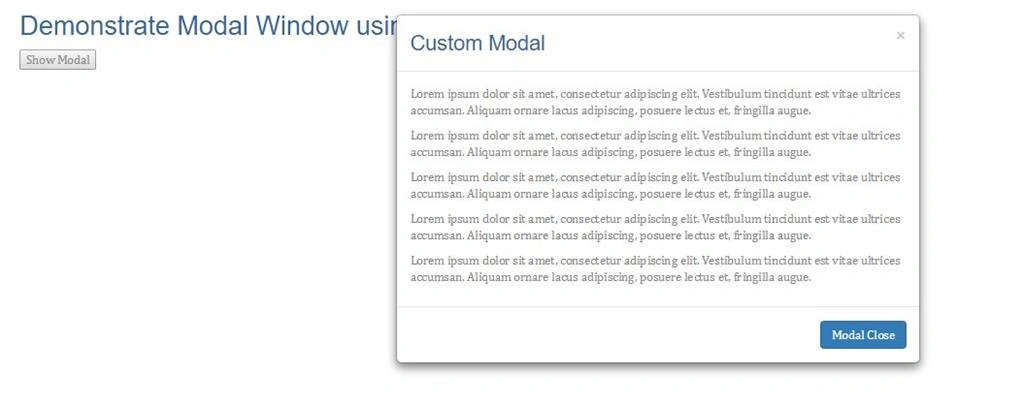
- <div class="modal" id="myModal" tabindex="-1" role="dialog" aria-labelledby="exampleModalLabel" aria-hidden="true" [ngStyle]="{'display' : display }">
- <div class="modal-dialog">
- <div class="modal-content animated bounceInRight">
- <div class="modal-header">
- <button type="button" class="close" (click)="fnClose()">×</button>
- <h3 class="modal-title">{{header}}</h3>
- </div>
- <div class="modal-body">
- <ng-content select="content-body"></ng-content>
- </div>
- <div class="modal-footer">
- <ng-content select="content-footer"></ng-content>
- </div>
- </div>
- </div>
- </div>
- import { Component, OnInit, ViewChild, Input } from '@angular/core';
- @Component({
- moduleId: module.id,
- selector: 'modal-window',
- templateUrl: 'app.component.modal.html'
- })
- export class ModalComponent implements OnInit {
- @Input() private display: string = 'none';
- @Input('header-caption') private header: string = 'Modal';
- constructor() {
- }
- ngOnInit(): void {
- }
- private fnClose(): void {
- this.display = 'none';
- }
- showModal(): void {
- this.display = 'block';
- }
- close(): void {
- this.fnClose();
- }
- setModalTitle(args: string): void {
- this.header = args;
- }
- }
- <div>
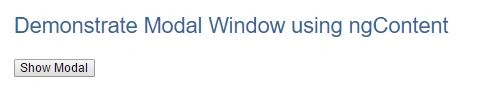
- <h2>Demonstrate Modal Window using ngContent</h2>
- <input type="button" value="Show Modal" class="btn-group" (click)="fnOpenModal()" />
- <br />
- <modal-window [header-caption]="caption" #modal>
- <content-body>
- <p>Lorem ipsum dolor sit amet, consectetur adipiscing elit. Vestibulum tincidunt est vitae ultrices accumsan. Aliquam ornare lacus adipiscing, posuere lectus et, fringilla augue.</p>
- <p>Lorem ipsum dolor sit amet, consectetur adipiscing elit. Vestibulum tincidunt est vitae ultrices accumsan. Aliquam ornare lacus adipiscing, posuere lectus et, fringilla augue.</p>
- <p>Lorem ipsum dolor sit amet, consectetur adipiscing elit. Vestibulum tincidunt est vitae ultrices accumsan. Aliquam ornare lacus adipiscing, posuere lectus et, fringilla augue.</p>
- <p>Lorem ipsum dolor sit amet, consectetur adipiscing elit. Vestibulum tincidunt est vitae ultrices accumsan. Aliquam ornare lacus adipiscing, posuere lectus et, fringilla augue.</p>
- <p>Lorem ipsum dolor sit amet, consectetur adipiscing elit. Vestibulum tincidunt est vitae ultrices accumsan. Aliquam ornare lacus adipiscing, posuere lectus et, fringilla augue.</p>
- </content-body>
- <content-footer>
- <input type="button" class="btn-default active" class="btn btn-primary" value="Modal Close" (click)="fnHideModal();" />
- </content-footer>
- </modal-window>
- </div>
- import { Component, OnInit, ViewChild } from '@angular/core';
- import { ModalComponent } from './app.component.modal';
- @Component({
- moduleId: module.id,
- selector: 'parent-content',
- templateUrl: 'app.component.parent.html'
- })
- export class ParentComponent implements OnInit {
- private caption: string = 'Custom Modal';
- @ViewChild('modal') private _ctrlModal: ModalComponent;
- constructor() {
- }
- ngOnInit(): void {
- }
- private fnOpenModal(): void {
- this._ctrlModal.showModal();
- }
- private fnHideModal(): void {
- this._ctrlModal.close();
- }
- }
- import { NgModule, NO_ERRORS_SCHEMA } from '@angular/core';
- import { BrowserModule } from '@angular/platform-browser';
- import { FormsModule } from "@angular/forms";
- import { ParentComponent } from './src/app.component.parent';
- import { ModalComponent } from './src/app.component.modal';
- @NgModule({
- imports: [BrowserModule, FormsModule],
- declarations: [ParentComponent, ModalComponent],
- bootstrap: [ParentComponent],
- schemas: [NO_ERRORS_SCHEMA]
- })
- export class AppModule { }
- import { platformBrowserDynamic } from '@angular/platform-browser-dynamic';
- import { AppModule } from './app.module';
- const platform = platformBrowserDynamic();
- platform.bootstrapModule(AppModule);
- <!DOCTYPE html>
- <html>
- <head>
- <title>Angular2 - ngContent</title>
- <meta charset="UTF-8">
- <meta name="viewport" content="width=device-width, initial-scale=1">
- <link href="../resources/style/bootstrap.css" rel="stylesheet" />
- <link href="../resources/style/style1.css" rel="stylesheet" />
- </head>
- <body>
- <parent-content>Loading</parent-content>
- <!-- Polyfill(s) for older browsers -->
- <script src="../resources/js/jquery-2.1.1.js"></script>
- <script src="../resources/js/bootstrap.js"></script>
- <script src="../node_modules/core-js/client/shim.min.js"></script>
- <script src="../node_modules/zone.js/dist/zone.js"></script>
- <script src="../node_modules/reflect-metadata/Reflect.js"></script>
- <script src="../node_modules/systemjs/dist/system.src.js"></script>
- <script src="../systemjs.config.js"></script>
- <script>
- System.import('app').catch(function (err) { console.error(err); });
- </script>
- </body>
- </html>
Nisith PandaPosted May 10, 2019, 11:43 PM
Hi Debasis, Thank you very much for clear explanation. But if I want to give my own style to the modal, how will do that. Because, style it not getting applied into the element which are replace by ng-content. I will be very helpful if you give some idea. Thank, Nisith
V.ARUMUGAM RK.ARASANPosted Mar 14, 2017, 1:45 PM
Http://www.c-sharpcorner.com/article/angularjs-2-0-from-the-beginning-viewchild-day-nine This link not working please look into. Thanks ur articles great!!!
sreenivasa kPosted Mar 10, 2017, 1:36 AM
Really good. worthy one