In this article I am showing how to customize SharePoint default Survey look & feel and how to add heading in survey (for a section) using Microsoft Office SharePoint Designer for Microsoft Office SharePoint 2007.
Step-by-Step Guide:
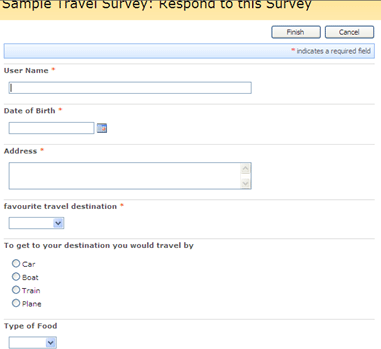
1. Create a survey in SharePoint. I created a sample Travel Survey. I will show you how to change the fields in two columns and add a heading.
2. Open your site in share point designer. Before starting the customization you have to check out the NewForm.aspx of the corresponding list.
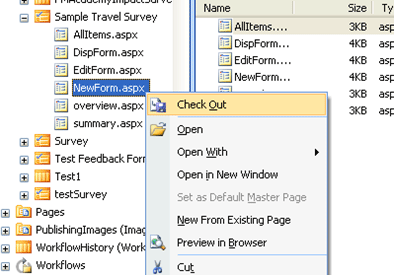
3. After Check out, double click on NewForm.aspx form. It will open NewForm.aspx. After that click on the web part. It will select the web part as shown below.
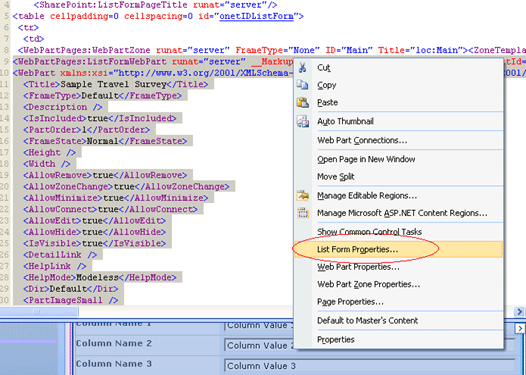
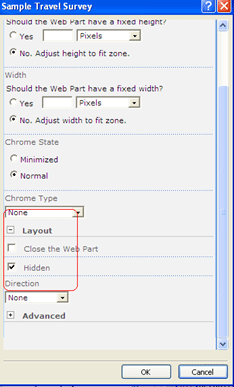
4. Then you have to hide this web part. For that right click on the web part, then select List Form Properties.
5. Expand Layout section. Then click Hidden and click ok. It will hide the web part.
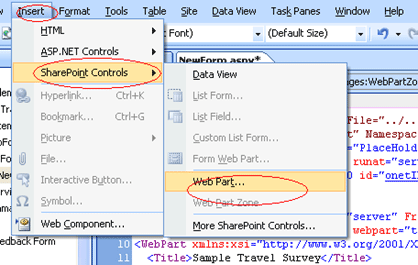
6. Then you have to add a web part. For that select SharePoint Controls from Insert. Then select web part. It will add a new Web part.
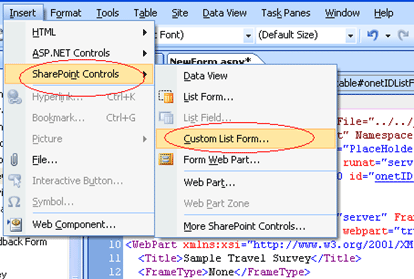
7. After adding Web part, go to Insert then SharePoint Controls and select Custom List Form from the menu.
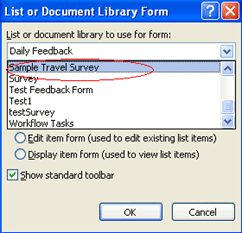
8. You will get a pop up. You have to choose corresponding Survey list name from the drop down in "List or Document library to use for form". You have to select the same Survey list name from the second drop down (Content Type to use for them). Then select ok.
9. Now you are ready to customize and to change the look and feel of your survey list. First select the new web part.
To add a heading (or level) you can add the code as below.
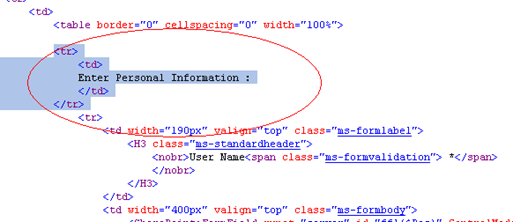
10. You can now select any column or row as you wish. Here I want to put User name and Date of Birth in the same row, so I delete the Second row starting and first row closing (</tr> <tr>) to put the two in one row in code views. Also I want to add some more heading.
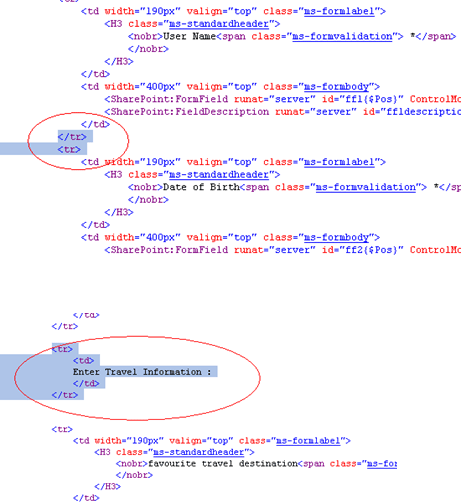
You can now select any column or row as you wish and do the customization.
11. After the customization is done save the NewForm.aspx and after saving check in the NewForm.aspx.
12. Now refresh the SharePoint site. Now when you click "respond to this Survey" you will get your modified, customized SharePoint Survey.
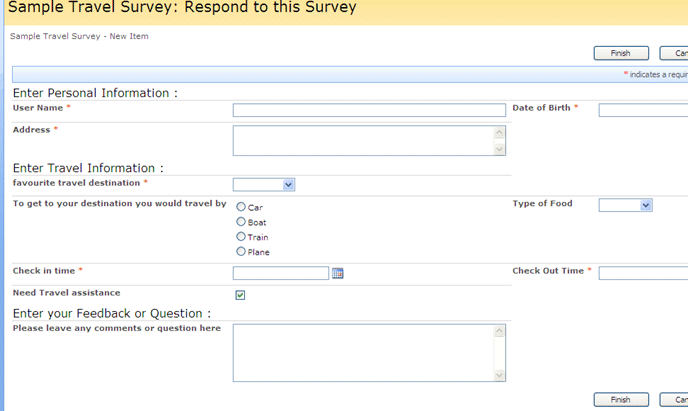
This type of customization is useful if the survey contains a large number of fields and you want to group some survey questions in a section.