
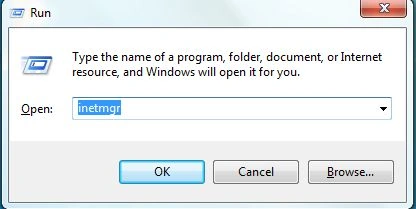
Step 1: Run IIS by typing the command "inetmgr" in Run as shown in the picture below:
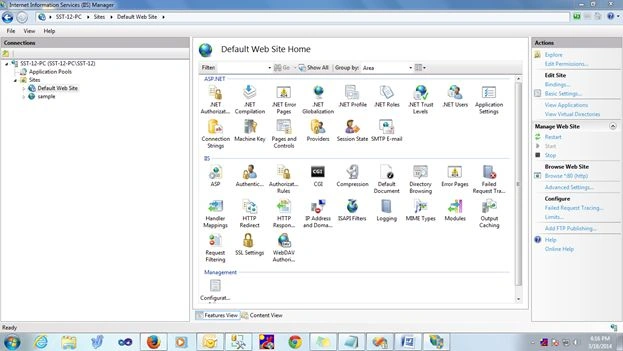
Step 2: In IIS Explore connections under that explore sites you will get the Default Web site.
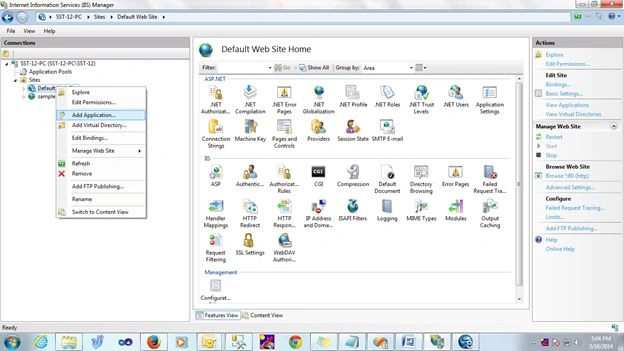
Step 3: In Sites right-click on Default Web site and then select Add Application as shown in the diagram below:
Step 4: Now provide an alias name (Website Name) and physical path and check test settings.
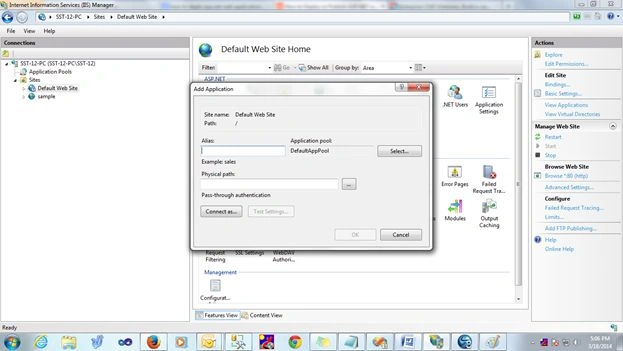
Step 5: After clicking the test settings you need to get the following screen:
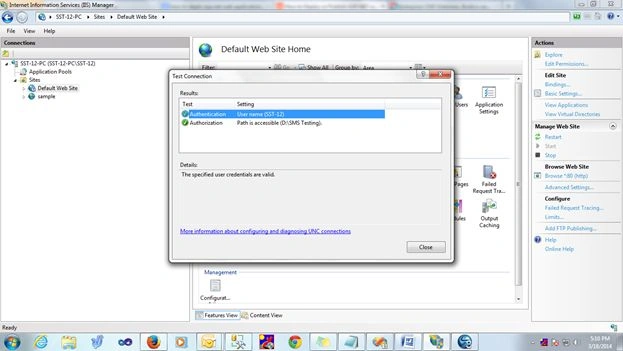
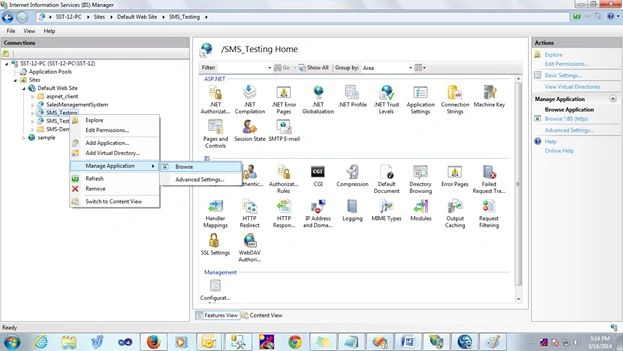
Step 6: Now the entire procedure for adding a website is done. Now to check the site in a browser. Right-click on the website you added in IIS then go to Manage Application and then click on Browse as shown in the diagram:
Join the conversation! Your thoughts help the community grow.