
This article is about NUnit. Let us now try to understand the following concepts.
- What NUnit is
- How to download and set up NUnit
- How to create test classes
- Finally, how to run the tests
NUnit is a Unit Testing Framework in .NET that allows us to create automated tests. There are many benefits of creating automated tests. Let's talk about some of the benefits that are very important.
- Higher quality code can be produced
- Cost can be reduced
- Regression Safety Net
Note: The following are the various automation tools of unit testing frameworks in various programming languages.
- Junit: Java
- NUnit: NET
- cppUnit: C++
- PHPUnit: PHP
- PyUnit: Python
- Test::Unit: Ruby
- JsUnit: JavaScript
You can download NUnit from http://www.nunit.org/
Once your download is completed, you can unzip the folder and run that application to use it.
Creating a Class Library Project
Let us now create a simple test class using C# that adds two numbers and test it. Use the following procedure to create a Test Class in Visual Studio using C#.
Step 1: Create a Class Library Project
I am using Visual Studio 2012 Professional.
To create a Class Library project first go to File -> New -> Project then select Visual C# in the installed templates then select Class Library. Provide an appropriate name (I used IntroNUnitTest) then click “OK”.

Figure: Creating Class Library
Once you click the “OK” button, you will be able to see your project in the Solution Explorer (in the top corner of the right side of Visual Studio).
Step 2: Add a reference to your project
Now you should add the reference of NUnit to your project. This can be done with the following procedure.
Right-click on the reference then select Add reference-> Browse then select nunit.framework.dll then click “OK”.
Step 3: Creating a Test Class
Right-click on the project then select Add -> Class then provide a name (I used MyNUnitTestClass) then click “Add”.
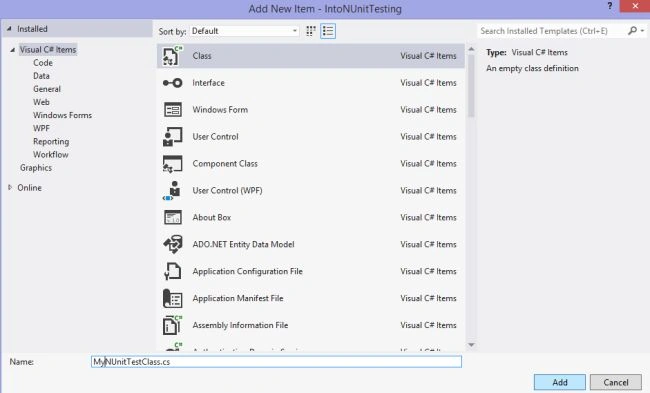
Figure: Adding a Test Class to the project
After you click Add you will see a class as in the following figure.
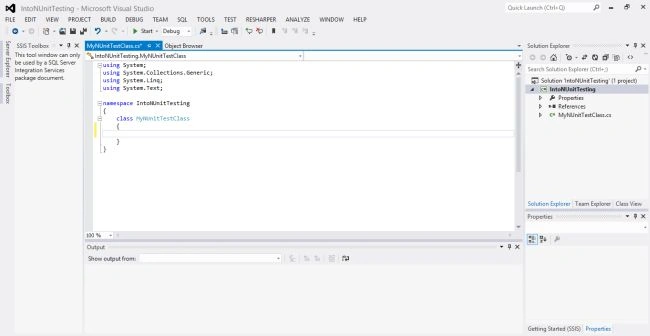
Figure: Class
After your class has been created, you should add using NUnit.Framework in your class.
The following are some important conditions to follow:
- Each Class must have a [TestFixure] attribute and it must be Public.
- Each Method must have a [Test] attribute.
- Test runner: an application that finds and executes test methods on test fixtures.
- Assertion: a Boolean expression that describes what must be true when some action has been executed.
- Expected Exception: the type of an Exception we expect to be thrown during the execution of a test method.
- Setup: Code that is run before every test method is executed (for example, logging in as a specific user or initializing a singleton).
- Teardown: Code that is run after every test method has finished(for example, deleting rows from a table that were inserted during the test).
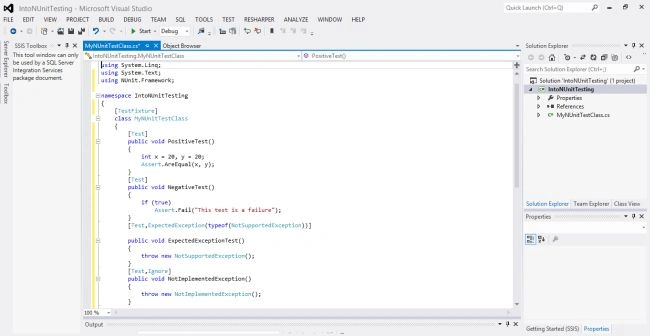
Figure: Test class with 4 tests
In this example, I am just trying to compare the two variables x and y. I assigned a value of 20 to each variable. I have written a total of 4 tests (PositiveTest, NegativeTest, ExpectedExceptionTest and NotImplementedException).
Running Tests
After writing all the tests in your test class, we should run all those tests to check whether or not all the tests are ing. In order to run the tests go to the NUnit folder then select NUnit Application (.exe) and double-click on it then select File-> Open Project then select your project (in my case it is IntroNUnitTest.dll) then click Run.
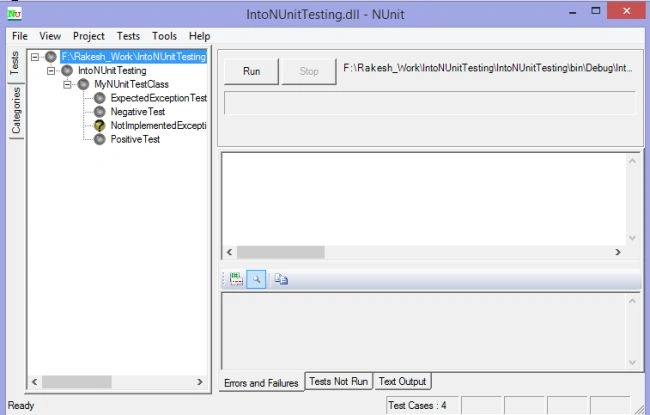
Figure: NUnit application for running tests.
Then after you click on the Run button you'll see the numbers of tests that have ed, failed and didn't execute.

Figure: Test Results: 2 ed, 1 Failed and 1 didn't run (because we used the Ignore option in the Test attribute).
If you want to run only a specific test then you can right-click inside the test that you want to run and select Run test(s).
Other Tools
We can also use other tools to run the tests, they are:
- Testdriven.net can be downloaded from http://www.testdriven.net/download.aspx
- ReSharper by Jetbrains can be downloaded from https://www.jetbrains.com/resharper/download
Santhakumar MunuswamyPosted Jun 25, 2015, 12:05 AM
Thanks for sharing.
Gowtham RajamanickamPosted Mar 16, 2015, 2:27 AM
good...
Rahul Kumar SaxenaPosted Feb 25, 2015, 12:19 PM
very Helpful...