
Introduction
This article explains how to store a person's data with an image in a SQLite Database.
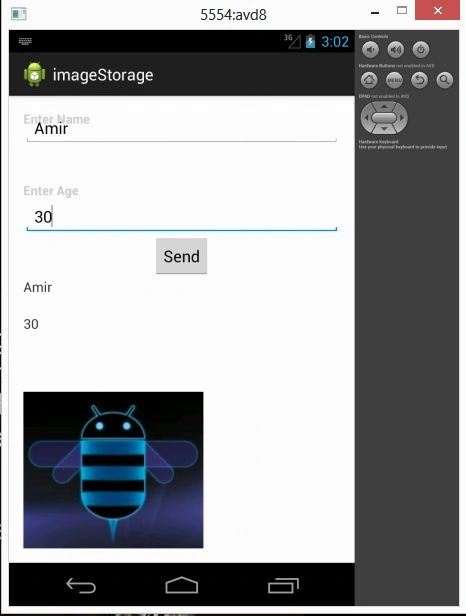
Using this application you can get an image from a drawable folder and store it in an SQLite Database and also you can retrieve that image from the SQLite database to be shown on the screen.
Step 1
Use the following procedure to create the sample.
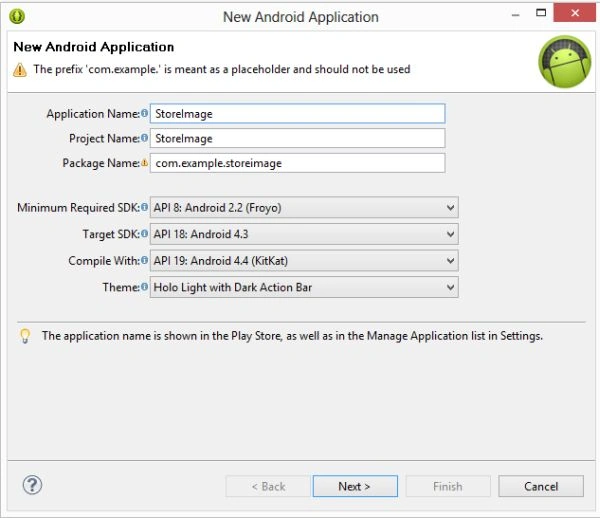
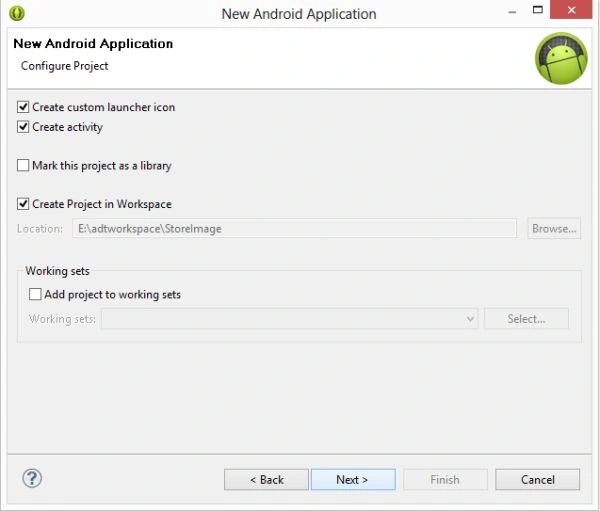
Go to "File" and select "Android Application Project".
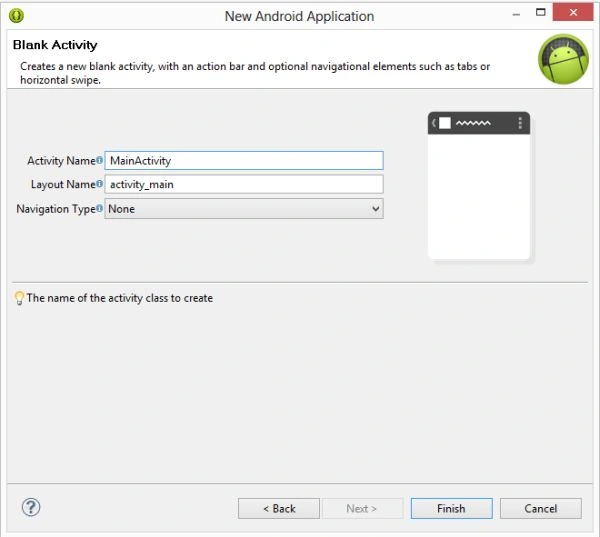
Step 2
Create an XML file with the following.
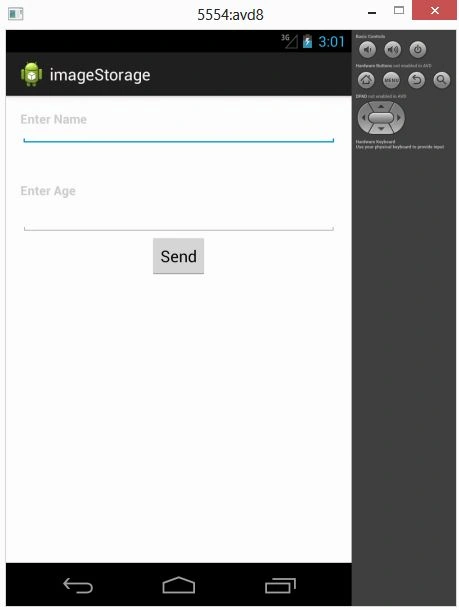
In this XML I use two EditTexts, four TextViews, and an ImageView. We enter the value in an EditText and fetch it in a Java class file to store it in a data base.
- <RelativeLayout xmlns:android="http://schemas.android.com/apk/res/android"
- xmlns:tools="http://schemas.android.com/tools"
- android:layout_width="match_parent"
- android:layout_height="match_parent"
- android:paddingBottom="@dimen/activity_vertical_margin"
- android:paddingLeft="@dimen/activity_horizontal_margin"
- android:paddingRight="@dimen/activity_horizontal_margin"
- android:paddingTop="@dimen/activity_vertical_margin"
- tools:context=".MainActivity" >
- <TextView android:layout_height="wrap_content"
- android:layout_width="wrap_content"
- android:id="@+id/textView1"
- android:text="Enter Name"
- android:textColor="#cccccc"
- android:textStyle="bold"/>
- <EditText
- android:id="@+id/editText1"
- android:layout_height="wrap_content"
- android:layout_width="fill_parent"
- android:layout_below="@+id/textView"/>
- <LinearLayout
- android:layout_height="wrap_content"
- android:layout_below="@+id/editText1"
- android:layout_width="fill_parent"
- android:id="@+id/linearLayout"
- android:orientation="vertical"
- android:layout_marginTop="40dp">
- <TextView android:layout_height="wrap_content"
- android:layout_width="wrap_content"
- android:id="@+id/textView2"
- android:text="Enter Age"
- android:textColor="#cccccc"
- android:textStyle="bold"/>
- <EditText
- android:layout_height="wrap_content"
- android:id="@+id/editText2"
- android:layout_width="fill_parent"
- android:layout_below="@+id/textView"/>
- </LinearLayout>
- <Button
- android:layout_centerInParent="true"
- android:text="Send"
- android:layout_below="@+id/linearLayout"
- android:layout_height="wrap_content"
- android:layout_width="wrap_content"
- android:id="@+id/button">
- </Button>
- <TextView
- android:id="@+id/textView3"
- android:layout_below="@+id/button"
- android:layout_width="wrap_content"
- android:layout_height="41dp"
- android:textSize="15dp"/>
- <TextView
- android:id="@+id/textView4"
- android:layout_width="wrap_content"
- android:layout_height="41dp"
- android:layout_below="@+id/textView3"
- android:textSize="15dp"/>
- <LinearLayout
- android:layout_width="wrap_content"
- android:layout_marginTop="300dp"
- android:layout_height="wrap_content">
- <ImageView
- android:id="@+id/myimage"
- android:layout_width="200dp"
- android:layout_height="200dp"
- />
- </LinearLayout>
- </RelativeLayout>
Step 3
Create a Java class file with the following:
- package com.imagestorage;
- import java.io.ByteArrayOutputStream;
- import android.app.Activity;
- import android.content.ContentValues;
- import android.content.Context;
- import android.database.Cursor;
- import android.database.sqlite.SQLiteDatabase;
- import android.database.sqlite.SQLiteDatabase.CursorFactory;
- import android.database.sqlite.SQLiteOpenHelper;
- import android.graphics.Bitmap;
- import android.graphics.BitmapFactory;
- import android.os.Bundle;
- import android.view.View;
- import android.view.View.OnClickListener;
- import android.widget.Button;
- import android.widget.EditText;
- import android.widget.ImageView;
- import android.widget.TextView;
- public class MainActivity extends Activity
- {
- /** Called when the activity is first created. */
- MyDataBase mdb;
- SQLiteDatabase db;
- Cursor c;
- ImageView iv;
- byte[] img, img1;
- Bitmap b;
- String name, age, getname;
- TextView textView3, textView4;
- EditText editText1, editText2;
- @Override
- public void onCreate(Bundle savedInstanceState)
- {
- super.onCreate(savedInstanceState);
- setContentView(R.layout.activity_main);
- /*Create the database by calling and ing all the parameters to the constructor of MyDataBase class*/
- mdb = new MyDataBase(getApplicationContext(), "imagedata", null, 1);
- this.deleteDatabase("imagedata");
- iv = (ImageView) findViewById(R.id.myimage);
- textView3 = (TextView) findViewById(R.id.textView3);
- textView4 = (TextView) findViewById(R.id.textView4);
- editText1 = (EditText) findViewById(R.id.editText1);
- editText2 = (EditText) findViewById(R.id.editText2);
- Button button = (Button) findViewById(R.id.button);
- button.setOnClickListener(new OnClickListener()
- {
- @Override
- public void onClick(View v)
- {
- // TODO Auto-generated method stub
- name = editText1.getText().toString();
- /* In this i have used BitMap class which is used to put the image in a variable. Bitmapfactory class is used to get the image from the drawable folder by calling decodeResource() method. */
- age = editText2.getText().toString();
- Bitmap b = BitmapFactory.decodeResource(getResources(), R.drawable.image);
- /*create the object of ByteArrayoutputStream class. Now break the image into the byte parts by calling toByteArray() of ByteOutputStream class and store it in a array */
- ByteArrayOutputStream bos = new ByteArrayOutputStream();
- b.compress(Bitmap.CompressFormat.PNG, 100, bos);
- byte[] img = bos.toByteArray();
- /*to write in a database call the getWritableDatabase method */
- db = mdb.getWritableDatabase();
- ContentValues cv = new ContentValues();
- cv.put("image", img);
- cv.put("name", name);
- cv.put("age", age);
- db.insert("tableimage", null, cv);
- String selectQuery = "SELECT * FROM tableimage";
- c = db.rawQuery(selectQuery, null);
- if (c != null)
- {
- c.moveToFirst();
- do
- {
- img1 = c.getBlob(2);
- String getname = c.getString(0);
- String age = c.getString(1);
- } while (c.moveToNext());
- }
- Bitmap b1 = BitmapFactory.decodeByteArray(img1, 0, img1.length);
- iv.setImageBitmap(b1);
- textView3.setText(name);
- textView4.setText(age);
- }
- });
- }
- }
- class MyDataBase extends SQLiteOpenHelper
- {
- public MyDataBase(Context context, String name, CursorFactory factory,
- int version)
- {
- super(context, name, factory, version);
- // TODO Auto-generated constructor stub
- }
- public void onCreate(SQLiteDatabase db)
- {
- // TODO Auto-generated method stub
- db.execSQL("create table tableimage (name text,age int,image blob);");
- }
- public void onUpgrade(SQLiteDatabase db, int oldVersion, int newVersion)
- {
- // TODO Auto-generated method stub
- }
- }
Step 4
Android Manifest. xml file
- <?xml version="1.0" encoding="utf-8"?>
- <manifest xmlns:android="http://schemas.android.com/apk/res/android"
- package="com.imagestorage"
- android:versionCode="1"
- android:versionName="1.0" >
- <uses-sdk
- android:minSdkVersion="8"
- android:targetSdkVersion="18" />
- <application
- android:allowBackup="true"
- android:icon="@drawable/ic_launcher"
- android:label="@string/app_name"
- android:theme="@style/AppTheme" >
- <activity
- android:name="com.imagestorage.MainActivity"
- android:label="@string/app_name" >
- <intent-filter>
- <action android:name="android.intent.action.MAIN" />
- <category android:name="android.intent.category.LAUNCHER" />
- </intent-filter>
- </activity>
- </application>
- </manifest>
Step 5
Enter your Name and Age as in the following:
 When you click on the button the image will be stored and also be shown on the screen with your name and age. I have selected this image randomly to show that you can use your image.
alisha kumarPosted Feb 12, 2015, 4:59 AM
Good try..but i m getting error using this article used same coding..pls help