
Introduction
This article explains how to store an image in an SQLite Database in Android.
This application gets the image from the drawable folder and stores it into a database using an SQLite Database.
Step 1
Create a project like this:
 Step 2
Create an XML file with the following.
In this XML file you will use an ImageView in which you set the image after getting it from the drawable folder.
Step 2
Create an XML file with the following.
In this XML file you will use an ImageView in which you set the image after getting it from the drawable folder.
- <RelativeLayout xmlns:android="http://schemas.android.com/apk/res/android"
- xmlns:tools="http://schemas.android.com/tools"
- android:layout_width="match_parent"
- android:layout_height="match_parent"
- android:paddingBottom="@dimen/activity_vertical_margin"
- android:paddingLeft="@dimen/activity_horizontal_margin"
- android:paddingRight="@dimen/activity_horizontal_margin"
- android:paddingTop="@dimen/activity_vertical_margin"
- tools:context=".MainActivity" >"
- <ImageView
- android:layout_width="fill_parent"
- android:layout_height="fill_parent"
- android:id="@+id/imageView"></ImageView>
- </RelativeLayout>
Step 3
Create a Java class file with the following.
- package com.imagestorage;
- import java.io.ByteArrayOutputStream;
- import android.app.Activity;
- import android.content.ContentValues;
- import android.content.Context;
- import android.database.Cursor;
- import android.database.sqlite.SQLiteDatabase;
- import android.database.sqlite.SQLiteDatabase.CursorFactory;
- import android.database.sqlite.SQLiteOpenHelper;
- import android.graphics.Bitmap;
- import android.graphics.BitmapFactory;
- import android.os.Bundle;
- import android.view.View;
- import android.view.View.OnClickListener;
- import android.widget.Button;
- import android.widget.EditText;
- import android.widget.ImageView;
- import android.widget.TextView;
- public class MainActivity extends Activity
- {
- /* This is my MainActivity class which extends the Activity class. Activity class provides the onCreate() method so when you run your application your compiler first goes to this method to create the activity. setContentView() method is used to set the layout in your activty. */
- /** Called when the activity is first created. */
- MyDataBase myDataBase;
- SQLiteDatabase database;
- Cursor c;
- ImageView imageView;
- byte[] img, img1;
- Bitmap b;
- @Override
- public void onCreate(Bundle savedInstanceState)
- {
- super.onCreate(savedInstanceState);
- setContentView(R.layout.activity_main);
- ImageView imageView = (ImageView) findViewById(R.id.imageView);
- myDataBase = new MyDataBase(getApplicationContext(), "imagedata", null, 1);
- // this.deleteDatabase("imagedata");
- /*Bitmap is a binary representation in which a bit or a set of bits correspond to some part of an object such as an image. Here we use the Bitmap class which is provided by the Android system to hold the image. Here I have created the object of Bitmap class to hold the image. bitmap Factory class is used to create the object from various resources including files, streams and byteArrays. */
- Bitmap bitmap = BitmapFactory.decodeResource(getResources(), R.drawable.image);
- ByteArrayOutputStream bos = new ByteArrayOutputStream();
- bitmap.compress(Bitmap.CompressFormat.PNG, 100, bos);
- byte[] img = bos.toByteArray();
- //getWritebleDatabese() method is used to perform write operation into the database
- database = myDataBase.getWritableDatabase();
- // content values is used to create empty set of values using the default initial size
- ContentValues cv = new ContentValues();
- cv.put("image", img);
- database.insert("tableimage", null, cv);
- String selectQuery = "SELECT * FROM tableimage";
- c = database.rawQuery(selectQuery, null);
- if (c != null)
- {
- c.moveToFirst();
- do
- {
- img1 = c.getBlob(c.getColumnIndex("image"));
- } while (c.moveToNext());
- }
- Bitmap b1 = BitmapFactory.decodeByteArray(img1, 0, img1.length);
- imageView.setImageBitmap(b1);
- }
- }
- // Mydatabase class is used to create the database by extending the SqliteopenHelper class which provides onCrate() and onUpGrade() method.
- class MyDataBase extends SQLiteOpenHelper
- {
- public MyDataBase(Context context, String name, CursorFactory factory, int version)
- {
- super(context, name, factory, version);
- // TODO Auto-generated constructor stub
- }
- public void onCreate(SQLiteDatabase db)
- {
- // TODO Auto-generated method stub
- db.execSQL("create table tableimage (image blob);");
- }
- public void onUpgrade(SQLiteDatabase db, int oldVersion, int newVersion)
- {
- // TODO Auto-generated method stub
- }
- }
Step 4
Android Manifest.xml file
- <?xml version="1.0" encoding="utf-8"?>
- <manifest xmlns:android="http://schemas.android.com/apk/res/android"
- package="com.imagestorage"
- android:versionCode="1"
- android:versionName="1.0" >
- <uses-sdk
- android:minSdkVersion="8"
- android:targetSdkVersion="18" />
- <application
- android:allowBackup="true"
- android:icon="@drawable/ic_launcher"
- android:label="@string/app_name"
- android:theme="@style/AppTheme" >
- <activity
- android:name="com.imagestorage.MainActivity"
- android:label="@string/app_name" >
- <intent-filter>
- <action android:name="android.intent.action.MAIN" />
- <category android:name="android.intent.category.LAUNCHER" />
- </intent-filter>
- </activity>
- </application>
- </manifest>
Step 5
You can see your stored image in the SQLite database in such a way
Go to the Files Explorer then select "Data" -> "Data" then go to "YourDataBase" and click on your database name.
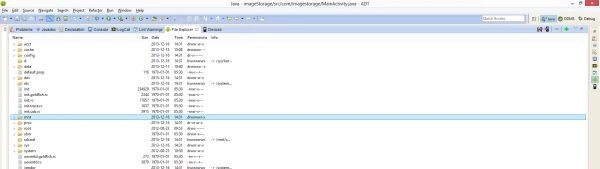 Click on "Data".

Go to your database name.


Болор БолорPosted Dec 17, 2016, 2:38 AM
Thanks a lot it is very useful for me, i am newby in android
Neeraj KumarPosted Jul 30, 2015, 6:19 PM
Nice